

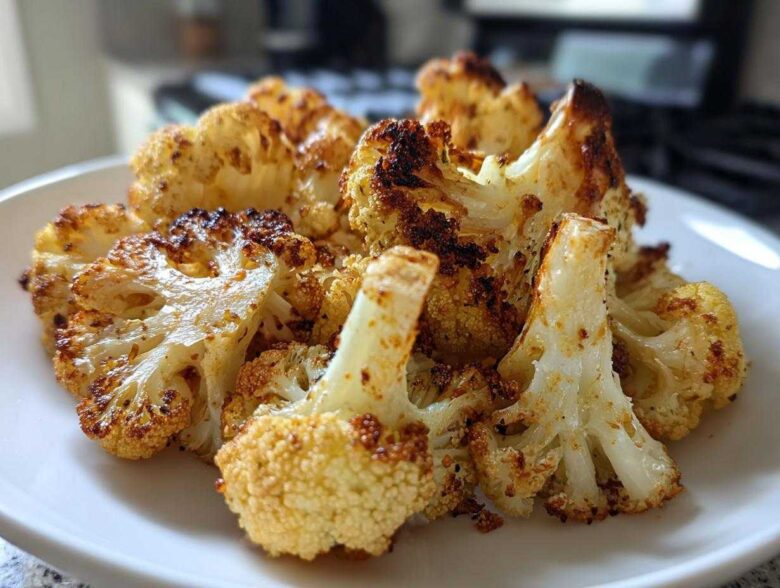
If you’re anything like me, you’ve been burned—literally and figuratively—by roasted vegetables that turn out mushy or steamed in the oven. I swear, I spent years trying to get that restaurant-quality crunch on simple side dishes! But I finally cracked the code for crispy roasted cauliflower that snaps when you bite it. Trust me, the difference between limp cauliflower and genuinely crunchy roasted cauliflower comes down to a couple of non-negotiable steps.
After way too many sad, soggy attempts, I realized it wasn’t about the spices; it was about the technique. Boiling the cauliflower or using a low oven temperature? Forget about it! We are going to rely on high heat and preparation magic to get that perfect, golden-brown exterior we are all dreaming about. I promise you, I’ve ironed out all the wrinkles in this simple roasted vegetable recipe so you don’t have to waste a single head of cauliflower figuring it out.
I’ve got the lowdown on everything from how to properly dry the florets (this part is critical!) to the secret ingredient that helps boost the crunch factor. Head over to my main blog hub if you’re looking for more great finds like this one: Find more kitchen adventures here.
Why You Will Master **Crispy Roasted Cauliflower** With This Recipe
I’m giving you the map directly to the perfect crunch, my friend! This isn’t just another side dish recipe; this is the ultimate guide to making vegetables *gasp* crispy in the oven. You won’t have to worry about soggy messes ever again. When you follow these steps, you’re guaranteed success. I promise the payoff is worth the minimal effort!
- Maximum crunch factor achieved through precise temperature control.
- Super simple seasoning profile lets the vegetable flavor shine through.
- Ready in under 40 minutes total time—perfect for busy weeknights.
- It’s the simplest way to make a truly impressive crunchy roasted cauliflower side dish.
Guaranteed High-Heat Vegetable Roasting Results
The biggest secret I learned is that gentle cooking equals mush. If you want that wonderful, slightly caramelized, nearly potato-chip-like exterior, you need intense heat. We keep the oven roaring hot because that high heat activates something wonderful called the Maillard reaction. That reaction is what gives roasted cauliflower those beautiful brown spots and that amazing depth of flavor and, crucially, the crunch we’re after!
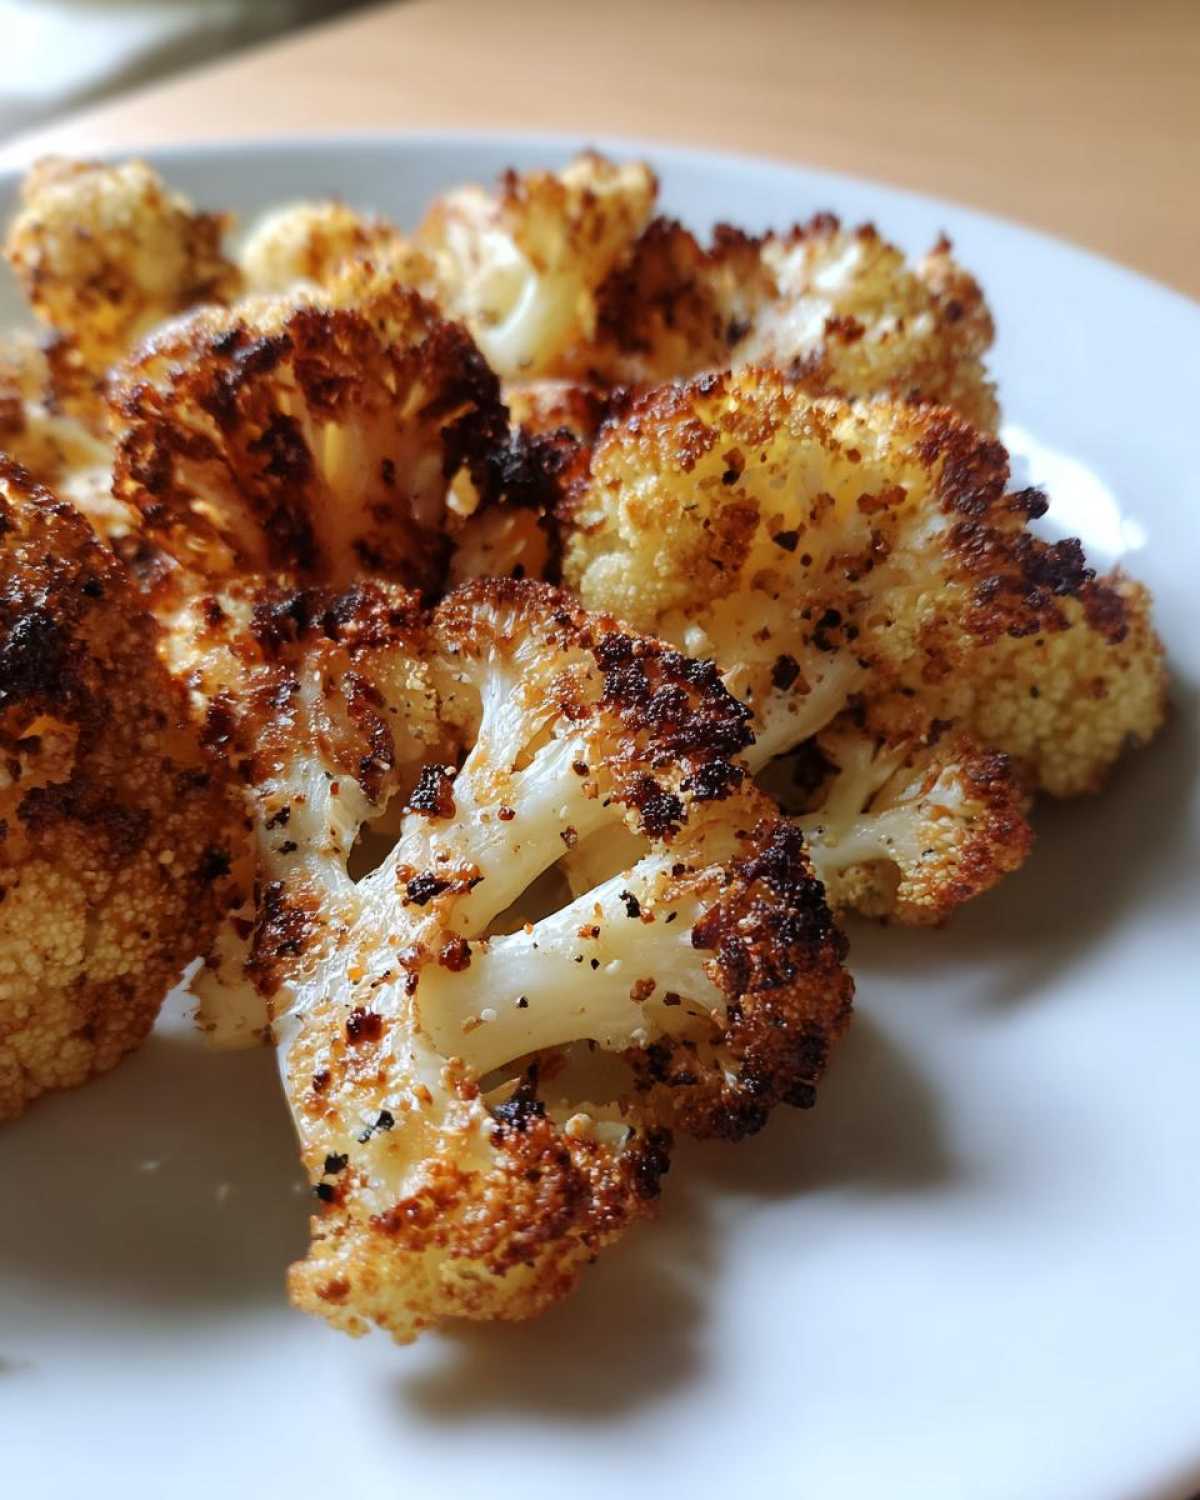
Essential Ingredients for **Perfectly Roasted Cauliflower**
Okay, time to talk shop! Honestly, you don’t need much for this recipe, which is what I love about it. The fewer items you have, the less there is to mess up, right? But the quality of what you *do* use really matters when we are chasing that perfect crispiness.
If your cauliflower is sad, your roast will be sad. That’s just science! Make sure you grab a nice, tight head. Here is the short shopping list:
- 1 large head cauliflower, cut into uniform florets (We need them about the same size so they cook evenly—no giant chunks next to tiny ones!)
- 3 tablespoons olive oil (Use the good stuff, but not your fancy finishing oil!)
- 1 teaspoon salt
- 1/2 teaspoon black pepper
- 1/2 teaspoon garlic powder
- 1/4 teaspoon paprika
Ingredient Notes and Substitutions
We have to discuss the prep work right here. Because we aren’t pre-cooking anything, every little ingredient has to pull its weight to get that crunch.
First up: If you want the BEST result, grab yourself some cornstarch. It sounds weird, but tossing your florets with about 1 teaspoon of cornstarch right along with the oil is my secret weapon for achieving maximum crunch. It helps draw out any remaining surface moisture and creates a shell when it hits that hot pan. Seriously, add it to your bowl!
As for oil, you need something that can handle the heat. Olive oil is great, but if you happen to have avocado oil or another high smoke point oil, that’s fantastic too. We need that oil temperature to stay high and aggressive so the cauliflower sears immediately and doesn’t just sit there steaming in its own juices. That’s the difference between a great side dish and a mediocre one, in my book!
The **Oven Roasted Cauliflower Technique** for Maximum Crunch
Alright, deep breath. This section is where the real magic happens. If you want that restaurant-style texture, you have to respect the temperature. We aren’t messing around with 375 degrees; we are going hot and fast! The absolute biggest game-changer I ever implemented was preheating the baking sheet. Seriously, put that sheet in the oven while it warms up. When those cold, seasoned florets hit that screaming hot metal, they immediately start searing instead of just sitting there sweating into mush.
But before the heat can work its magic, we must address the true enemy of crispiness: water! You have to dry those cauliflower florets like your life depends on it. Grab a whole stack of paper towels and just pat, pat, pat until you think they are dry, and then pat them again. I learned this the hard way when I tried to rush it years ago. Now, I treat the drying stage like the most important part of my how-to make crispy vegetables routine!
Step-by-Step Instructions for **Crispy Roasted Cauliflower**
Here’s the sequence you must follow to guarantee a crunch. Get everything ready to go before you even think about turning on the oven!
- First things first: Crank that oven up to 425°F (220°C). Stick that baking sheet inside while it heats up!
- Take your time drying those florets with paper towels! Seriously, dry them completely.
- Toss the perfectly dry cauliflower in a big mixing bowl with the olive oil until they are all shimmery.
- Now add all your seasonings—salt, pepper, garlic powder, and paprika, plus that secret cornstarch if you’re using it! Toss it until everything is evenly coated.
- When the oven beeps, use thick mitts (safety first!) to carefully pull out that hot baking sheet. Arrange your seasoned cauliflower on the hot metal. This is crucial—spread them out so they aren’t touching.
- Pop them back in for 20 to 25 minutes. Set a timer for 12 minutes and give them a good flip so they brown on the second side.
- Check around the 25-minute mark. You want the edges looking dark brown and deeply caramelized. If they look pale, give them 5 more minutes until they look perfectly crunchy!
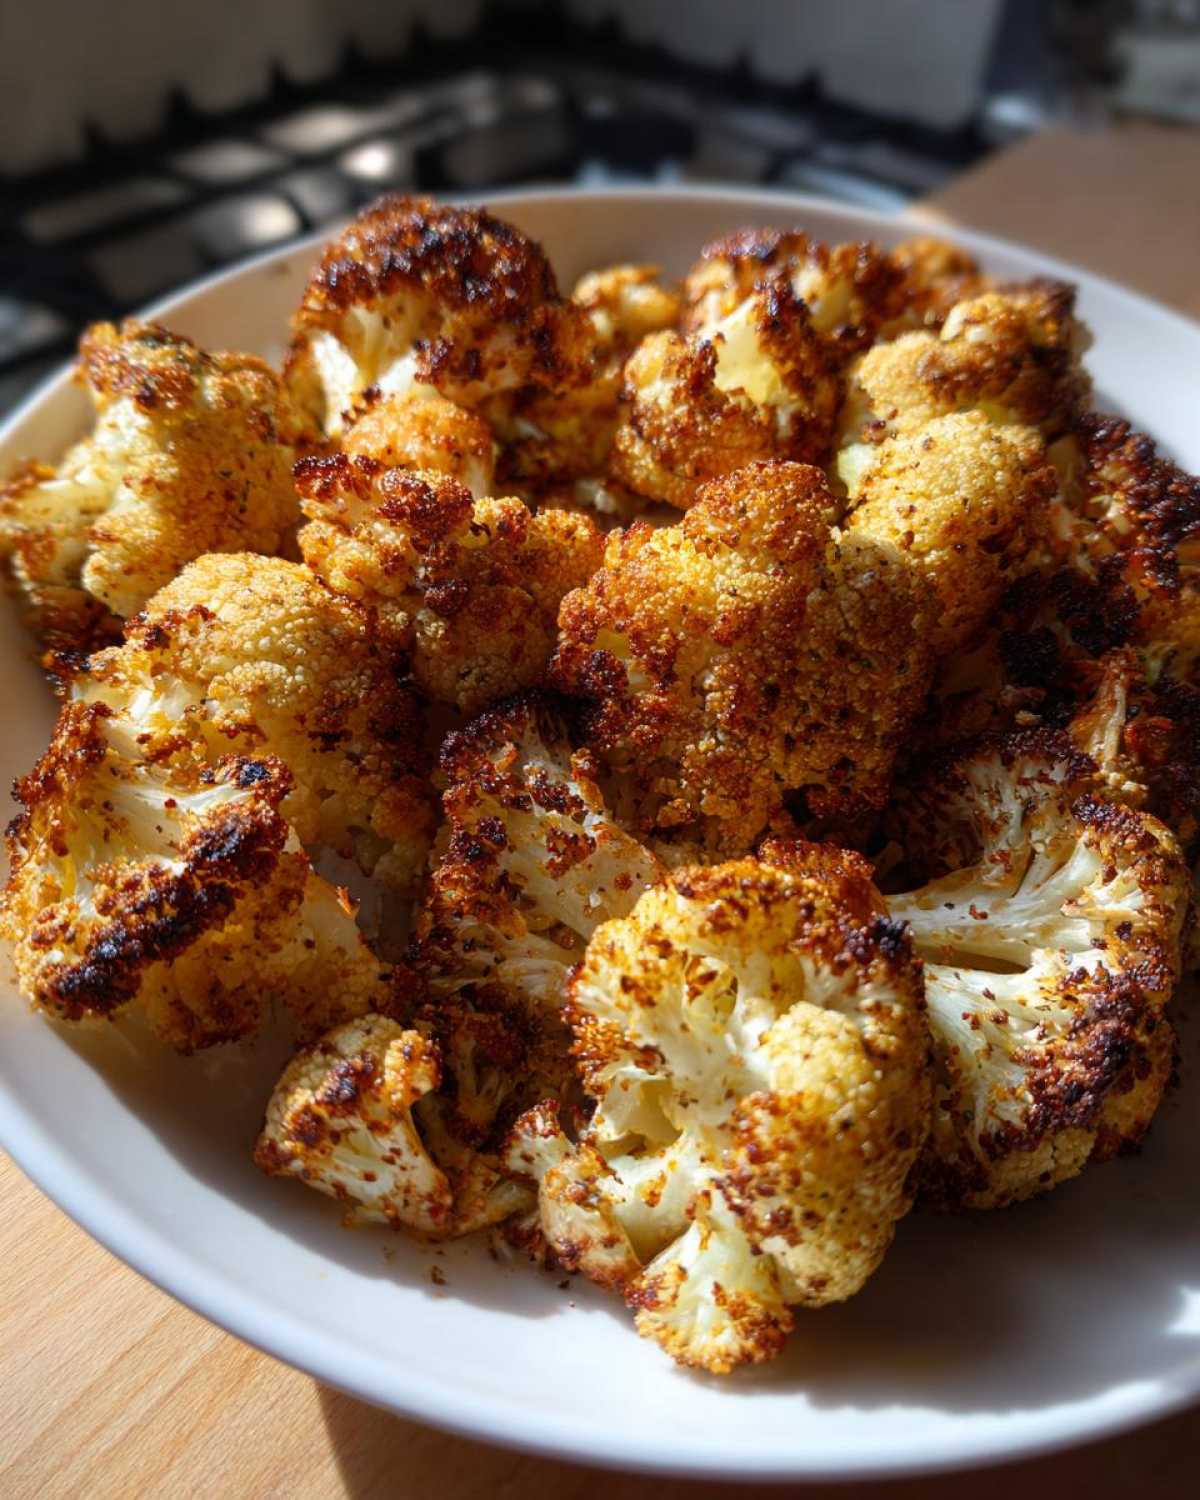
Cauliflower Roasting Tips and Tricks for Crispiness
I mentioned the cornstarch earlier, but I wanted to reiterate how much of a beast that tiny ingredient is for texture. It just helps form that immediate crust that protects the interior from turning steamy. Remember, we are aiming for a sear!
But here’s another pro-tip that took me forever to figure out: You must not overcrowd the pan! If those florets are huddled together, they end up sharing their steam, turning your beautiful batch into a sad, pale steamer. If you have to use two baking sheets, please do it. Give them space to breathe and crisp up individually. It makes a massive difference between an okay roast and the amazing, crunchy roasted cauliflower side dish you deserve!
Flavor Variations for Your **Crunchy Roasted Cauliflower Side Dish**
If you’ve mastered the high-heat technique and are getting that perfect satisfying crunch—congratulations! Now we get to have fun with flavors. The beauty of this simple roasted vegetable recipe is that the base seasoning is almost neutral, just salty and garlicky enough to make the cauliflower shine. But if you’re feeling adventurous, here are a few ways I like to switch up the spice cabinet when serving this up.
You can swap out the paprika and garlic powder we used, or just add to them, depending on what you’re pairing it with that night. I always keep a few dry spice shaker blends ready to go, just in case I want to make a quick batch!
For example, if I’m serving this alongside something like grilled chicken, I might go for a punchy Indian-inspired flavor profile. Or if I’m using it as a snack, something smoky hits the spot. These are just starting points, of course—feel free to go wild!
- Smoky Southwest Crunch: Ditch the paprika and replace it with 1 teaspoon of smoked paprika and 1/2 teaspoon of ground cumin. A little pinch of cayenne pepper mixed in with the seasoning blend gives it a nice little kick. It’s fantastic!
- Bright Lemon-Herb Zest: After the cauliflower comes out of the oven (when it’s piping hot!), immediately toss it with the juice of half a fresh lemon and a tablespoon of finely chopped fresh parsley. This is beautiful for a lighter meal. I think this works best if you skip the spices entirely and just use salt and pepper before roasting.
- Curried Cauliflower Bliss: When you mix your oil and seasonings, add 1 teaspoon of good quality curry powder. It smells amazing while roasting and gives the florets a beautiful golden-orange hue. It’s a great way to trick your family into eating more vegetables!
- Parmesan Finish: If you aren’t worried about keeping it strictly vegan, stirring in 1/4 cup of freshly grated Parmesan cheese right when the cauliflower comes out of the oven is heaven. It melts slightly onto the hot, crispy bits. Next time I make my comforting soup recipe, I might even sprinkle some on top there too!
Troubleshooting Common Issues with **Crispy Roasted Cauliflower**
Don’t you just hate it when you follow the directions perfectly and still end up with a questionable vegetable? It happens to the best of us! Achieving that perfect snap consistently takes practice, but usually, when cauliflower gets soggy or refuses to brown, it boils down to one of three culprits. Let’s solve these issues right now so you can stop feeling like you failed the cauliflower!
If you’ve followed my high-heat roasting instructions and still ended up with a disappointing, steamy mess, read through these common problems. Chances are, you’ll spot exactly where things went sideways in your kitchen, and you can fix it next time!
Why Did My Cauliflower Steam Instead of Roast?
This is the number one frustration when trying to make crispy roasted cauliflower! If the edges are soft and pale instead of dark brown, it means your cauliflower was cooked under a cloud of steam, not directly by the dry oven air. This happens almost exclusively for two reasons, and we already talked about the first one extensively:
- It was too wet: If there was any residual water on the surface of the florets after washing, that water turned into steam the second it hit the hot pan. You can’t skip the vigorous patting down process, trust me on this one!
- The Pan was Overcrowded: If the pieces are touching each other, they start touching their neighbors’ moisture. They crowd each other out, trap the steam released from their own surface, and essentially boil themselves. Always use a second tray if your florets are overlapping on the first one. Give them space to breathe and crisp up individually!
My Cauliflower is Burnt on One Side and Raw on the Other!
This is usually a temperature or consistency issue. Remember I told you to cut your florets uniformly? If you have giant chunks mixed with tiny crumbs, the tiny ones burn up before the big ones soften. Make sure all pieces are roughly the same size—aiming for about 1 to 1.5 inches across.
Also, make sure you are flipping them halfway through the baking time! That flip ensures that both sides get direct contact with that radiant oven heat coming from above and below. If you skip the flip, one side gets roasted while the top just sits there drying out unevenly.
Why Isn’t the Cauliflower Getting Brown Enough?
If your cauliflower is cooked through but still looks pale and light yellow, you probably missed our key flavor booster! Did you remember the cornstarch? That little bit of starch helps facilitate that fast, deep browning. If you forgot it, don’t sweat it—just blast the heat.
If your oven is running a little cool (many home ovens are off by 25 degrees!), try bumping it up to 450°F for the last five minutes just to push those edges over the top into truly crunchy territory. Just watch it like a hawk during those last few minutes, because that’s when the magic happens!
Serving Suggestions for **Best Roasted Cauliflower Recipe**
So, you’ve got this stunning, perfectly crispy roasted cauliflower cooling on the counter, and now you’re thinking, “What do I do with this perfection?” Well, that’s the best part! This crunchy roasted cauliflower side dish is one of the most versatile things I cook all week. It goes way beyond just sitting by a piece of roast beef, though it certainly does that job beautifully.
Because the texture is so satisfying—all brittle edges and tender insides—it stands up well to robust main courses or acts as the star of a light vegetarian meal. I always try to serve it immediately after I pull it from the oven because that’s when the crunch is at its absolute peak. You want zero time delay!
If you’re looking for a great way to package this up with other amazing roasted things, you should check out my recipe for chicken, sausage, and orzo—this cauliflower would be an amazing addition to change up the texture there!
As a Quick, Hearty Snack
Honestly, sometimes I just make a batch of this crunchy roasted cauliflower and eat it while standing over the sink, pretending I’m not eating the entire thing before dinner. It’s that good on its own. But if you want to make it feel more intentional, serve it with a cool, creamy dip on the side. Think cooling tzatziki, a spicy Greek yogurt sauce, or even just a quality ranch dressing. Dipping makes any vegetable snack feel a little more indulgent, doesn’t it?
Elevating Grain Bowls and Salads
When I want to get my veggies in but I’m bored of plain lettuce, I toss this crispy roasted cauliflower right into a bowl. It adds a wonderful warm crunch. Try serving it over a bed of quinoa or farro, adding some diced avocado, and topping it with a light vinaigrette. The crunch stays put, and the warm, smoky flavor mixes beautifully with the fresh ingredients. It turns a standard, boring grain bowl into something I actually look forward to eating!
The Ultimate Side Dish Star
Of course, this is a powerhouse side dish for anything grilled or roasted. It pairs incredibly well with simple proteins because it provides all the texture and flavor complexity that you might otherwise need a heavy sauce for. I serve it alongside simple grilled salmon or chicken breasts. If you’re doing a big Sunday roast, this seasoned cauliflower is a much more exciting companion than plain steamed broccoli. It just feels a bit more intentional, you know? It shows everyone that you cared enough to get that incredible best roasted cauliflower recipe down to a science!
Storage and Reheating Instructions for **Perfectly Roasted Cauliflower**
Okay, so you managed to have leftovers! That’s a victory in itself, because usually this stuff vanishes the second it leaves the oven. But if you have some of this perfectly roasted cauliflower leftover, storing it correctly is key because we are trying to preserve that delicate crispiness for round two!
Here’s the deal: moisture is the enemy of the crunch, whether you’re storing it or reheating it. If you are planning on keeping these beauties for more than a few hours, you need to treat them carefully. Don’t even think about putting them in a sealed, airtight plastic container right out of the oven. They’ll steam themselves silly overnight!
For short-term storage—say, 2 or 3 days max—let the cauliflower cool completely on the counter (don’t rush this part!). Once it’s room temperature, transfer it to an airtight container, but here’s my trick: place a paper towel on the bottom of the container first. That paper towel will wick away any condensation that tries to make your cauliflower soggy while it sits in the fridge. Keep it cold and dry!
How to Bring Back the Crunch: Reheating
Look, I’m going to be brutally honest: if you microwave leftover roasted cauliflower, I’m probably going to track you down. The microwave is the natural enemy of crispiness, and it completely ruins the beautifully developed texture we worked so hard to achieve with that high heat vegetable roasting technique. Don’t do it to yourself!
You have two primary methods for waking up that crunch, and both involve dry heat. You want to reverse the steaming process by drying the exterior again with intense heat.
- The Oven Method (Best for larger batches): Spread the cooled cauliflower back out onto your original baking sheet—the one you preheated, remember? Put it back into a hot oven, maybe 375°F (190°C). Let it roast for about 5 to 8 minutes. Keep an eye on it! It heats up fast because it’s already cooked. This brings back almost all of the original crispness.
- The Air Fryer Method (Fastest way to crisp): If you have an air fryer, this is your superhero tool for reheating! Toss the leftovers in the basket and run it at about 380°F (195°C) for just 3 to 4 minutes. Give the basket a good shake halfway through. It blasts the moisture right off the exterior, and you’re back to enjoying crunchy roasted cauliflower side dish heaven in no time!
Frequently Asked Questions About **Crispy Roasted Cauliflower**
I know you might still have some little nagging questions, especially if you’re new to this whole high-heat vegetable roasting game! It’s rare that I get questions about the main recipe steps anymore, but little things always pop up. I’m happy to clear up the confusion because once you nail this method, you’ll never go back to steaming your veggies again! It’s all about getting that satisfying crunch every single time.
What is the best temperature for roasting cauliflower for maximum crunch?
If you want that coveted restaurant-style crispy roasted cauliflower, you need serious heat! I always creep my oven up to 425°F (220°C). Lower temperatures just don’t deliver that immediate sear necessary to dry out the surface before the insides get soft. If you feel like your oven runs hot, you could even push it to 450°F, but you will have to watch it like a hawk for burning! The key here is high heat coupled with that preheated baking sheet trick we talked about earlier. That immediate contact with hot metal is non-negotiable for the best roasted cauliflower recipe.
Does the type of oil really matter for crispy roasted cauliflower?
Yes and no! For this specific preparation where we are going for high heat vegetable roasting, the oil really does matter because of its smoke point. You need an oil that won’t start smoking aggressively before the cauliflower is done roasting. Olive oil is what I use most of the time—it has a decent smoke point and great flavor—but if you have avocado oil, that’s even better because it handles heat like a champ. What you want to avoid is butter or low-quality oil, because they break down too fast and can actually end up making your florets taste greasy instead of crispy!
I’m trying to eat healthier; is this recipe still good for me?
Absolutely! This is a wonderfully simple roasted vegetable recipe that relies mostly on the natural flavor of the vegetable. You’re using just enough oil to get the seasoning to stick and facilitate the searing. Plus, cauliflower is packed with fiber! As you saw in the estimates, it’s quite low in calories, making it a fantastic, guilt-free side dish. I love that I can feel good about eating this every night!
Is the **Air Fryer Crispy Cauliflower Alternative** Faster?
That’s a great question! People always ask if they can skip putting the sheet pan in the oven and just use their air fryer. The short answer is yes, you certainly can use an air fryer! In fact, for a small batch (say, two servings), the air fryer is fantastic and definitely faster overall. You can usually get it done in about 12 to 15 minutes total because the hot air circulates so closely around every single floret.
However, I find that the oven method is best when you are cooking a larger volume, like four or more servings, because air fryers are small and force you to cook in smaller batches. If you have to run two or three batches through the air fryer, you actually spend more time overall than just doing one big sheet pan in the oven. Plus, that initial blast from a preheated sheet pan in a conventional oven creates a sear that’s hard to replicate even in an air fryer. If you want to dive deeper into that method, check out my thoughts on the air fryer crispy cauliflower steak variation!
Nutritional Estimates for This Simple Roasted Vegetable Recipe
I’m happy to share the basic nutritional breakdown for this side dish, but you know how kitchen science goes, right? Measurements can change wildly based on the size of your cauliflower head, how much oil you actually managed to soak up, and the exact ingredients you chose for your flavor profiles!
These numbers are based strictly on the core recipe (the oil, salt, pepper, garlic, and paprika, without any optional additions like cornstarch or Parmesan). Think of this as a general guideline for your simple roasted vegetable recipe side portion. You can always find more general information over on my main cooking hub if you’re comparing different recipes! Check out more healthy options here.
Here’s the approximate nutritional breakdown per serving (this recipe yields 4 servings):
- Serving Size: 1 serving
- Calories: 110
- Fat: 7g (This is almost entirely from the olive oil, remember, we need that fat for crisping!)
- Saturated Fat: 1g
- Carbohydrates: 11g
- Fiber: 4g (Great way to boost your daily intake!)
- Protein: 3g
- Sugar: 3g (Mostly natural sugars from the cauliflower itself)
- Sodium: 480mg (This will vary greatly depending on how much salt you sprinkle on!)
- Cholesterol: 0mg
A Quick Note: If you add things like brown sugar in flavor variations, or toss on that Parmesan cheese at the end, those numbers—especially the sugar and sodium—are going to creep up! But even with the added crunch boosters, this remains a fantastic, relatively light, and very flavorful way to enjoy your vegetables.
PrintCrispy Roasted Cauliflower
A straightforward recipe for achieving maximum crispiness when roasting cauliflower florets in the oven.
- Prep Time: 10 min
- Cook Time: 25 min
- Total Time: 35 min
- Yield: 4 servings
- Category: Side Dish
- Method: High Heat Roasting
- Cuisine: American
- Diet: Vegetarian
Ingredients
- 1 large head cauliflower, cut into uniform florets
- 3 tablespoons olive oil
- 1 teaspoon salt
- 1/2 teaspoon black pepper
- 1/2 teaspoon garlic powder
- 1/4 teaspoon paprika
Instructions
- Preheat your oven to 425 degrees Fahrenheit (220 degrees Celsius). Place a large baking sheet in the oven while it preheats.
- Thoroughly dry the cauliflower florets. Pat them completely dry with paper towels; moisture prevents crisping.
- In a large bowl, toss the dry cauliflower florets with olive oil until lightly coated.
- Add the salt, pepper, garlic powder, and paprika. Toss again to distribute the seasonings evenly.
- Carefully remove the hot baking sheet from the oven. Arrange the seasoned cauliflower in a single layer on the hot sheet. Do not overcrowd the pan; use two sheets if necessary.
- Roast for 20 to 25 minutes, flipping the florets halfway through the cooking time.
- Continue roasting until the edges are dark brown and very crispy. Check after 25 minutes for desired crunch.
- Remove from the oven and serve immediately.
Notes
- For extra crispiness, toss the florets with 1 teaspoon of cornstarch along with the oil and spices before roasting.
- Using a preheated baking sheet helps the cauliflower sear immediately, promoting a crisp exterior.
- If you prefer a softer interior with crispy edges, reduce the oven temperature to 400 degrees Fahrenheit and increase the cooking time slightly.
Nutrition
- Serving Size: 1 serving
- Calories: 110
- Sugar: 3
- Sodium: 480
- Fat: 7
- Saturated Fat: 1
- Unsaturated Fat: 6
- Trans Fat: 0
- Carbohydrates: 11
- Fiber: 4
- Protein: 3
- Cholesterol: 0
