

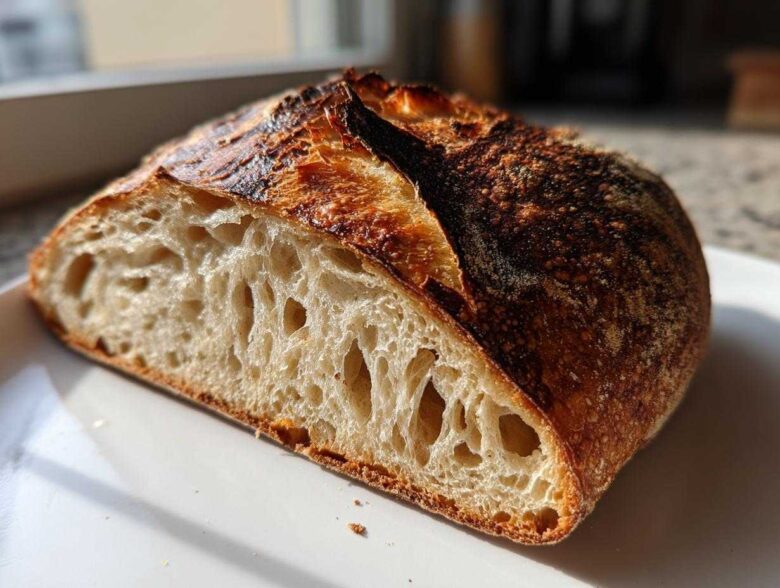
Okay, listen up. If you’ve been terrified of sourdough because every video shows people wrestling with dough like it’s a live octopus, I get it. Traditional kneading felt too complicated, too messy, and frankly, too much like work when I first started out. I nearly gave up after my first few flat, dense attempts!
But friends, I found the secret handshake, and it requires zero actual kneading. We are talking about the best noknead sourdough bread (beginnerfriendly!). This method lets time and biology do all the heavy lifting, giving you that gorgeous, open crumb and amazing crust you see artisan bakers showing off—I promise.
I’ve tested this probably two dozen times to make sure it’s truly foolproof for first-timers. You just mix, fold gently a few times, and let chemistry happen. You can check out some of my other baking adventures over at my main recipe feed for more inspiration, but for now, focus here. Getting that perfect, crusty loaf is so much easier than you think when you follow these steps exactly. You can do this!
Why This is the Best No-Knead Sourdough Bread (Beginner Friendly!) Recipe
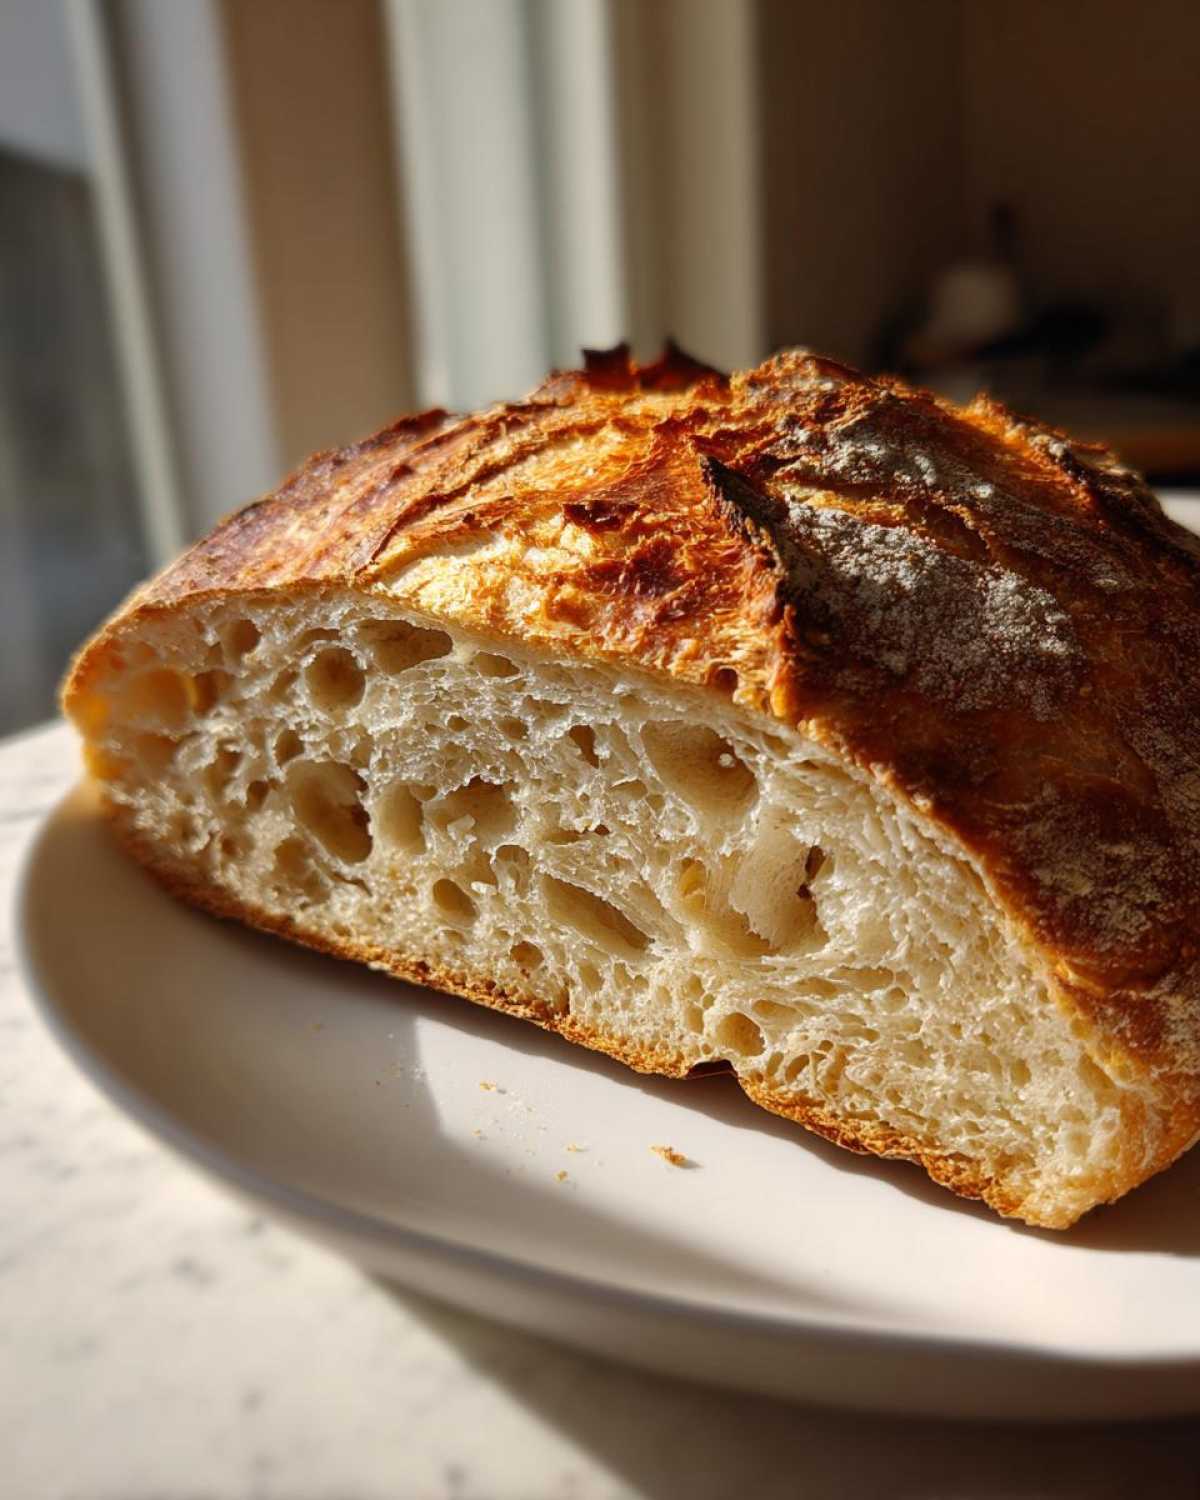
Honestly, what I love most about this approach is how it turns baking into waiting! Seriously, the physical work required is almost zero. You get that beautiful, airy crumb you associate with high-end bakeries, but you skip the hour of intense dough slapping. That’s why this is the best noknead sourdough bread (beginnerfriendly!).
This method is perfect because it uses time—long, slow fermentation—to develop strength in the dough, not your biceps. It lets you learn what dough *should* feel like by letting you observe it instead of forcing it.
- Minimal hands-on time; you basically just mix and fold occasionally.
- It handles really high water content (hello, moisture!) without fighting you.
- We rely on those hot Dutch oven bakes to guarantee fantastic oven spring—the rise you want!
- It’s incredibly reliable, which is exactly what a new baker needs. For more on achieving that classic artisan texture without all the sweat, check out my guide on no-knead artisan bread.
Key Features of Our No Knead Sourdough for Beginners
When I say this is a foolproof sourdough loaf, I mean it. We aren’t relying on complicated tension maneuvers. We look for simple visual confirmation at every stage. That’s the secret to making this the easiest sourdough bread ever for newcomers.
Here’s what makes it so forgiving:
- Time Over Technique: We use several gentle stretch and folds just to introduce some structure, but the bulk of the gluten development happens naturally overnight.
- Wet Dough Confidence: It *should* look messy when you mix it. Don’t panic that it’s too wet; trust the process!
- Clear Visual Cues: I tell you exactly what to look for—the dough rising 30 to 50%—instead of just saying “proof for four hours.”
Gathering Ingredients for the Best No-Knead Sourdough Bread (Beginner Friendly!)
Before we even think about mixing anything, we need the players lined up! Getting your ingredients right is half the battle, especially when you aren’t kneading away your mistakes. Don’t worry about running out to buy a ton of specialty things, though; the ingredient list for this simple no knead bread is surprisingly short.
For one glorious, crusty loaf, here is what you’ll need hanging around your counter:
- 200g active sourdough starter (and this is important—it must be fed 4 to 12 hours prior so it’s bubbly and doubled!)
- 350g warm water (aim for about 90°F, just a little warmer than lukewarm bath water works great)
- 500g bread flour (Yes, bread flour! It handles the wetness better, trust me.)
- 10g fine sea salt
See? Only four things! That’s the beauty of letting time do the work.
Ingredient Notes and Substitutions
Let’s chat specifics so you can nail this on your first time sourdough bake. These small details separate a good loaf from a great one, especially for us beginners.
First, the starter. We need it happy! If your starter has been chilling in the fridge, you need to feed it and let it get super active. A good visual cue for the right starter is that it should look light, maybe feel slightly jiggly, and definitely have bubbles popping on top. If it sinks immediately when you drop a tiny spoonful in water? Wait a little longer! This lively starter is what replaces the energy you’d usually put into kneading.
Regarding flour, while All-Purpose flour *can* work, I strongly suggest bread flour here. Because this is a wet dough sourdough recipe, bread flour has higher protein content, which helps the dough develop the necessary strength during those gentle stretch and folds. If you skipped the stretch and folds entirely, the loaf would likely turn into a pancake, so using the right flour sets you up for success!
Finally, the water temperature is just a nudge to help wake up those wild yeasts in your starter. If you don’t have a thermometer? Just use water that feels comfortably warm—not scalding hot—to the touch. I’ve done it loads of times without a thermometer and it’s always worked out fine for this no knead sourdough for beginners.
Step-by-Step Instructions for Your Simple No Knead Bread
Alright, time to get sticky! Remember, this is a wet dough sourdough recipe, so we are fighting gravity a little bit here, but don’t fret. We are going to treat the dough gently throughout the entire process—no hard mixing or wrestling allowed. Patience is really the main tool in our arsenal for making the best noknead sourdough bread (beginnerfriendly!).
We have about four main stages here: mixing, strengthening, rising (bulk fermentation), and then chilling. Make sure your Dutch oven is ready to go later, because warm ovens love this dough! For more fundamental advice on these initial baking stages, you can always check out this helpful link.
Mixing and Initial Rest for No Knead Sourdough for Beginners
First things first: grab that active starter and warm water. Stir them together until the starter dissolves a bit. Now, dump in the flour and salt. You are going to mix this with your hand or a sturdy spoon just until you can’t see any white, dry flour streaks left. That’s it! It absolutely should look shaggy, rough, and definitely way too sticky to handle. Resist the urge to add more flour! This is how this easy sourdough bread recipe starts off. Cover the bowl for just 30 minutes to let the flour fully hydrate.
Building Strength with Stretch and Folds
This part is our secret weapon instead of kneading. After that initial 30-minute rest, we do our first set of folds. Dip your hand in water—this stops the dough from gluing itself to you—then reach under one side, pull the dough up gently, and fold it over the middle. Rotate the bowl a quarter turn and do it again. Four folds total! Cover it and let it rest another 30 minutes. We repeat this whole stretching process two more times, resting half an hour in between each set. By the end of the third set, you’ll feel the dough responding better; it’s getting structure without any hard work!
Bulk Fermentation and Shaping the Rustic No Knead Loaf
Once those folds are done, cover it up and let it chill out for 3 to 5 hours at room temperature. Don’t stare at the clock! You are looking for a visual cue: the dough needs to look puffier, maybe 30% to 50% bigger, and you should see a few bubbles poking through the top. When it looks happy, gently scrape it out onto a lightly floured surface. Now, shape it! Gently pull the edges underneath towards the center to make a sort of tight ball. You aren’t squeezing hard, just creating a little skin on top. Pop that shaped dough, seam-side up, into your floured proofing basket. It’s ready for its long nap in the fridge now!
The Cold Proof: Developing Flavor in Your Slow Rise Sourdough Bread
Okay, here is where things get really easy for you, the baker. After you shape your dough so nicely and tuck it into that floured basket (your banneton), it goes into the fridge for the cold proof. This is non-negotiable if you want the absolute best results from this best noknead sourdough bread (beginnerfriendly!) recipe.
We’re talking 12 to 18 hours in the cold. I know, it sounds like forever, but that slow rise is magic! While the dough rests chillingly, two wonderful things happen. First, the cold slows down the yeast activity but allows the bacteria to slowly munch away and create those deep, complex, slightly tangy sour flavors we crave. It’s pure flavor development!
Second, and maybe more important for beginners, the cold dough firms up significantly. Think about the difference between handling silly putty when it’s room temperature versus when it’s stiff from the fridge—the cold dough is SO much easier to handle when you flip it out onto parchment paper to bake.
While we wait, you can go bake cookies, perhaps checking out my amazing sourdough chocolate chip cookies recipe if you need a break from bread. But remember, the longer that dough chills comfortably, the better your final crust will be and the easier it will be to score (or just plop naked into the hot pot!). This long, cold rest is essential for any great slow rise sourdough bread.
Baking Crusty No Knead Bread in a Dutch Oven
Okay, this is the grand finale, the moment of truth! We’ve done the waiting, the gentle folding, and the long, cold rest. Now we unleash the heat to get that stunning, crackly crust. This is where the Dutch oven becomes your absolute best friend for achieving that perfect oven spring on your first time sourdough bake.
About an hour before you plan to bake, you need to put that empty Dutch oven—lid and all—into your oven and crank the heat up to 500°F (260°C). Seriously, let it get screaming hot. That insane initial heat transfer is what shocks the dough into rising up beautifully, giving you that professional-looking height on your crusty no knead bread.
Once it’s searing hot, carefully take it out. Use that piece of parchment paper you shaped the dough on as a sling and gently lower the cold dough right into that hot pot. Cover it quickly so you trap all that steam inside. Bake it covered for 20 minutes. The trapped moisture is what keeps the crust soft temporarily, allowing the bread maximum expansion.
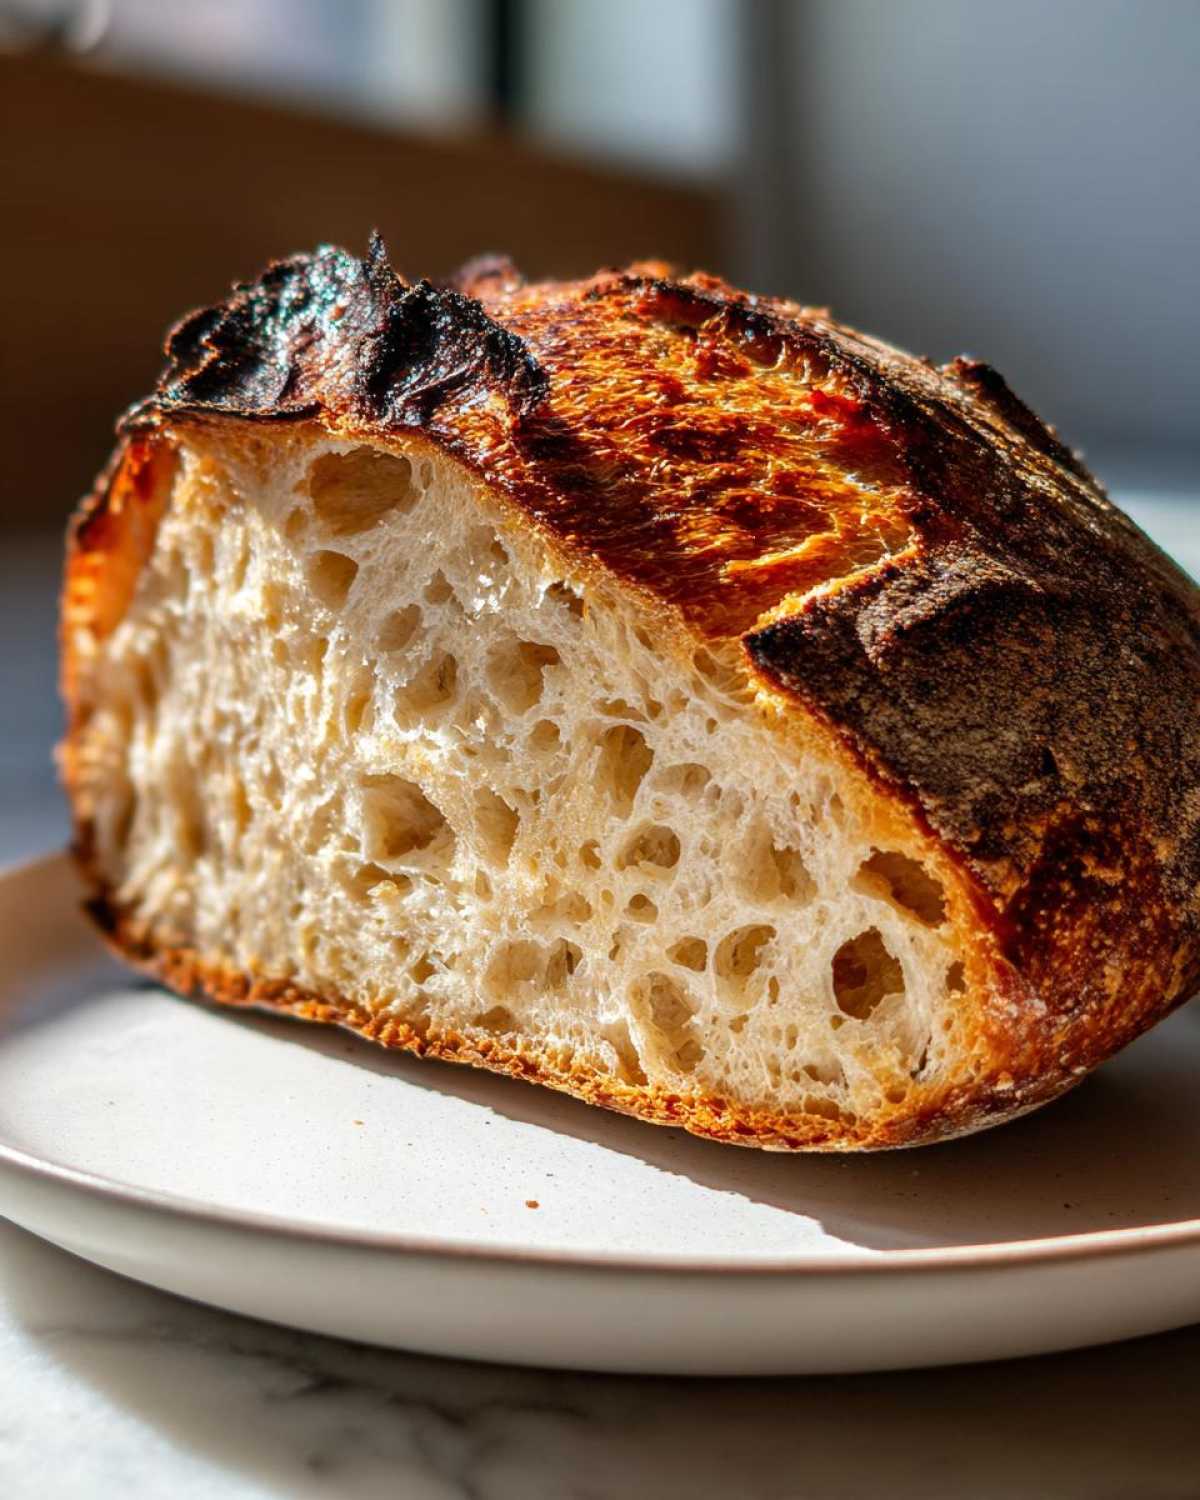
After those 20 minutes, it’s time to get rid of the lid, which allows the crust to dry out and darken up. I immediately drop the temperature down to 450°F (230°C) before you remove the lid. Then, bake uncovered for another 20 to 25 minutes until the color is a deep, rich mahogany brown. Don’t be scared by the color—that deep brown means flavor! You can find more details on how I use Dutch ovens for other breads right here.
Now, if you don’t own a Dutch oven, don’t panic! That just means we have to build our own steamy environment. Instead of the pot, preheat a baking stone or just a heavy baking sheet until it’s smoking hot. When you put your loaf in (on parchment!), immediately place a pan on the rack underneath and quickly pour a cup of boiling water into that hot pan. That steaming setup mimics the Dutch oven perfectly for creating steam during those crucial first 20 minutes!
Finally, and this is the hardest part after waiting so long: take the bread out and let it cool on a wire rack for at least two full hours. If you cut into it now, the inside will look gummy! We need that time for the interior structure to set. Trust me on this cooling step!
Expert Tips for Beginner Bakers Sourdough Success
Look, I know we covered the steps, but sourdough is sensitive. It’s not like making a quick box cake; your counter temperature plays a HUGE role. I want to give you some extra reassurance here. These tips for beginner bakers sourdough are things I learned through making disastrously flat loaves at home, so you don’t have to repeat my mistakes!
Remember that note about looking for that 30-50% volume increase during bulk fermentation? That’s super important, but the time it takes can change wildly depending on how warm your kitchen is. Don’t obsess over the clock; watch the dough!
Managing Kitchen Temperature for the Easiest Sourdough Bread Ever
If it’s chilly in your house—say, below 68°F—that long fermentation time I mentioned (3 to 5 hours) might stretch out to 6 or even 7 hours. You need that slow rise to develop flavor and structure, but if it takes too long, you might think you messed up your starter. Don’t!
If your kitchen is warm, like in the summer, you must watch closely! A warm kitchen can proof this dough faster than you think. Sometimes, I’ve come back after just two hours and the dough looked ready to overflow the bowl. As I mentioned in my general baking notes over at my blog, dough temperature is everything. If you’re struggling, try placing your dough bowl inside your oven with *just the oven light on*. That tiny bit of warmth helps prod the yeast along without actually baking the dough.
Also, if your dough seems too slack or wet during shaping, that usually means the bulk proof went a little long. In that case, don’t stress! Just be extra gentle when you scrape it out and try pulling those edges tighter than usual during the shaping phase to build whatever strength you can manage. A tight final shape means a better final loaf, even with this easy sourdough bread recipe.
The Importance of Cooling Before Slicing
I know, I know, that beautiful, crusty loaf is sitting there smelling like heaven, and you just want to hack into it with a bread knife immediately. Please, please resist that urge! This is where so many beginners ruin what would otherwise be a perfect loaf.
When the bread comes out of the Dutch oven, it is still actively baking inside. The internal moisture is super high, and the starches are set but gummy. If you slice it open too soon—say, within the first hour—all that steam escapes rapidly, and you end up with a sticky, gummy interior, even though the crust is perfect. That ruins the beautiful, airy structure we worked so hard to achieve with this **sourdough without kneading** method!
You must let it cool for a minimum of two hours on a wire rack. Two hours! I usually bake it in the morning and force myself to wait until lunchtime. Once it has cooled completely, the crumb structure firm up beautifully, giving you those light, open pockets that signal a successful bake. It’s the final, quiet step in making this the artisan bread no effort loaf you dreamt of!
Storing and Reheating Your No Knead Sourdough Loaf
Congratulations! You pulled that gorgeous, deeply colored loaf out of the oven. Now comes the part where we protect our hard-earned crust. Because this is such a crusty, artisan-style loaf, storage is slightly different than for soft sandwich bread. We want to protect that beautiful exterior that took zero kneading to achieve!
For the first day, honestly, the best way to store your loaf is just sitting out on the counter, cut-side down, on a sturdy cutting board or a clean tea towel. This allows air circulation but prevents the crust from getting soft. If you wrap it up immediately in plastic, that crunchy exterior is going to turn tough and leathery almost instantly. We worked too hard for a soft crust!
If you need to keep your no knead sourdough loaf for a second or third day, you have to wrap it, but you must be smart about it. My favorite way is a paper bag, sealed loosely, placed inside a large zip-top bag. This keeps some of the bread’s moisture in without trapping condensation directly against the crust, which is what softens it up. This usually keeps it tasting great for about three days max.
What if it starts to taste a little dull on day three? Don’t toss it! This is bread worth saving. You don’t need fancy tools here. Just reheat the whole loaf (or half a loaf) in a 350°F oven for about 5 to 7 minutes. You’ll hear that crust crackle again as it warms up, and it tastes virtually fresh-baked—the best way to enjoy your easy sourdough bread recipe leftovers!
If you have any huge leftovers you know you won’t eat, slice it thinly right away and freeze the slices. Then, you can pop them directly from the freezer into the toaster later. Easy peasy!
Frequently Asked Questions About Sourdough Without Kneading
I totally get it—when you try something new, especially baking that relies on science like sourdough, you end up with a million questions swirling in your head. Don’t feel silly! I had the same confusion when figuring out my beginner sourdough guide. Here are the things I hear most often from folks making sourdough without kneading for the first time.
Can I skip the cold proof (the overnight fridge time)?
Oh, I wish you could! Seriously, if you skip the cold proof, you are skipping the single most important flavor development step in this whole recipe. You can probably cut it short—maybe 8 hours instead of 12—but you absolutely need that chill time. If you don’t chill it, the bulk fermentation will continue in the fridge, and you’ll likely over-proof the dough before you even bake it. Plus, the cold dough is so much easier to handle and score.
What happens if my dough is still really soupy after the final stretch and fold?
This is a classic sign of a **wet dough sourdough recipe** not quite cooperating yet, or maybe your flour just won’t absorb water like mine does. If it’s truly soupy, you have two options, but move fast! First, you can try one extra set of stretch and folds, waiting a full hour between that extra set and the shaping time. If it’s still too slack, you can proceed to shaping anyway, but you must be extremely gentle. When you shape it, don’t try to create a tight ball; just gently pull the edges onto itself, flip it upside down into the heavily floured basket, and get it into the fridge right away. That cold will tighten things up a bit for baking.
My starter wasn’t doubling before I mixed it; will this loaf still work?
This is a really common issue when starting out! Your starter might not be vigorous enough if it didn’t double after feeding. When your starter isn’t strong, it doesn’t have enough power (the yeast and bacteria) to produce the gas needed for that rise. If you used a weak starter, your bulk fermentation might take way longer than 5 hours, or worse, it might not rise much at all.
If you used a suspect starter, you need to look really closely at the dough after 4 hours. If it hasn’t visibly increased in volume at all, you probably won’t get much oven spring. For your next loaf, make sure you feed your starter twice—a “double feed”—to really wake it up. But for this loaf, you can still bake it! It will likely be denser, more like a rustic flatbread than a towering boule, but it will still taste delicious! Don’t let this stop you from trying again soon.
Why is preheating the Dutch oven for a full hour so important for this easy sourdough bread recipe?
This is everything for making **crusty no knead bread**! Think of it like this: when you put a cold mound of dough into a cool pot, the dough loses heat and slowly begins to bake. We want the opposite! We want that instant shock of heat hitting the dough surfaces so fast that the water inside turns to steam immediately, forcing the loaf to spring up high before the crust sets. That initial 500°F blast for 20 minutes—aided by the hot pot—is what gives you that incredible ‘oven spring.’ If you only preheat for 20 minutes, the pot itself won’t be hot enough, and you’ll end up with a sad, flat loaf, even if your starter was perfect!
Serving Suggestions for Your Perfect Loaf
You did it! You pulled off **the best noknead sourdough bread (beginnerfriendly!)** without breaking a sweat! Now, the best part: eating the thing. I know you want to just tear into it, but remember that two-hour cool down? Once it’s cool, you are holding a truly versatile loaf. It has enough chew and structure to stand up to anything you throw at it.
Since this bread took zero kneading effort on your part, you deserve a gloriously simple treatment.
Here are my favorite ways to enjoy this **rustic no knead loaf**:
- The Classic Melt: Just a thick slice, toasted, with really good quality salted butter. Let the butter melt into those air pockets you worked so hard to create. It’s simple perfection.
- Elevated Toast: This bread is the ultimate base for avocado toast. I have a really creamy version of mine over here if you need some ideas for toppings beyond salt and pepper.
- Soup Dipper Supreme: This crust is sturdy enough to handle hearty tomato soup or a thick lentil stew without dissolving halfway through the dunk. It’s the perfect companion for a cold night.
- Breakfast Sandwich Base: Toast two slices thick, layer on some crispy bacon, a runny fried egg, and a slice of sharp cheddar. It holds up to the juices beautifully, unlike those weak supermarket loaves.
Honestly, any way you slice it—literally—this loaf is a winner. Go enjoy your masterpiece!
PrintThe Best No-Knead Sourdough Bread (Beginner Friendly!)

This simple, no-knead sourdough recipe uses a long, slow fermentation to develop flavor and structure, making it perfect for your first loaf.
- Prep Time: 20 min
- Cook Time: 45 min
- Total Time: 15 hr 5 min
- Yield: 1 loaf
- Category: Bread
- Method: Baking
- Cuisine: American
- Diet: Vegetarian
Ingredients
- 200g active sourdough starter (fed 4-12 hours prior)
- 350g warm water (about 90°F)
- 500g bread flour
- 10g fine sea salt
Instructions
- In a large bowl, mix the active starter and warm water until combined.
- Add the flour and salt to the wet mixture. Use a wooden spoon or your hand to mix until no dry flour remains. The dough will be very wet and shaggy. Do not overmix.
- Cover the bowl tightly with plastic wrap or a lid. Let the dough rest at room temperature (about 70°F) for 30 minutes.
- Perform the first set of stretch and folds: Reach under one side of the dough, gently stretch it up, and fold it over the center. Rotate the bowl a quarter turn and repeat three more times (four folds total). Cover and rest for 30 minutes.
- Repeat the stretch and fold process two more times, resting 30 minutes between each set. After the third set, the dough should feel slightly stronger.
- Cover the bowl and let the dough bulk ferment at room temperature for 3 to 5 hours, or until it has increased in volume by about 30-50% and shows some bubbles.
- Gently scrape the dough out onto a lightly floured surface. Shape it into a loose round by gently pulling the edges toward the center to create surface tension.
- Place the shaped dough, seam-side up, into a well-floured banneton or a bowl lined with a floured kitchen towel.
- Cover the basket and place it in the refrigerator for a cold proof for 12 to 18 hours.
- About one hour before baking, place a Dutch oven (with the lid on) into your oven and preheat to 500°F (260°C).
- Carefully remove the hot Dutch oven from the oven. Gently turn the cold dough out of the banneton onto a piece of parchment paper. Score the top of the loaf with a sharp blade if desired.
- Using the parchment paper as a sling, carefully lower the dough into the hot Dutch oven. Cover with the lid.
- Bake for 20 minutes with the lid on.
- Reduce the oven temperature to 450°F (230°C). Remove the lid and bake for an additional 20 to 25 minutes, until the crust is deep golden brown.
- Remove the bread from the Dutch oven and cool completely on a wire rack before slicing (about 2 hours).
Notes
- The exact bulk fermentation time depends heavily on your kitchen temperature. Look for volume increase, not just time elapsed.
- If you do not have a Dutch oven, bake the loaf directly on a preheated baking stone or heavy baking sheet, placing a pan of hot water on the bottom rack to create steam for the first 20 minutes.
- Use bread flour for the best structure in this wet dough recipe.
Nutrition
- Serving Size: 1 slice
- Calories: 250
- Sugar: 0.5
- Sodium: 400
- Fat: 1.0
- Saturated Fat: 0.2
- Unsaturated Fat: 0.8
- Trans Fat: 0.0
- Carbohydrates: 50
- Fiber: 2.5
- Protein: 9
- Cholesterol: 0
