

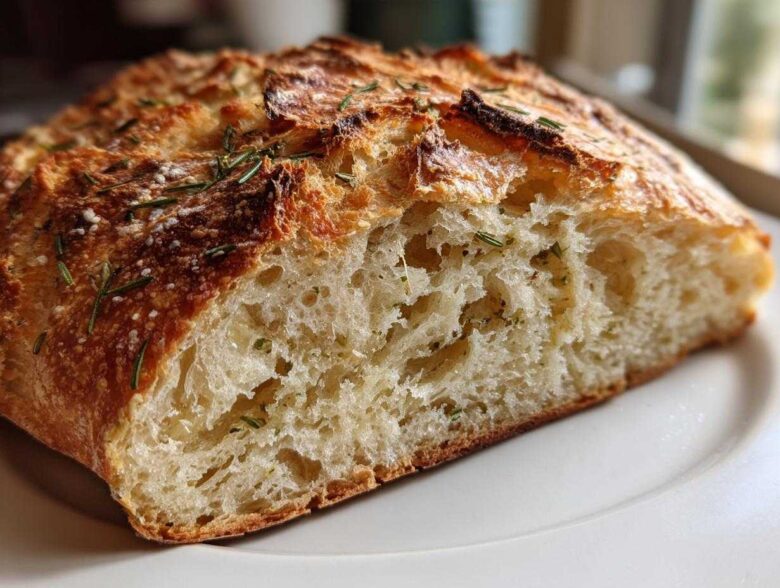
Listen, I know you hear “artisan bread” and immediately think of flour dust everywhere, hours of kneading, and maybe needing some kind of scary sourdough starter to get that crackle. Forget all that! I spent years trying to get that bakery-style loaf at home, and it always ended up dense or flat. Then I found this method, and honestly, it’s wild how little effort it takes to get spectacular results. This is absolutely the easiest **no-knead bread** you will ever use. If you want that perfect, chewy interior and that beautiful, thick crust every single time, this is your recipe. Trust me, this simple technique changed everything for me, and now I whip up this amazing loaf anytime I need something incredible, even if I’m just serving it alongside some easy homemade naan bread!
Why This No-Knead Artisan Bread Recipe Works So Well
Making **artisan bread** used to feel like a high-stakes science experiment, and I was always failing the texture test. But this method? This is pure magic, and it’s all thanks to two very simple things working together. First, the no-knead part. By letting the dough rest for 18 hours, the yeast does all the hard work developing those deep flavors and the network of bubbles that make the inside soft and airy. You just mix, forget, and come back later!
Second, the Dutch oven! That heavy cast iron pot traps all the steam released by the dough right at the start of the bake. That steam is what keeps the crust soft just long enough for the bread to expand fully. Once the steam is gone, the high heat blasts it, giving you that incredible, crackly exterior that defines truly **crusty bread homemade**. It’s honestly how you get **bakery style bread** without dealing with fancy steam injection setups. It’s genius, if you ask me! If you want to explore other fast skillet breads, check out my tips on easy homemade naan bread on the skillet.
Ingredients for Your Flavorful Artisan Bread
Okay, this list is short and sweet, which is why it’s one of my favorite **artisan bread recipes**. Seriously, only four main ingredients are required for the dough structure, but we’re adding some flavor bombs to make this more exciting! Don’t worry if you don’t have Parmesan; it’s totally optional, but boy, does it make the crust savory!
You’ll need:
- 3 cups all-purpose flour – just good old standard flour works perfectly here.
- 1 1⁄2 teaspoons salt – make sure you measure this precisely!
- 1⁄4 teaspoon instant yeast – yes, only a tiny bit! Don’t use active dry unless you dissolve it first, as noted later.
- 1 1⁄4 cups cool water – don’t use warm water; we want a slow, cold ferment for flavor.
- 2 cloves garlic, minced – make sure it’s finely minced so it doesn’t burn on the outside of the loaf while baking.
- 1 tablespoon fresh rosemary, chopped – chop it small; we want flavor, not giant sprigs!
- 1⁄4 cup grated Parmesan cheese (optional) – finely grated is best so it melts beautifully into the dough.
If you want to get a jump start on pairing this bread, I always have a batch of easy homemade garlic butter recipe ready to go. You’ll need that butter on hand for when this loaf comes out of the oven!
Step-by-Step Guide to Making Perfect Artisan Bread
You’ve already done the hardest part—waiting! Now it’s showtime. Since this is a true **no knead bread** recipe, the actual hands-on effort today is maybe five minutes total. This is totally achievable for **beginner bread baking**, I promise! Just follow these steps carefully, especially around the heat, because we are working with some serious temperatures here to get that amazing crust.
Mixing and the Long Fermentation Rest for Artisan Bread
First things first: grab a big bowl. Whisk together your flour, salt, and that tiny bit of instant yeast. Make sure it’s all distributed evenly, which is important since we aren’t kneading it later. Now, pour in the cool water bit by bit. I use a sturdy wooden spoon here, mixing just until you absolutely see no more dry flour streaks. It’s supposed to look messy and shaggy—almost like a very thick batter, not a smooth ball! That’s Step 2 done.
Now for the magic wait! Seriously, don’t rush this. Cover that bowl super tightly with plastic wrap—I mean TIGHTLY—and just let it sit on your counter for 12 to 18 hours minimum. When you come back, it will be bubbly, jiggly, and look totally different. That long rest develops all the flavor we want in real **artisan bread**.
Preheating the Dutch Oven Bread Setup
About 30 minutes before you are ready to shape your loaf, it’s time to get things blistering hot. Place your Dutch oven—lid and all—right into the middle rack of your oven. Crank that temperature up to 450°F (232°C). You want that pot roaring hot! Seriously, don’t try to skip this preheat; the shock of the hot metal hitting the dough is what sets that gorgeous, crunchy exterior that makes this **homemade loaf** so delicious.
Folding in Flavors and Final Shaping for Your Artisan Bread
Once the time is up and the oven is hot, gently scrape your sticky, bubbly dough out onto a counter dusted lightly with flour. Don’t deflate it all at once! Just gently fold the edges into the center a couple of times to create a rough ball shape. This is your moment to customize!
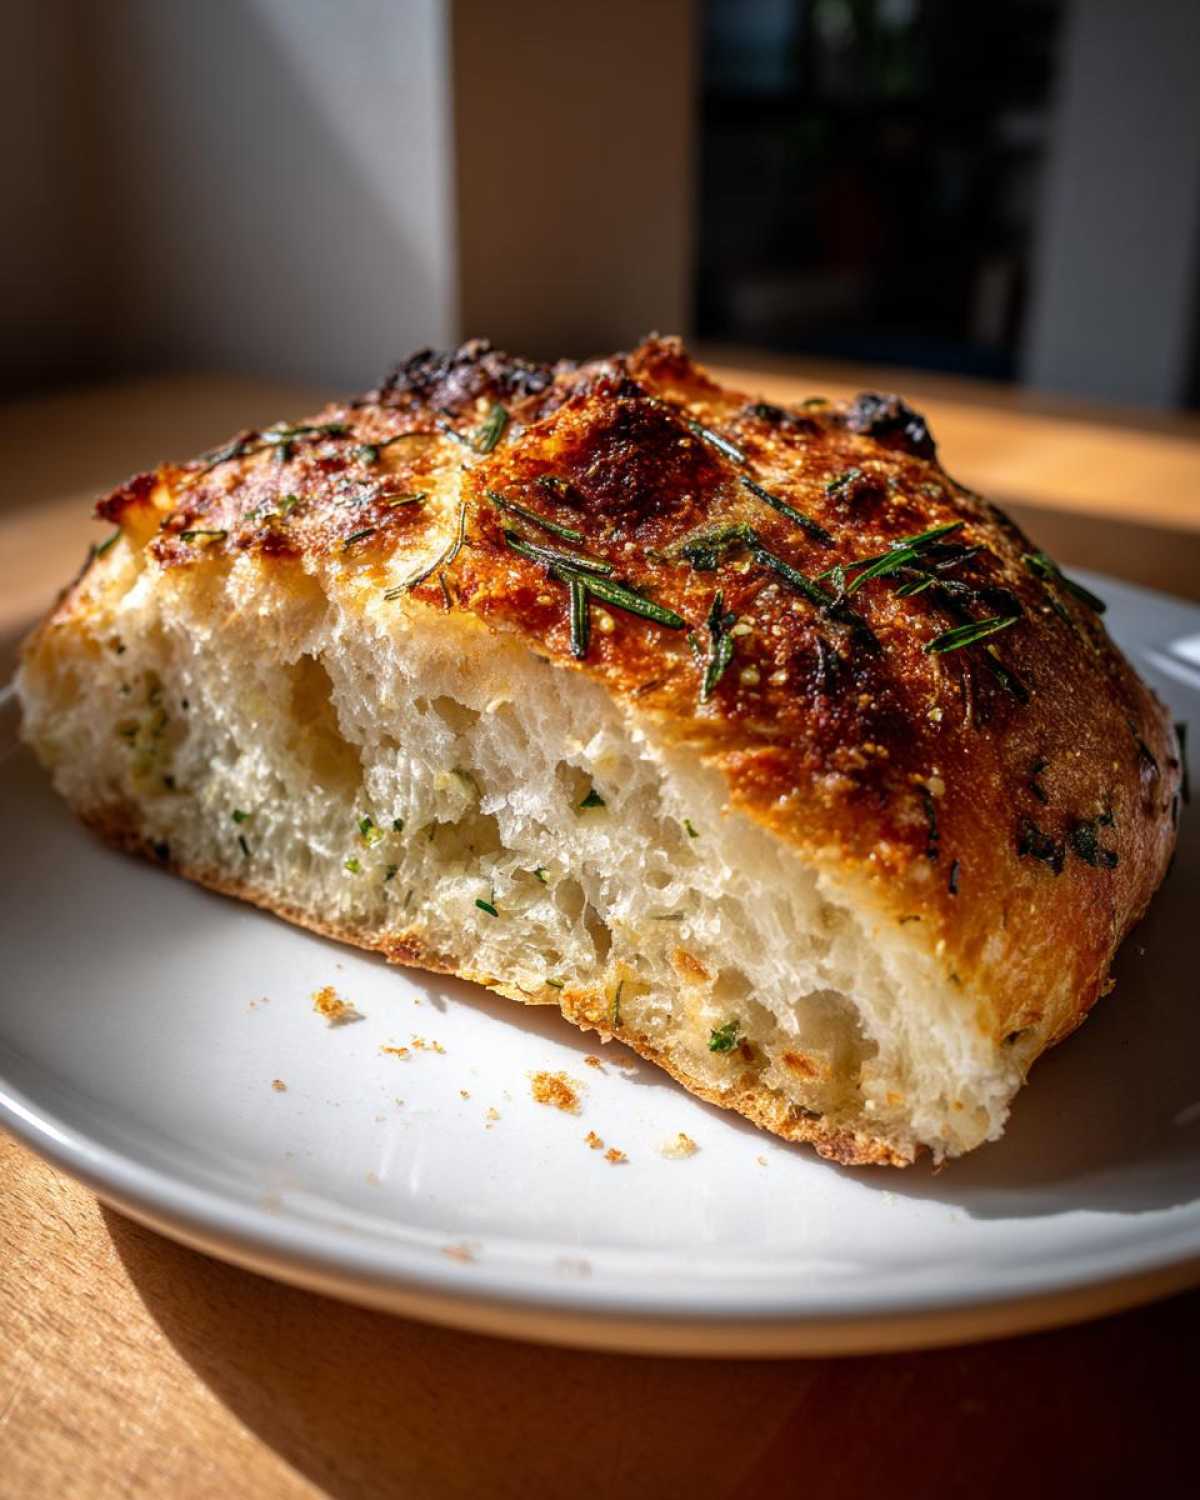
Sprinkle that minced garlic, the chopped rosemary, and the Parmesan cheese (if you’re using it!) right over the top. Fold those flavors in gently, just enough so they are encased in the dough, but try not to punch all the air out we waited so long to create. You want the flavors trapped inside the dough matrix for the ultimate **Italian artisan bread** experience.
Baking Instructions for Crusty Bread Homemade
Okay, this part requires care! Very carefully open the oven and pull out that pot—it will be screaming hot! Use some parchment paper sling or just your floured hands to gently lower that dough ball right into the center of the hot pot. Pop that lid right back on and slide it back into the oven for 30 minutes. This creates that essential steam bath.
After 30 minutes, take the lid off. Watch it transform! Keep baking for another 15 to 20 minutes. You are looking for a deep, dark golden brown crust—the darker it looks, the crispier it will be! When it looks exactly how you want your perfect **rustic bread** to look, pull it out. Make sure you let it cool completely on a wire rack afterward. If you slice it when it’s hot, the beautiful internal structure will get gummy, and we worked too hard for that!
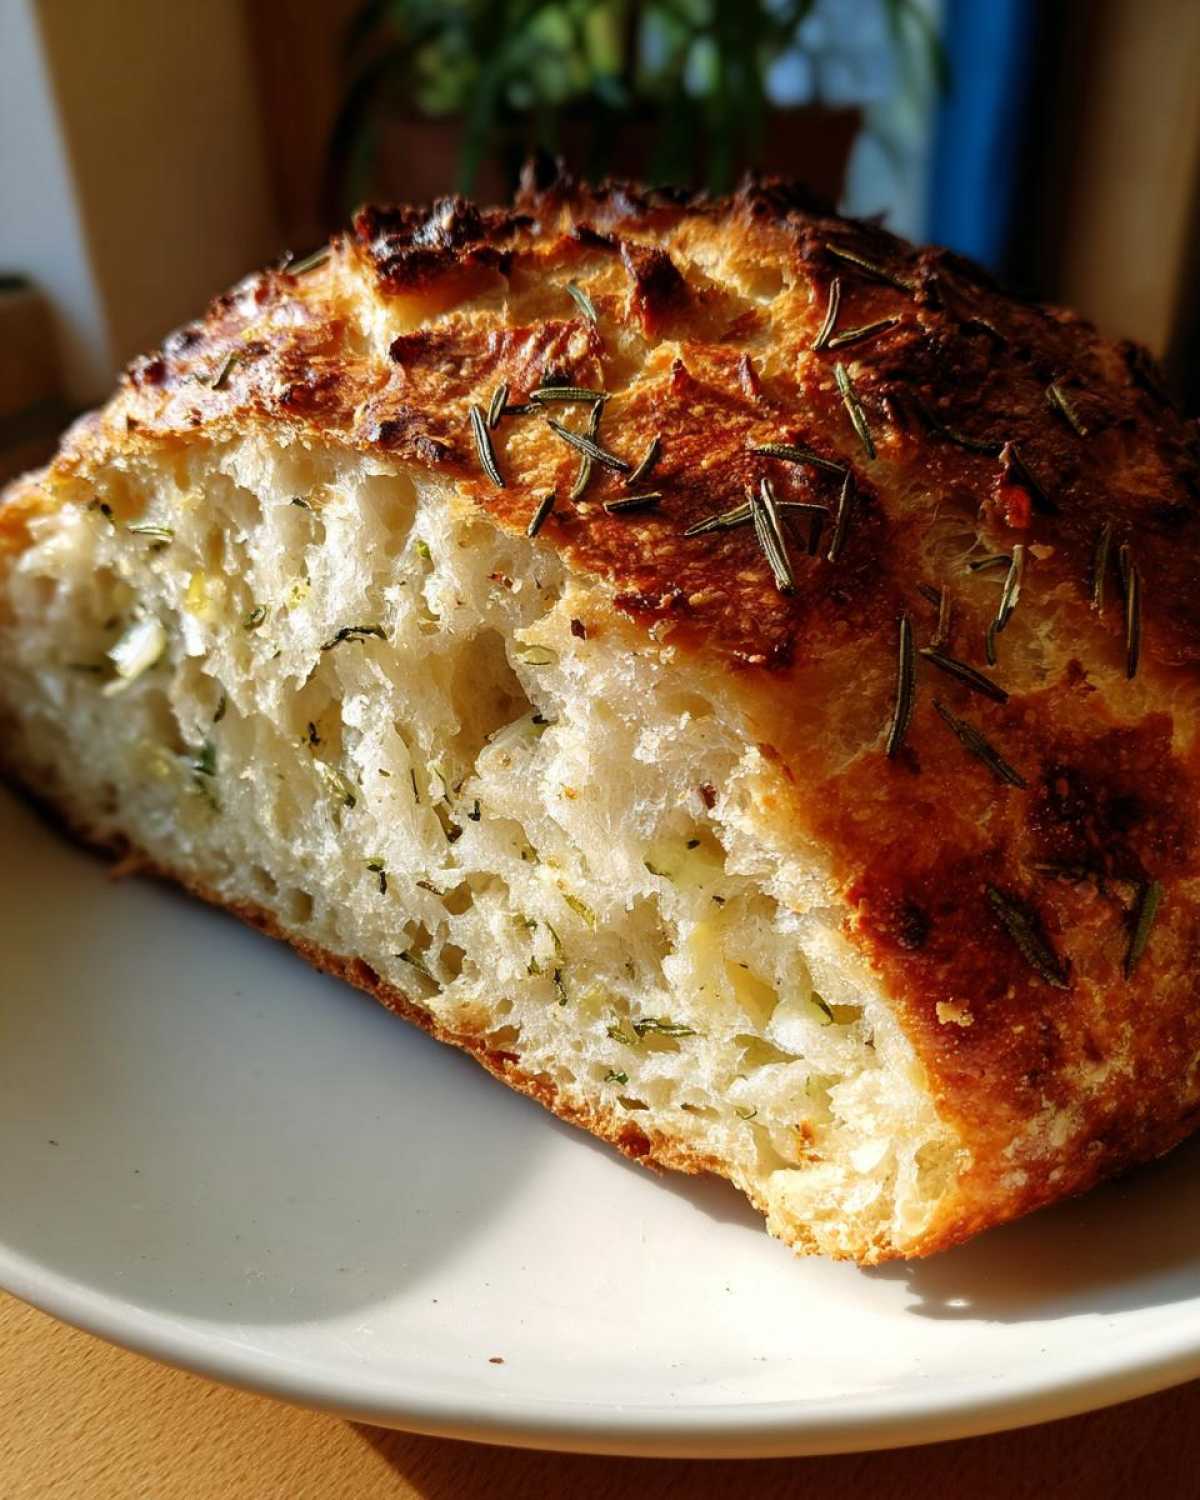
If you want some more ideas for flavored loaves, check out my recipe for easy Italian bread recipe or my general guide on easy artisan bread recipe basics.
Tips for Achieving Bakery Style Bread Success
So many people follow the steps perfectly but still don’t get that *crack* sound when they slice the bread, and that’s usually down to a few tiny things we can adjust. Remember, we’re going for professional results here with minimal fuss, so every tip counts!
One of the biggest secrets to fighting a pale crust, especially if your kitchen doesn’t stay super humid while baking, is boosting that initial steam. In the recipe notes, I mentioned placing a metal pie plate on the bottom rack while you preheat everything. This isn’t just for show! Once you put your dough in the hot pot, carefully pour about half a cup of ice cubes into that hot metal plate.
The difference that ice makes is incredible! Those cubes instantly vaporize, flooding the oven with extra steam for those first 30 minutes. Steam keeps the crust pliable so the bread can reach its maximum volume before the crust sets hard. When you remove the lid, the crust immediately starts browning fiercely. It’s a little chaotic reaching in to drop the ice, so wear an oven mitt over your hand, but wow, the results are worth the quick dash of danger!
My absolute non-negotiable rule, though, is cooling. I know it’s the hardest part when you smell that gorgeous garlic and rosemary wafting through the house, but you must, must, MUST let this **homemade loaf** cool completely on a wire rack before you slice into it. If you cut it hot, all that beautiful internal structure—all those air pockets we created with the long rest—will collapse, and the inside will feel gooey and gummy. We worked 18 hours for that perfect texture; don’t ruin it in the last five minutes!
Once it’s cool, slice it thick and dip it into something amazing, like my easy creamy beer cheese dip recipe. You deserve a treat after mastering this technique!
Variations on This Easy Artisan Bread Recipe
The beauty of this **artisan bread recipe**, once you master the no-knead technique, is that it’s basically a blank canvas for flavor! Since the base dough is so neutrally flavored (flour, water, salt, yeast), you can swap out the herbs and cheese we used for the garlic loaf to keep things interesting week after week. You don’t fix what isn’t broken, but you can certainly accessorize!
If you aren’t feeling the rosemary vibe one day, you can easily pivot this into a different kind of savory loaf. Instead of rosemary and garlic, try swapping in a tablespoon of mixed Italian herbs—think oregano, basil, and thyme. That brings it closer to a classic tavern-style loaf that is amazing toasted with butter.
As for the cheese? Parmesan is wonderful because it melts well and adds saltiness, but feel free to experiment! Sharp white cheddar melts beautifully and adds a lovely tang that complements the long fermentation flavor of the slow-risen **no knead bread**. Or, if you want something even simpler than cheese, just skip the cheese entirely and toss a handful of poppy or sesame seeds all over the dough right before you drop it into the hot pot. They toast up beautifully on the outside when the lid comes off.
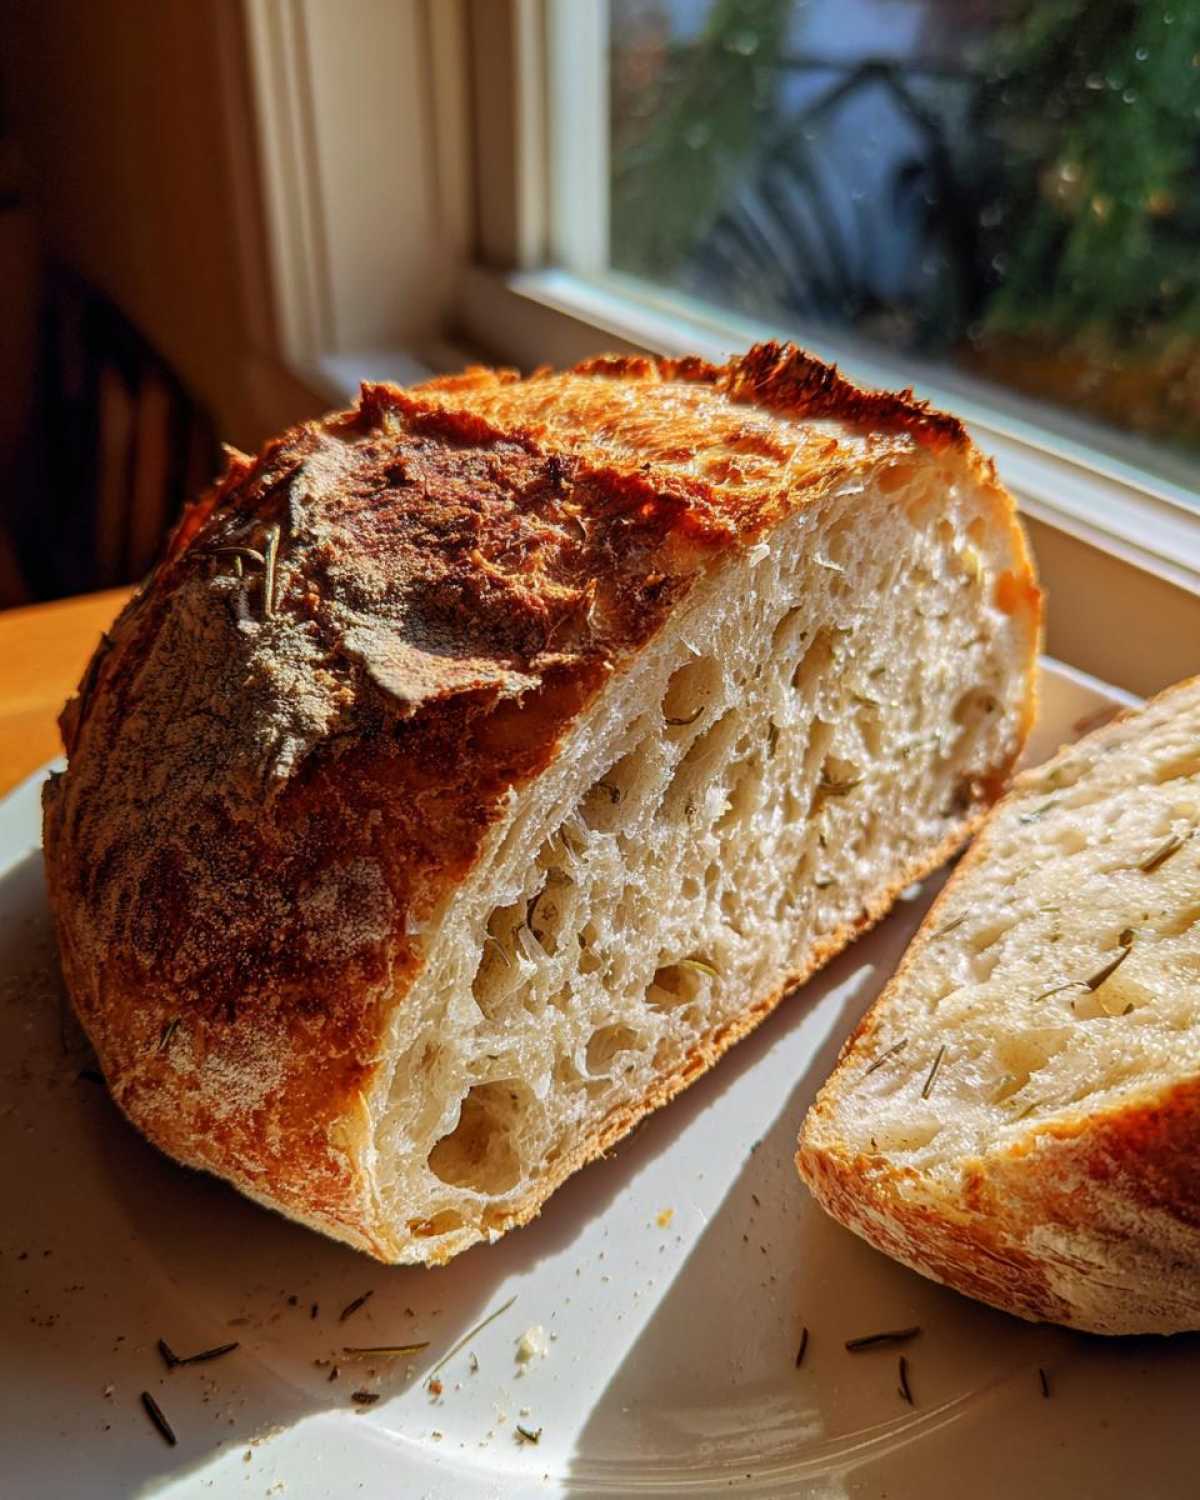
For those who love a little texture or a heartier feel, you can also mix in different flours, though you must be careful! If you want to make a fully **rustic bread**, swap out half a cup of the all-purpose flour for whole wheat flour. Remember, whole wheat absorbs more liquid, so you might notice the dough feels a little stiff, but the flavor in the final **homemade loaf** is phenomenal. If you want to try a different flavored bread altogether, check out my Italian herb and cheese bread recipe for more inspiration!
Serving Suggestions for Your Homemade Loaf
Now that you have a stunning, fragrant loaf of **artisan bread**—crispy on the outside, studded with garlic and rosemary inside—the real question is: what do you eat with it? This isn’t bread you use to make a simple sandwich; this requires something worthy of its crusty texture and savory flavor. It begs to be dunked, smeared, or placed right next to something hearty.
Since this loaf has so much built-in flavor, you don’t need much at all. A simple slather of good, salted butter right after it cools slightly is heaven. But honestly, the flavor profile—garlic and fresh herbs—screams for something rich and creamy to soak up all the internal softness.
If you’re looking for a main course pairing, this bread is absolutely phenomenal alongside a hearty, brothy bowl of soup. Forget plain toast; this is the perfect vehicle. It holds up wonderfully without getting soggy too fast. I highly recommend serving it alongside my creamy potato and leek soup—the gentle sweetness of the potato is a beautiful contrast to the savory garlic in the crust. It works so well that I actually have a slightly different version of that soup recipe on my site too, if you prefer a second opinion on soup bases! It truly makes **bread for soup** night feel like a gourmet experience.
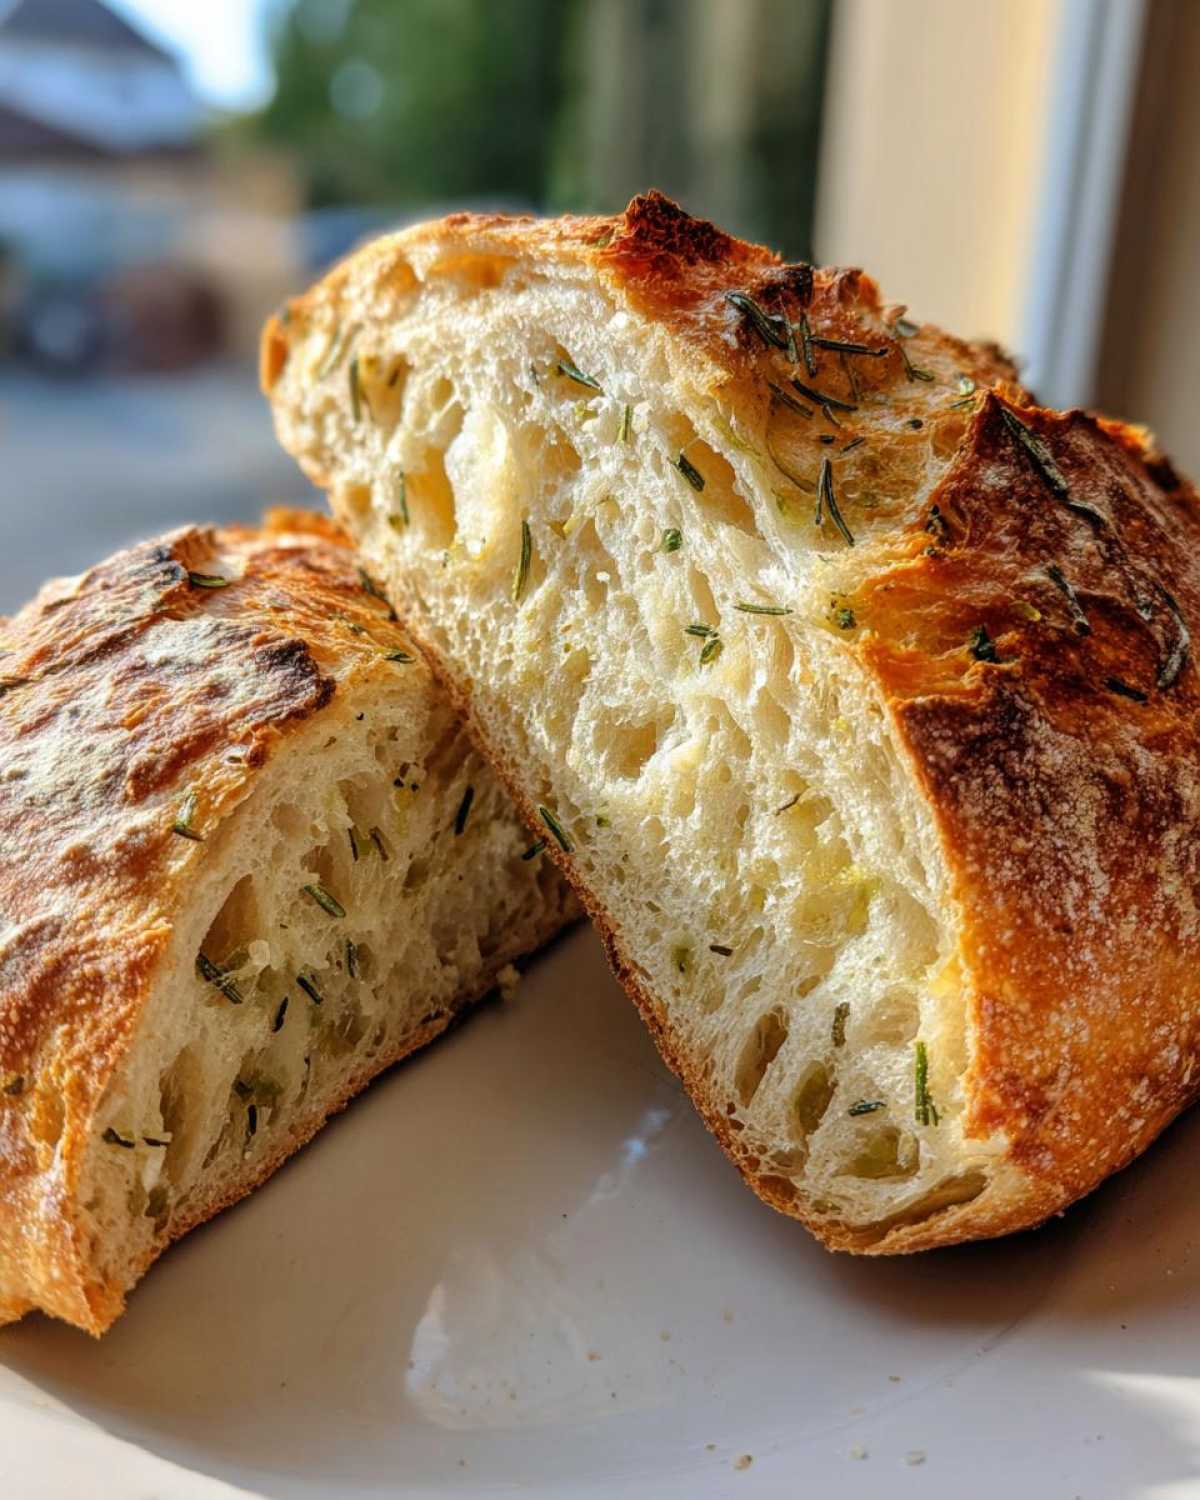
For appetizers, tear off chunks of the warm loaf and serve it with a small bowl of high-quality olive oil seasoned with just a pinch of flaky salt and maybe a splash of balsamic vinegar for dipping. Or, if you are feeling fancy, cube up some stale pieces the next day, toss them in olive oil, and toast them up for homemade croutons. They’ll be the most flavorful croutons you’ve ever made!
Storage and Reheating Instructions for Artisan Bread
You just spent 18 hours nurturing this magnificent dough, and now you have the best **artisan bread** loaf ever. We absolutely cannot let that glorious crust go soft and sad! When it comes to storing homemade bread, especially a crunchy one like this **no knead bread**, you have to treat it differently than store-bought loaves wrapped in plastic.
Plastic is the enemy of crisp texture! If you wrap this beautiful loaf tightly in plastic wrap or put it in a sealed plastic bag, all that lovely moisture that escaped when you took the lid off the Dutch oven will condense right back onto the crust. Goodbye, crunch; hello, chewy sadness. For the first day, I just let the loaf sit on the cooling rack, uncovered, for a few hours, and what’s left gets stored in a plain brown paper bag.
If you need to store it for two or three days, slip the paper bag into a slightly larger, looser plastic bag, or just wrap the paper bag in a clean kitchen towel. This keeps the main crumb soft while allowing the crust a little breathing room to let moisture escape so it doesn’t get soggy. It won’t stay perfectly crisp past day one, but it will definitely hold its flavor and chew.
Now, if your loaf is a day or two old and the crust has softened up a bit, don’t panic! We can bring it back to life. The secret to rejuvenating this **artisan bread** loaf is quick, intense heat to re-crisp the exterior. Preheat your oven—you don’t need the Dutch oven for this part—to about 350°F. Give the loaf a light spritz with water from a spray bottle if you want an extra crisp boost.
Pop the loaf directly onto the oven rack for just about 5 to 8 minutes. Keep an eye on it! You’re not trying to reheat the inside all the way through, just blister that crust back into submission. When you pull it out, give it 10 minutes to cool slightly on the rack before slicing. You’ll be amazed at how that initial crunch returns! That quick reheat makes it perfect for serving with soup or turning into the best croutons you’ve ever made!
Frequently Asked Questions About No Knead Bread
I totally get it. When you try a new recipe, especially one involving yeast and a long wait like this **artisan bread recipe**, you’re going to have questions! Don’t sweat it if you run into anything weird—baking takes practice, and this method is a little different than the quick loaves you might be used to making. Here are the things I get asked most often when people try making their first **crusty bread homemade** using this technique.
Can I make this artisan bread recipe without a Dutch oven?
That’s a fair question! If you don’t have a heavy cast iron Dutch oven, you can absolutely still make this bread, but you need to compensate for the lost steam environment. The Dutch oven lid traps the moisture right around the dough during those critical first 30 minutes, creating that signature crust. If you only have a sheet pan or a baking stone, here’s what I recommend: put a metal pie plate on the lowest rack while preheating, just like in the steam tip above!
When you place your dough onto the hot stone or pan, quickly dump boiling water into that hot pie plate to create steam. You’ll have to be fast, and the steam won’t last quite as long as it does inside the pot, but it helps immensely. The trade-off is that the crust won’t be quite as thick and shatteringly crisp as when you use the sealed pot, but you will still get a beautiful, respectable **homemade loaf**! Just watch the browning carefully because it cooks slightly differently.
What is the difference between this and a sourdough starter free bread?
The main difference is the leavening agent, and honestly, it’s what makes this recipe so fast and beginner-friendly! True **sourdough starter free bread** relies on wild yeast and bacteria captured in the starter—that takes days of feeding and waiting to get the right balance and flavor. It’s wonderful, but it’s definitely not beginner level, which is why I love sharing this alternative!
This **yeast bread recipe** uses instant commercial yeast. We only use a tiny pinch because we rely on that long, slow, room-temperature rest—the 12 to 18 hours—to develop the depth of flavor you usually only get from sourdough. So, you get the great flavor profile of an authentic **rustic bread** without having to maintain a starter. It’s instant gratification with slow-fermented taste!
If you want to see more tips on achieving that bakery quality without the sourdough fuss, pop over to my guide on the easy artisan bread recipe basics!
Serving Suggestions for Your Homemade Loaf
You did it! You made a stunning, fragrant loaf of **artisan bread** dotted with garlic and rosemary that smells incredible. The best part of this kind of bread is how versatile it is, especially because it has such great flavor built right in—you don’t need to hide it behind elaborate sandwiches. This is a showstopper meant to be a star side dish!
My favorite way to serve this savory loaf is when the outside is still warm and crackly. Slice it thick and use it to mop up rich sauces and stews. It’s the absolute perfect companion when you are serving something flavorful that needs a sturdy base. Think heavy chili, beef bourguignon, or a hearty lentil stew. This bread can handle it all!
It works wonders with soups in particular. Because the interior is so delightfully soft and chewy, it soaks up broth without immediately disintegrating, making it the best **bread for soup** night you can find. I often pair this specific garlic-rosemary loaf with something creamy, like my creamy potato and leek soup recipe. The deep, savory notes of the herbs play off the sweetness of the potatoes so beautifully!
Sometimes, if I want to make a quick snack, I just cut thin slices, drizzle them with a little olive oil, and toast them until they are just slightly browned. They become instant, incredible bruschetta bases. Or, if you want a full meal, pair it with a nice cheesy dip! I have a great recipe for easy creamy beer cheese dip recipe that vanishes instantly when this bread is on the table. Honestly, any dish that benefits from a flavorful dunking vehicle is perfect for this loaf.
If you are serving it alongside any creamy dish, you might also enjoy my alternate potato soup recipe, creamy potato leek soup recipe, which uses a slightly different herb base.
Storage and Reheating Instructions for Artisan Bread
You just spent 18 hours nurturing this magnificent dough, and now you have the best **artisan bread** loaf ever. We absolutely cannot let that glorious crust go soft and sad! When it comes to storing homemade bread, especially a crunchy one like this **no knead bread**, you have to treat it differently than store-bought loaves wrapped in plastic.
Plastic is the enemy of crisp texture! If you wrap this beautiful loaf tightly in plastic wrap or put it in a sealed plastic bag, all that lovely moisture that escaped when you took the lid off the Dutch oven will condense right back onto the crust. Goodbye, crunch; hello, chewy sadness. For the first day, I just let the loaf sit on the cooling rack, uncovered, for a few hours, and what’s left gets stored in a plain brown paper bag.
If you need to store it for two or three days, slip the paper bag into a slightly larger, looser plastic bag, or just wrap the paper bag in a clean kitchen towel. This keeps the main crumb soft while allowing the crust a little breathing room to let moisture escape so it doesn’t get soggy. It won’t stay perfectly crisp past day one, but it will definitely hold its flavor and chew.
Now, if your loaf is a day or two old and the crust has softened up a bit, don’t panic! We can bring it back to life. The secret to rejuvenating this **artisan bread** loaf is quick, intense heat to re-crisp the exterior. Preheat your oven—you don’t need the Dutch oven for this part—to about 350°F. Give the loaf a light spritz with water from a spray bottle if you want an extra crisp boost.
Pop the loaf directly onto the oven rack for just about 5 to 8 minutes. Keep an eye on it! You’re not trying to reheat the inside all the way through, just blister that crust back into submission. When you pull it out, give it 10 minutes to cool slightly on the rack before slicing. You’ll be amazed at how that initial crunch returns! That quick reheat makes it perfect for serving with soup or turning into the best croutons you’ve ever made!
Serving Suggestions for Your Homemade Loaf
Now that you have a stunning, fragrant loaf of **artisan bread**—crispy on the outside, studded with garlic and rosemary inside—the real question is: what do you eat with it? This isn’t bread you use to make a simple sandwich; this requires something worthy of its crusty texture and savory flavor. It begs to be dunked, smeared, or placed right next to something hearty.
My favorite way to serve this savory loaf is when the outside is still warm and crackly. Slice it thick and use it to mop up rich sauces and stews. It’s the absolute perfect companion when you are serving something flavorful that needs a sturdy base. Think heavy chili, beef bourguignon, or a hearty lentil stew. This bread can handle it all!
It works wonders with soups in particular. Because the interior is so delightfully soft and chewy, it soaks up broth without immediately disintegrating, making it the best **bread for soup** night you can find. I often pair this specific garlic-rosemary loaf with something creamy, like my creamy potato and leek soup recipe. The deep, savory notes of the herbs play off the sweetness of the potato so beautifully!
Sometimes, if I want to make a quick snack, I just cut thin slices, drizzle them with a little olive oil, and toast them until they are just slightly browned. They become instant, incredible bruschetta bases. Or, if you are feeling fancy, cube up some stale pieces the next day, toss them in olive oil, and toast them up for homemade croutons. They’ll be the most flavorful croutons you’ve ever made!
If you are serving it alongside any creamy dish, you might also enjoy my alternate potato soup recipe, creamy potato leek soup recipe, which uses a slightly different herb base.
Storage and Reheating Instructions for Artisan Bread
You just spent 18 hours nurturing this magnificent dough, and now you have the best **artisan bread** loaf ever. We absolutely cannot let that glorious crust go soft and sad! When it comes to storing homemade bread, especially a crunchy one like this **no knead bread**, you have to treat it differently than store-bought loaves wrapped in plastic.
Plastic is the enemy of crisp texture! If you wrap this beautiful loaf tightly in plastic wrap or put it in a sealed plastic bag, all that lovely moisture that escaped when you took the lid off the Dutch oven will condense right back onto the crust. Goodbye, crunch; hello, chewy sadness. For the first day, I just let the loaf sit on the cooling rack, uncovered, for a few hours, and what’s left gets stored in a plain brown paper bag.
If you need to store it for two or three days, slip the paper bag into a slightly larger, looser plastic bag, or just wrap the paper bag in a clean kitchen towel. This keeps the main crumb soft while allowing the crust a little breathing room to let moisture escape so it doesn’t get soggy. It won’t stay perfectly crisp past day one, but it will definitely hold its flavor and chew.
Now, if your loaf is a day or two old and the crust has softened up a bit, don’t panic! We can bring it back to life. The secret to rejuvenating this **artisan bread** loaf is quick, intense heat to re-crisp the exterior. Preheat your oven—you don’t need the Dutch oven for this part—to about 350°F. Give the loaf a light spritz with water from a spray bottle if you want an extra crisp boost.
Pop the loaf directly onto the oven rack for just about 5 to 8 minutes. Keep an eye on it! You’re not trying to reheat the inside all the way through, just blister that crust back into submission. When you pull it out, give it 10 minutes to cool slightly on the rack before slicing. You’ll be amazed at how that initial crunch returns! That quick reheat makes it perfect for serving with soup or turning into the best croutons you’ve ever made!
Frequently Asked Questions About No Knead Bread
I totally get it. When you try a new recipe, especially one involving yeast and a long wait like this **artisan bread recipe**, you’re going to have questions! Don’t sweat it if you run into anything weird—baking takes practice, and this method is a little different than the quick loaves you might be used to making. Here are the things I get asked most often when people try making their first **crusty bread homemade** using this technique.
Can I make this artisan bread recipe without a Dutch oven?
That’s a fair question! If you don’t have a heavy cast iron Dutch oven, you can absolutely still make this bread, but you need to compensate for the lost steam environment. The Dutch oven lid traps the moisture right around the dough during those critical first 30 minutes, creating that signature crust. If you only have a sheet pan or a baking stone, here’s what I recommend: put a metal pie plate on the lowest rack while preheating, just like in the steam tip above!
When you place your dough onto the hot stone or pan, quickly dump boiling water into that hot pie plate to create steam. You’ll have to be fast, and the steam won’t last quite as long as it does inside the pot, but it helps immensely. The trade-off is that the crust won’t be quite as thick and shatteringly crisp as when you use the sealed pot, but you will still get a beautiful, respectable **homemade loaf**! Just watch the browning carefully because it cooks slightly differently. If you want to see more tips for achieving that bakery look, check out my easy artisan bread recipe guide.
What is the difference between this and a sourdough starter free bread?
The main difference is the leavening agent, and honestly, it’s what makes this recipe so fast and beginner-friendly! True **sourdough starter free bread** relies on wild yeast and bacteria captured in the starter—that takes days of feeding and waiting to get the right balance and flavor. It’s wonderful, but it’s definitely not beginner level, which is why I love sharing this alternative!
This **yeast bread recipe** uses instant commercial yeast. We only use a tiny pinch because we rely on that long, slow, room-temperature rest—the 12 to 18 hours—to develop the depth of flavor you usually only get from sourdough. So, you get the great flavor profile of an authentic **rustic bread** without having to maintain a starter. It’s instant gratification with slow-fermented taste!
Nutritional Estimate for This Artisan Bread Loaf
Now, I always have to put a little disclaimer on this part because I’m not a nutritionist and everyone measures and chops differently, especially when we’re adding rosemary and Parmesan! These numbers are based strictly on the core dough ingredients listed (flour, water, salt, yeast) and are calculated per slice, assuming you get 12 good slices from the loaf. If you get bigger slices, your numbers will obviously increase.
This is just a ballpark guide for tracking, but honestly, when **artisan bread** tastes this good, I try not to worry too much about the math! This is a lean, simple loaf, so it’s surprisingly light compared to enriched breads with lots of added fat.
Here’s the breakdown for one slice:
- Serving Size: 1 slice
- Calories: 220
- Fat: 1.5g
- Saturated Fat: 0.3g
- Carbohydrates: 46g
- Fiber: 2g
- Protein: 7g
You’ll notice the sodium is a little higher, which is pretty standard for any recipe that relies on salt for structure and flavor, like this fantastic **yeast bread recipe**. If you skip the optional Parmesan, you can shave a little bit off that sodium content, too! Remember, these estimates don’t account for any butter or dipping oil you might be serving with your gorgeous, crusty, **bakery style bread**!
Share Your Homemade Loaf
You finally have this gorgeous, crusty loaf of **artisan bread** sitting on your counter, and I am so incredibly excited for you! Seriously, I want to see the results of all that waiting and that high-heat blast in the Dutch oven. It’s truly rewarding to pull off a **crusty bread homemade** that rivals what you usually pay way too much for at the fancy bakery.
When you get a chance, please come back here and tell me how it went! Dropping a rating and a quick comment letting me know if the garlic and rosemary combo hit the spot is the best encouragement for me. It lets me know this **easy artisan bread** method is working for everyone, not just me!
And if you’re snapping photos—and you absolutely should be, because this bread is beautiful—please tag me on social media! I love scrolling through and seeing all your amazing bakes. Use the hashtag for my blog so I can find your pictures easily. I always scroll through the posts on my blog page looking for reader creations, and nothing makes me happier than seeing a perfectly risen **homemade loaf**!
Enjoy that first slice—it should be the best bread you’ve ever made!
PrintNo-Knead Artisan Bread with Garlic and Rosemary

Make bakery-style crusty bread at home using this simple no-knead method, baked in a Dutch oven. This recipe includes garlic and rosemary for added flavor.
- Prep Time: 10 min
- Cook Time: 50 min
- Total Time: 13 hours 0 min
- Yield: 1 loaf
- Category: Bread
- Method: Baking
- Cuisine: American
- Diet: Vegetarian
Ingredients
- 3 cups all-purpose flour
- 1 1/2 teaspoons salt
- 1/4 teaspoon instant yeast
- 1 1/4 cups cool water
- 2 cloves garlic, minced
- 1 tablespoon fresh rosemary, chopped
- 1/4 cup grated Parmesan cheese (optional)
Instructions
- In a large bowl, whisk together the flour, salt, and yeast.
- Add the cool water to the dry ingredients. Mix with a wooden spoon until just combined into a shaggy dough. Do not overmix.
- Cover the bowl tightly with plastic wrap and let it rest at room temperature for 12 to 18 hours. The dough will become bubbly and increase in volume.
- About 30 minutes before baking, place a 5- to 6-quart Dutch oven, with the lid on, into your oven. Preheat the oven to 450°F (232°C).
- Gently scrape the dough onto a lightly floured surface. Fold the dough over itself a few times to form a rough ball. Sprinkle the minced garlic, chopped rosemary, and Parmesan cheese (if using) over the dough and gently fold them in without deflating the dough too much.
- Carefully remove the hot Dutch oven from the oven. Take off the lid. Gently place the dough ball into the hot pot.
- Cover the Dutch oven with the lid and return it to the oven. Bake for 30 minutes.
- Remove the lid and continue baking for another 15 to 20 minutes, or until the crust is deep golden brown.
- Carefully remove the bread from the Dutch oven and let it cool completely on a wire rack before slicing.
Notes
- For a crispier crust, you can place a metal pie plate on the bottom rack while preheating to hold ice cubes for steam generation during the first 30 minutes of baking.
- If you do not have instant yeast, use active dry yeast and dissolve it in a small amount of the water first, letting it sit for 5 minutes before adding to the flour mixture.
- Cooling the bread completely prevents the interior from becoming gummy.
Nutrition
- Serving Size: 1 slice
- Calories: 220
- Sugar: 0.5
- Sodium: 380
- Fat: 1.5
- Saturated Fat: 0.3
- Unsaturated Fat: 1.2
- Trans Fat: 0
- Carbohydrates: 46
- Fiber: 2
- Protein: 7
- Cholesterol: 0
