

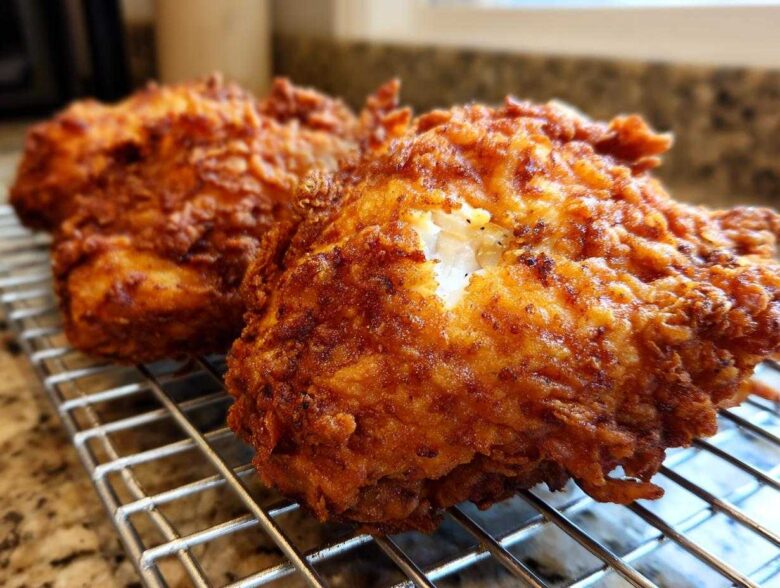
If you’re chasing that perfect bite—the sound of the crust shattering under your teeth while the inside is so juicy it practically melts—then you’ve come to the right place! Forget dry, bland chicken; we’re talking about the Best Homemade Fried Chicken that truly earns the title of comfort food royalty. This recipe delivers Ultra-Crispy Buttermilk Southern Fried Chicken every single time, thanks to a long soak. When I first started years ago, my results were hit-or-miss, but getting this recipe right was a huge turning point. Chef Tariq used to say that mastering authentic fried chicken is the true benchmark of a good cook, and his expertise in classic techniques is why we nail that balance between a golden, crunchy coating and unbelievable interior moisture.
If you want to learn more about how we work here at Savory Skies, feel free to check out our story. Now, let’s get frying!
Why This Buttermilk Southern Fried Chicken Recipe Delivers Ultimate Crunch
Folks, this isn’t just another recipe; this is the one that gives you that *sound* when you bite in—that satisfying crunch we all dream about! We’re talking about the Best Homemade Fried Chicken that truly earns the title of comfort food royalty. This recipe delivers Ultra-Crispy Buttermilk Southern Fried Chicken every single time, thanks to a long soak. If you want the inside scoop on achieving that golden, crunchy exterior, you’ll find all the background info and more inspiration over on the Savory Skies blog. Putting in the extra time for the brine and the dry dredge is how you get that aggressively Crunchy Chicken Coating that stays crisp, even when served for dinner.
The Buttermilk Brine Secret for Juicy and Crispy Chicken
The buttermilk soak isn’t just for flavor, which, by the way, is huge! The mild acid in the buttermilk actually starts to break down the tough tissues in the chicken just a tiny bit. This is what guarantees a truly tender inside. Plus, that slightly thick, tangy coating left on the chicken helps the dry flour stick around during frying. If you skip this step for your fried chicken, you’re just asking for sad, flaky crusts!
Achieving the Perfect Golden Brown Chicken Crust
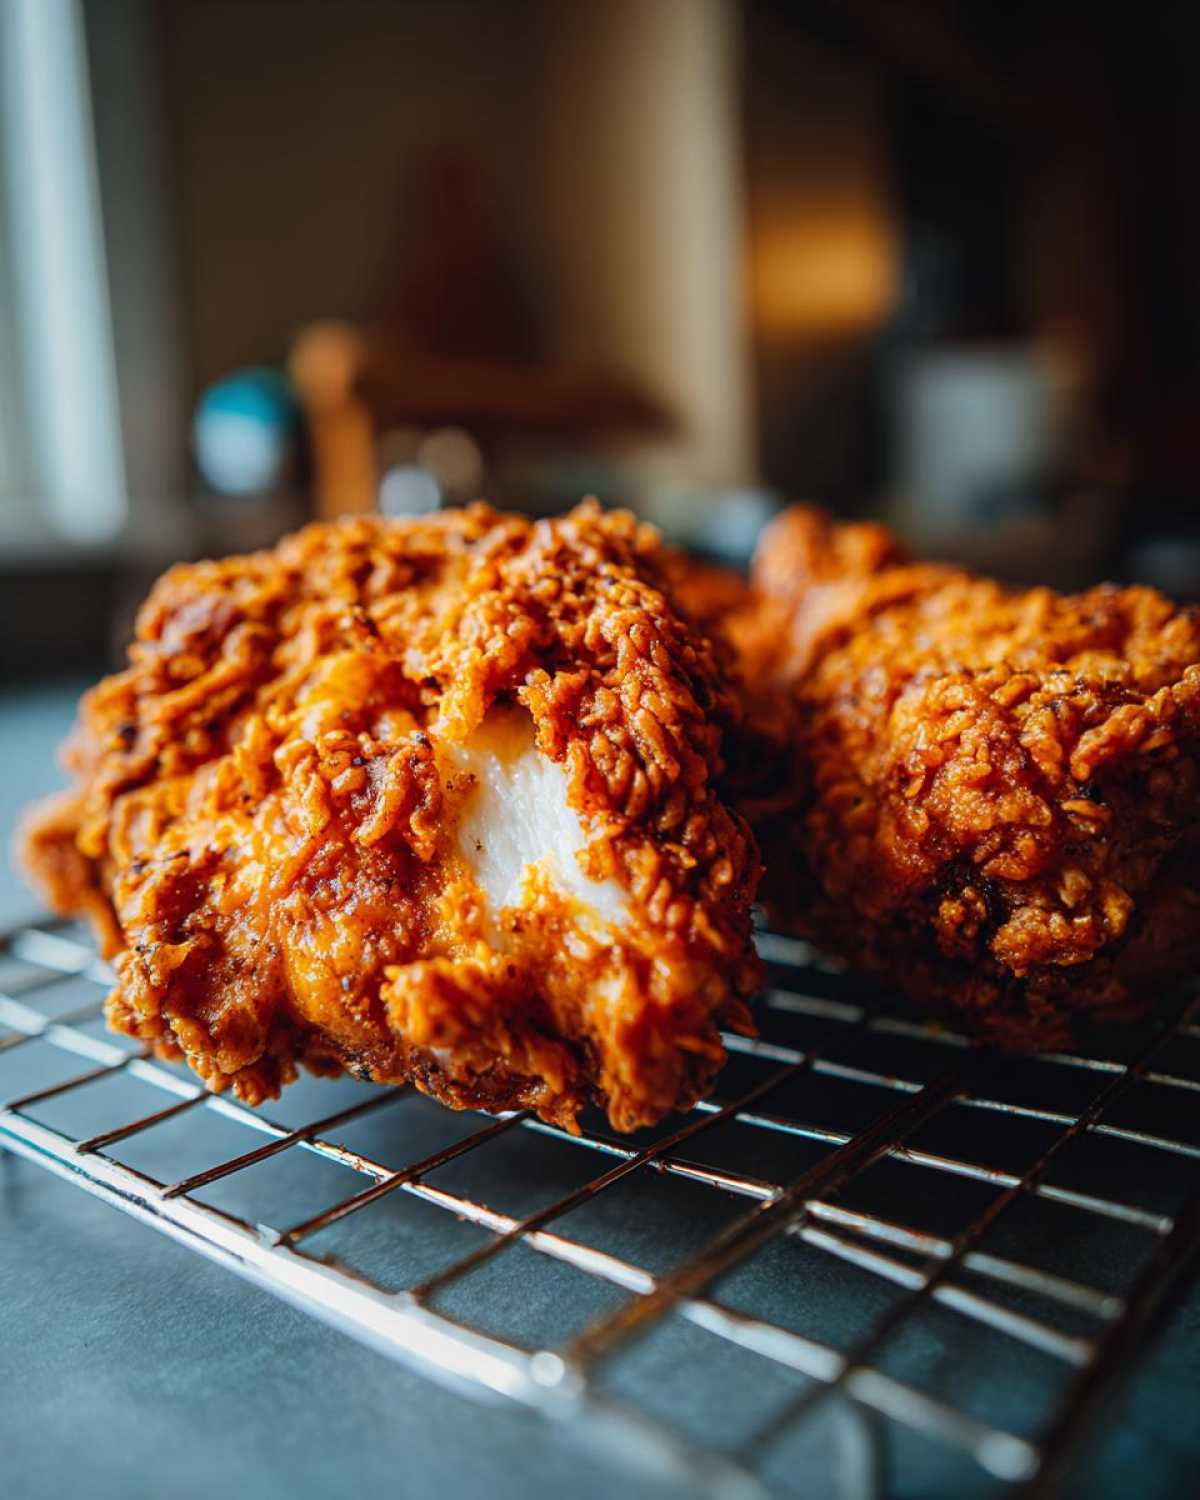
The real trick to staying golden brown and ultra-crispy lies in that dredge—specifically, the cornstarch. We mix it right into the flour, and it acts like little performance enhancers for the coating! Cornstarch absorbs moisture from the outside of the chicken differently than flour does, leading to that beautifully craggy, flaky texture that looks so good in pictures and tastes even better. It’s a simple addition, but it’s essential for that sought-after texture in this Juicy and Crispy Chicken.
Gathering Ingredients for Your Crispy Fried Chicken Recipe
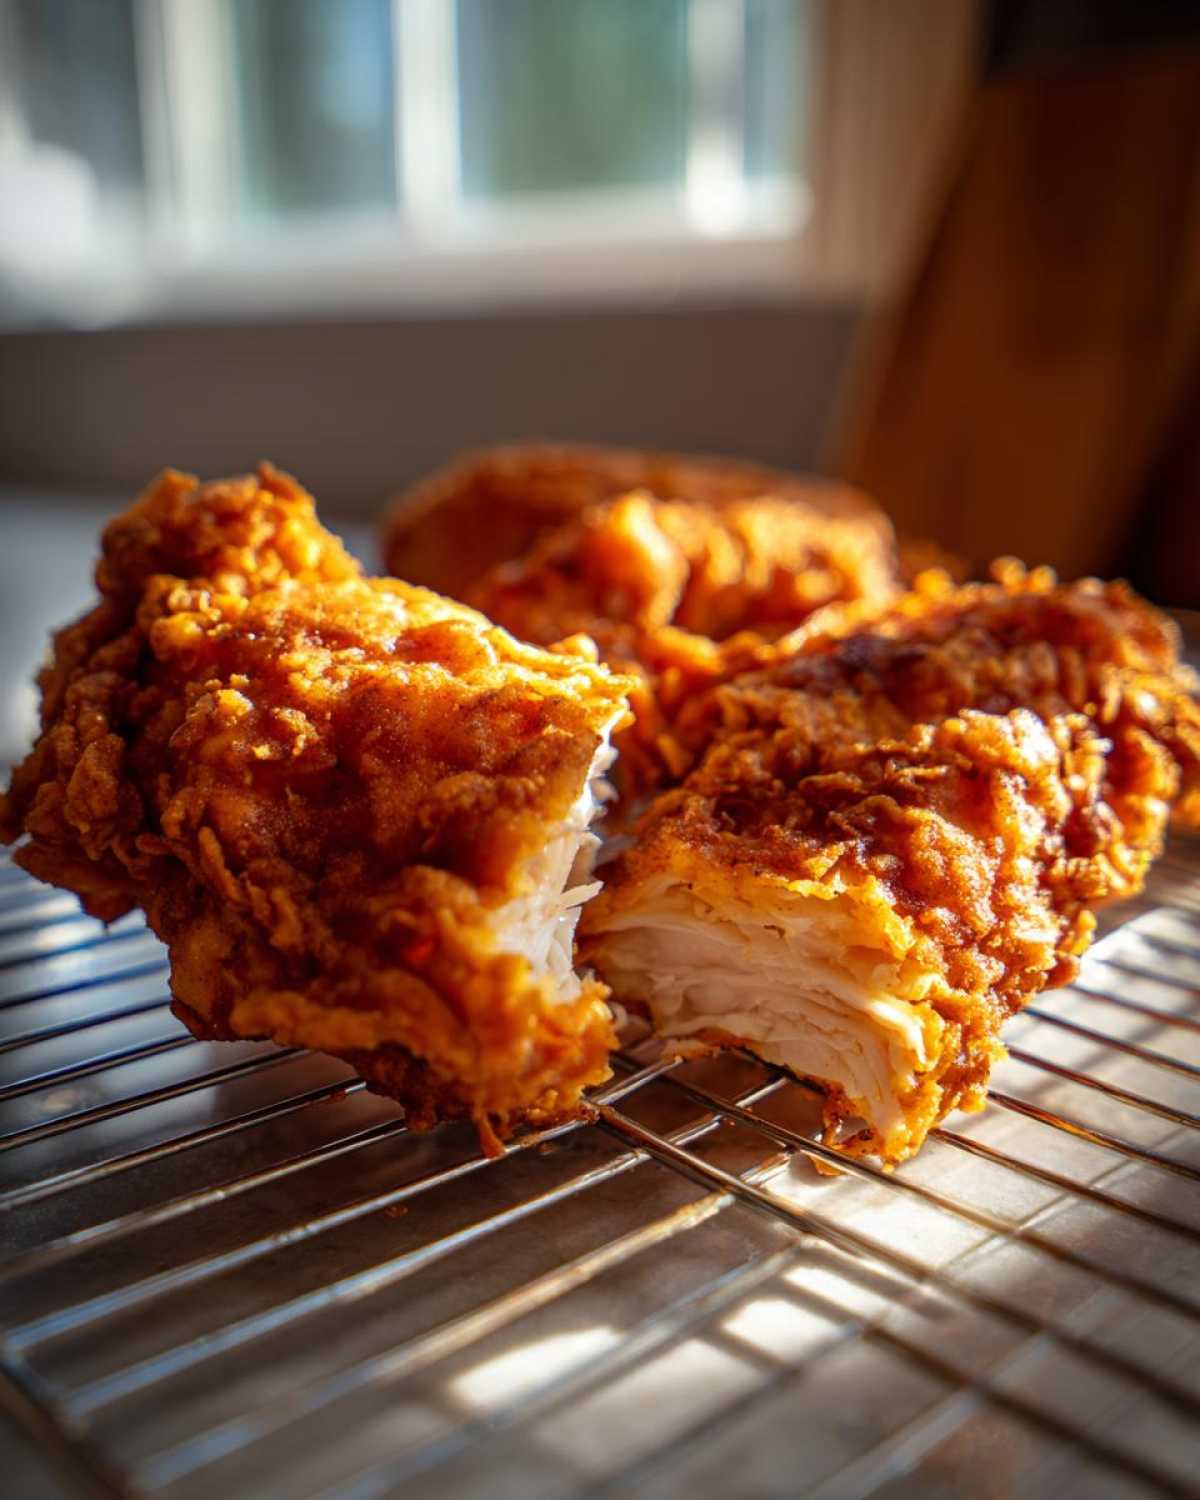
Okay, before we even think about firing up the oil, we need to get our ducks (or rather, our chickens!) in a row. This crispy fried chicken recipe relies on quality ingredients, especially the buttermilk soak, which we talked about, but don’t skimp on what goes into that amazing crust! Getting these components ready first makes the whole process so much smoother. When you’re dealing with hot oil for deep fried chicken, pausing halfway is just asking for trouble, so prep everything now. Also, make sure you have plenty of fresh vegetable or peanut oil ready to go—we need a good inch and a half in the pot for proper frying depth!
Chicken and Brine Components
This is where the magic starts to tenderize the meat. For the best results, I always grab bone-in pieces; the dark meat stays way juicier. Trust me on chicken thighs and drumsticks here!
- 4 lbs bone-in, skin-on chicken pieces (thighs and drumsticks work well)
- 4 cups buttermilk
- 2 tablespoons hot sauce (use your favorite brand for that background heat!)
- 2 teaspoons kosher salt
- 1 teaspoon black pepper
The Crunchy Chicken Coating Dredge
This mixture is what gives us that beautiful, craggy texture. The cornstarch is our secret weapon for that extra crunch! Make sure you whisk these together really well so there are no big clumps of spice anywhere.
- 3 cups all-purpose flour
- 1/2 cup cornstarch
- 1 tablespoon paprika (for color and a gentle flavor)
- 1 tablespoon garlic powder
- 1 tablespoon onion powder
- 1 teaspoon cayenne pepper (optional, but I almost always add it in!)
How To Make Fried Chicken: Step-by-Step Instructions
Alright, buckle up! This is where the magic happens. If you follow these steps for How To Make Fried Chicken precisely, you’re going to end up with the most unbelievably Juicy and Crispy Chicken you’ve ever tasted. It’s all about respecting the process, especially how long everything sits and what temperature we use. Resist the urge to rush the brine or the oil heating—that’s the difference between good fried chicken and legendary fried chicken! If you’re ever looking for flavor contrasts, like maybe switching gears after this savory dinner, I recommend checking out my recipe for homemade teriyaki sauce.
Step 1: The Essential Buttermilk Brining Process
First things first: the bath! You need a big, deep bowl for this. Combine your buttermilk, hot sauce, salt, and pepper until they’re happy together. Then, add your chicken pieces. And when I say add them, I mean make sure they are completely submerged. They need a good, long soak to get properly tenderized. I always aim to put this in the fridge overnight, minimum four hours. If you try to rush this part, the meat won’t absorb enough flavor or moisture. Don’t peek or mess with it until you’re ready to dredge!
Step 2: Preparing the Flour Dredge for Maximum Texture
While the chicken is chilling out, whisk your dredge ingredients together in a separate wide dish—that’s the flour, cornstarch, and all those lovely spices. Once your chicken is out of the wet mix, let the excess buttermilk drip off for just a second. Remember, we need some wetness clinging on! Now, take one piece at a time and really push that flour mixture onto it. Don’t just gently toss it! You have to press it in and manipulate the coating to build those little flaky bits. Those little bits are what turn into the craggy, Crunchy Chicken Coating we want.
This is my favorite little Chef Tariq tip: after you dredge that piece, lay it onto a wire rack set over a baking sheet. Now, you must let it rest for about 15 minutes. This resting period is crucial! It lets the coating actually hydrate and stick to the chicken skin. If you skip this rest, trust me, your coating will explode off the moment it hits the hot fat.
Step 3: Frying the Golden Brown Chicken in Batches
Time for the heat! Get your heavy pot set up with at least an inch and a half of oil, and bring it up to temperature. We are aiming for 325°F (160°C). Chef Tariq is firm on this: “If you think the temperature is high enough, check it again. Too cool, and you get greasy chicken; too hot, and you get charcoal breading.” You want that oil steady! Once it hits that sweet spot, carefully lower in only three or four pieces. Seriously, don’t overload the pot, or the temperature will plummet, and you’ll end up with soggy, pale fried chicken.
Fry each batch for about 6 to 8 minutes on each side. Keep an eye on that thermometer! We’re looking for that deep Golden Brown Chicken color and an internal temperature of 165°F (74°C) in the thickest part. When they look perfectly done, pull them out and place them right onto a clean wire rack, not paper towels! The rack allows air to circulate so the bottom doesn’t steam. Let them drain for a few minutes, and then get ready for the best bite of your life.
Tips for Success: Mastering Your Fried Chicken Technique
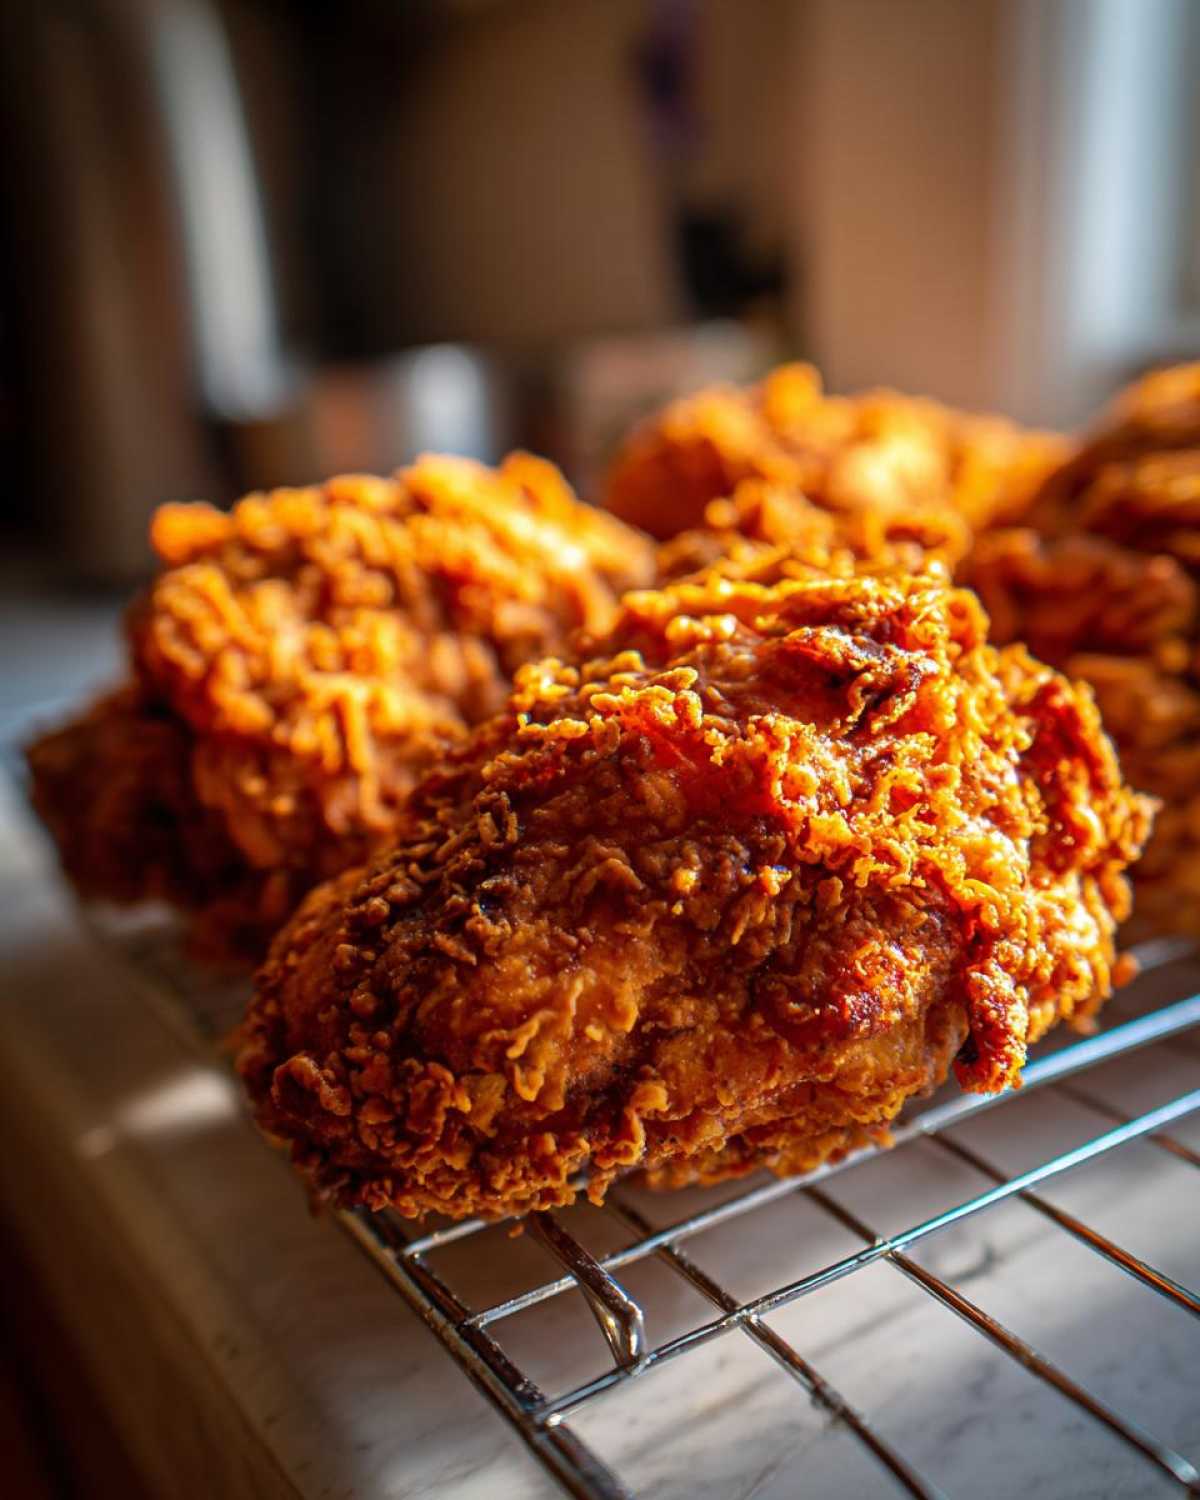
Look, even with the best recipe, making fried chicken can feel a little intimidating, right? But don’t worry, we’re making this unbelievably Foolproof Fried Chicken! I’ve gathered Chef Tariq’s best wisdom here—the little things that separate an okay batch from the kind of chicken that makes people scrape the plate clean. If you nail these small adjustments, your crust will be legendary.
If you’re looking for something completely different to serve alongside this masterpiece—maybe a little dip inspiration—you can find my recipe for easy creamy beer cheese dip. But first, let’s focus on getting that coating perfect!
The Double Dip Trick for Extra Crunchy Chicken Coating
Remember when I said pressing the flour on counts? Well, this next step takes that level of coating commitment even further. If you really, truly want that craggy, textured coating that flakes off perfectly, you need to try the double dip! It sounds extra, but it totally works. After you coat your chicken piece in the flour mixture the first time, dip it *right back* into that leftover buttermilk bath for just a second. Then, toss it back into the dry flour mixture and press hard again. This layers that crust so thick and rough—it’s pure gold when it fries up!
Oil Temperature Control for Perfect Fried Chicken
I can’t stress this enough: temperature is everything for Deep Fried Chicken. While we aimed for a steady 325°F when starting the fry, you have to constantly monitor it, and I want you to keep the thermometer handy. If the oil starts to creep up above 330°F, that coating is going to burn before the inside of that beautiful chicken thigh even warms up. Conversely, if it drops to, say, 315°F because you put too many pieces in the pot, the coating absorbs too much oil and gets greasy instead of crispy. Keep it held right in that 315°F–330°F zone, and you’ll be rewarded with super Juicy and Crispy Chicken!
Storage and Reheating Instructions for Leftover Fried Chicken
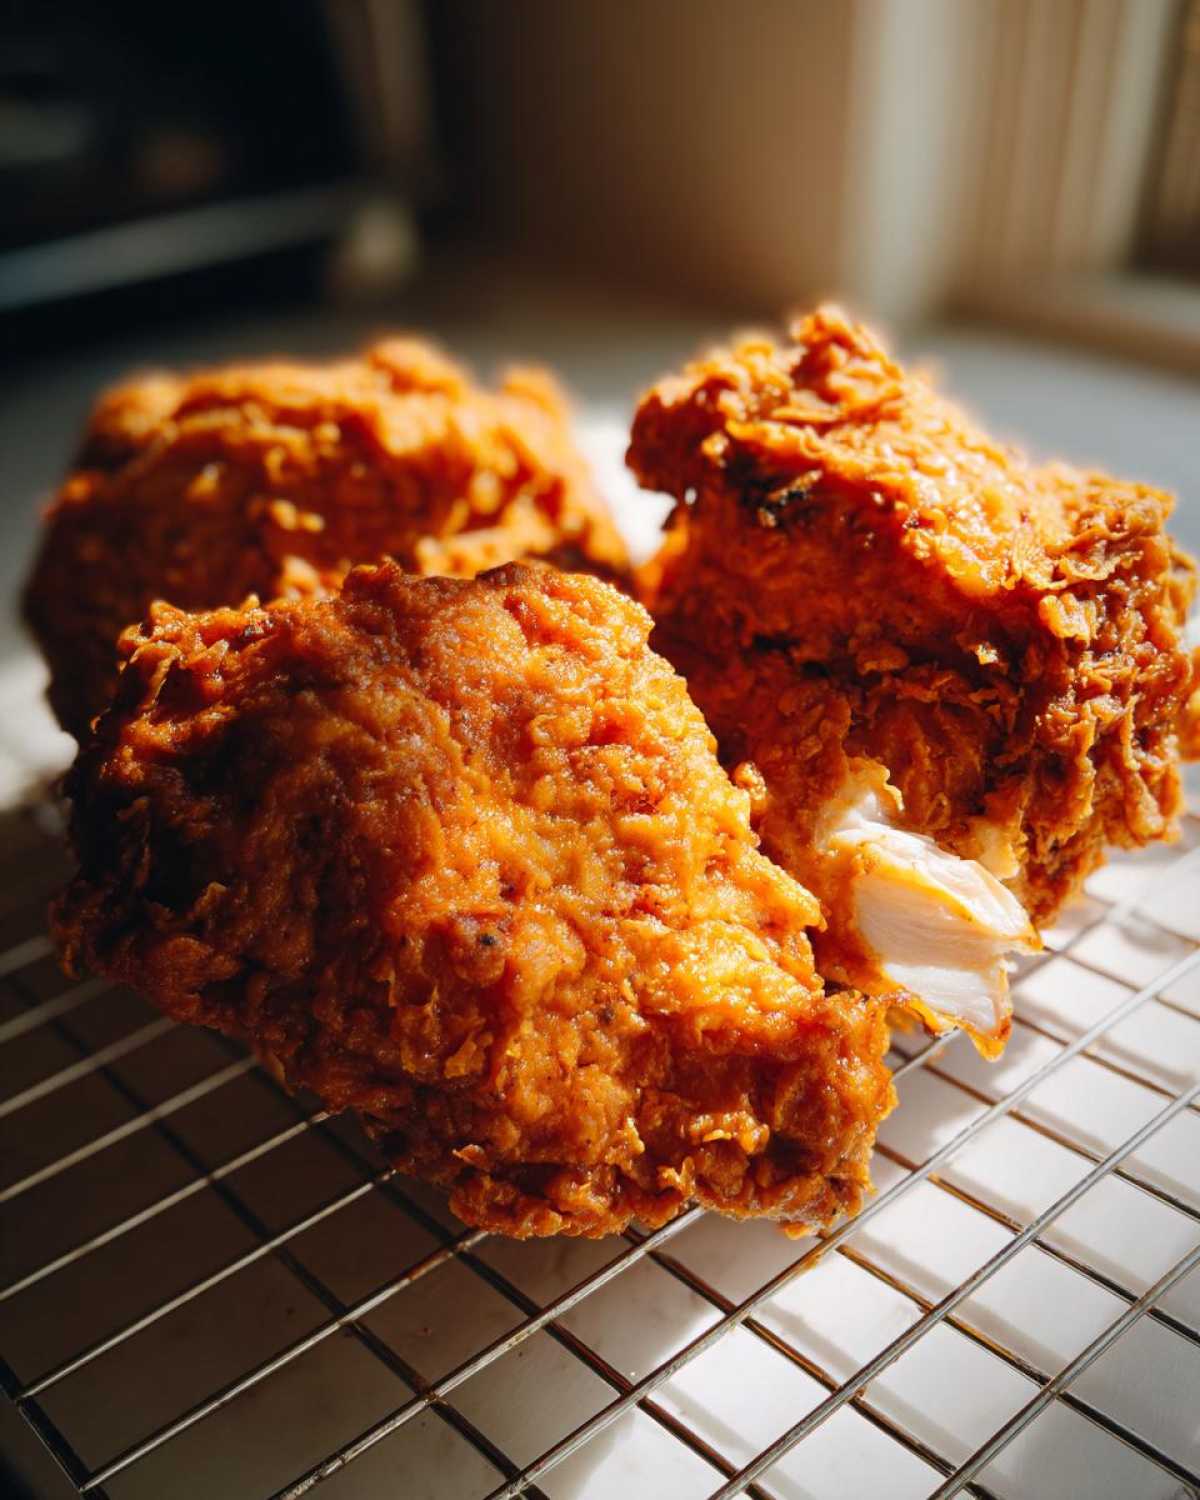
Don’t you just hate it when you have the most incredible leftover fried chicken, but by morning it’s soft? It kills me! Honestly, the absolute best way to enjoy this crispy treat is right out of the fryer, piping hot. But life happens, and sometimes we have leftovers. Here’s my advice straight from Tariq’s playbook on how to keep that Crunchy Chicken Coating intact for lunch the next day.
First rule: If you can avoid putting it in the fridge, do it! Cold air is the enemy of crispiness. If you know you’re eating it all within a few hours, just let it cool on that wire rack you used for draining and cover it loosely at room temperature. But if you absolutely need to store it, wait until it’s completely cooled down—maybe an hour or so—then place it in a zip-top bag or an airtight container. Remember to put a paper towel inside the container before you seal it if you have one handy; it helps catch some minor condensation.
Now, for reheating—and this is non-negotiable—do NOT use the microwave! Microwaving steamed chicken is the fastest way to guarantee soggy skin for your Classic Fried Chicken. For true crispiness, you want dry heat. I swear by the air fryer for this. Set your air fryer to about 375°F and zap those pieces for about 5 to 7 minutes, shaking the basket halfway through. If you don’t have one, the oven works great, too. Just set it to 350°F and place the chicken right on the rack (no pan underneath!) for about 10 to 12 minutes. That dry heat crisps everything right back up so it tastes almost exactly like it did the first time you made this Savory Chicken Dinner.
Serving Suggestions for Your Savory Chicken Dinner Ideas
Whew! You just made the best fried chicken known to humankind—now what are you going to serve it with? We can’t just eat this masterpiece all by itself, right? Making this the perfect centerpiece for your Savory Chicken Dinner Ideas means leaning into those amazing Southern sides that just soak up all the flavor.
My favorite, and honestly, Tariq’s too, is a heaping pile of creamy mashed potatoes. The sauce is just begging for something soft and fluffy to mingle with. You can make some amazing whipped sweet potatoes if you want just a touch of contrasting sweetness—you can find my recipe for creamy mashed sweet potatoes if you’re feeling adventurous!
But you absolutely can’t forget the crunch and the cool relief! A sharp, vinegary coleslaw cuts right through the richness of the deep-fried coating perfectly. And, of course, you need biscuits—warm, flaky biscuits ready to catch any stray bits of crust or gravy. Seriously, this is comfort food at its absolute peak. Enjoy every single bite!
Frequently Asked Questions About Making Fried Chicken
I get so many questions once people start trying this recipe out, which is wonderful! It means you’re getting into the good stuff. Here are the top things I hear about making sure your fried chicken turns out exactly how you want it—golden, crunchy, and fantastic.
Can I adapt this recipe for Country Fried Chicken instead?
That’s a great question, because Country Fried Chicken is delicious, but it’s a completely different beast compared to what we’re making here! Our recipe is for classic, deep-fried, extra-crispy poultry that stands tall. Country Fried Chicken (or Chicken Fried Steak, which is often done similarly) is usually made by lightly dredging thinner cutlets and then pan-frying them quickly in just a bit of oil or rendered fat. Then, that entire plate gets smothered in thick, creamy gravy. You absolutely could adapt the flavorings here, but for this crispiness and technique, you need to stick to deep frying!
What is the best oil to use for deep fried chicken?
When you’re committing to Deep Fried Chicken, the oil choice is super important, mostly because we need a very high smoke point so the oil doesn’t break down while we’re frying at 325°F. I usually reach for peanut oil because it has a high smoke point and a very neutral flavor, so it doesn’t fight with our savory spices. Vegetable oil works just beautifully, too, and it’s often easier to find in large quantities. Avoid using olive oil or butter unless you want a very short fry time and a strong flavor profile. For a big batch of Fried Chicken, peanut or vegetable oil is the way to go to maintain that perfect crust!
How long does the buttermilk brine need to sit for the best results?
If you want that Juicy and Crispy Chicken texture, you need patience! The minimum time I’ll let the chicken soak is four hours. That gives the buttermilk enough time to work on the meat fibers. However, if you can let it go overnight—I’m talking 12 to 24 hours—you will notice a genuinely superior level of tenderness. Overnight brining is my secret pleasure; just make sure that bowl is tightly covered in the fridge!
Can I bake this fried chicken to make it healthier?
You certainly *can* use an oven or an air fryer! People ask this one a lot when they want a lighter version of a Classic Fried Chicken dinner. If you bake it, you won’t get that exact aggressive crunch we achieved with the oil, but you can get close! Make sure you spray that flour coating lavishly with cooking spray or melted butter before putting it in the oven at 400°F. It’ll still be tasty, but in my humble opinion, the texture just isn’t the same as the true Southern style you get from deep frying.
Estimated Nutritional Data for Classic Fried Chicken
Now, I know what you might be thinking after all that talk about crispy coating and indulging in homemade comfort food. Yes, this is certainly a more decadent meal, and we need to be real about what goes into our bodies! We worked hard to make this fried chicken recipe the absolute best it can possibly be in flavor and texture, but that comes with some nutritional considerations.
Please remember, because we are deep frying and using bone-in, skin-on pieces, these numbers are just estimates. If you use thinner chicken pieces or trim some of the skin, your numbers will change a little! This data reflects the recipe as written, which is designed to give you that perfect, Golden Brown Chicken experience. These figures come straight from analyzing the ingredients we used for this recipe.
- Serving Size: 1 piece
- Calories: 450
- Fat: 28g
- Saturated Fat: 7g
- Carbohydrates: 15g
- Protein: 33g
- Sodium: 650mg
- Cholesterol: 110mg
Think of this Classic Fried Chicken as worthy of a celebration meal! Pair it up with some fresh greens, like that coleslaw I mentioned earlier, or maybe some lighter veggies to balance everything out. That’s how we manage those satisfying but rich dinners around here!
Share Your Ultra-Crispy Fried Chicken Experience
Wow, you made it! If you followed along, you now have your hands on the secret to truly phenomenal, southern-style fried chicken. That smell filling your kitchen right now? That’s success, my friend! We put a lot of love into making sure this recipe for Crispy Fried Chicken truly stands out, but the story doesn’t end here—it actually just starts when you share it!
We at Savory Skies—Tariq, Amara, and me—we absolutely love seeing what you create in your own kitchens. Seriously, nothing makes us happier than seeing your beautiful, deeply Golden Brown Chicken creations popping up online. Did you try the double dip? Did the buttermilk work its magic? I want to know!
Please, if you loved this Fried Chicken Recipe, don’t keep the deliciousness a secret! Head over to the comments section below and give this recipe a solid rating—five stars if you think it’s the Best Homemade Fried Chicken you’ve ever made! And if you snap a photo of your perfectly craggy, Juicy and Crispy Chicken, tag us on social media. We love cheering you on and seeing how you serve up your ultimate comfort food.
Keep cooking with curiosity, keep loving your food, and I truly hope this Savory Chicken Dinner becomes a staple at your table for years to come. Happy crunching!
PrintUltra-Crispy Buttermilk Southern Fried Chicken
Learn how to make the best homemade fried chicken that is golden, crunchy, and incredibly juicy inside. This recipe uses a classic buttermilk brine for tender results.
- Prep Time: 20 min
- Cook Time: 30 min
- Total Time: 3 hours 50 min
- Yield: 4 servings
- Category: Dinner
- Method: Deep Frying
- Cuisine: Southern American
- Diet: None
Ingredients
- 4 lbs bone-in, skin-on chicken pieces (thighs and drumsticks work well)
- 4 cups buttermilk
- 2 tablespoons hot sauce
- 2 teaspoons kosher salt
- 1 teaspoon black pepper
- 3 cups all-purpose flour
- 1/2 cup cornstarch
- 1 tablespoon paprika
- 1 tablespoon garlic powder
- 1 tablespoon onion powder
- 1 teaspoon cayenne pepper (optional, for a kick)
- Vegetable oil or peanut oil, for frying (enough to cover chicken by 1 inch)
Instructions
- In a large bowl, combine the buttermilk, hot sauce, 2 teaspoons of salt, and 1 teaspoon of pepper. Add the chicken pieces, ensuring they are fully submerged. Cover the bowl and refrigerate for at least 4 hours, or preferably overnight, for the best juicy results.
- In a separate wide, shallow dish, whisk together the flour, cornstarch, paprika, garlic powder, onion powder, and cayenne pepper (if using). This is your dredge mixture for the crunchy coating.
- Remove the chicken from the buttermilk, letting the excess drip off slightly. Do not wipe the chicken dry.
- Working with one piece at a time, dredge the chicken thoroughly in the flour mixture, pressing the flour firmly onto the chicken to create a thick, craggy coating. Place the coated pieces on a wire rack set over a baking sheet. Let the chicken rest for 15 minutes; this helps the coating adhere during frying.
- Pour enough oil into a heavy-bottomed pot or Dutch oven to reach about 1 to 1.5 inches deep. Heat the oil over medium-high heat until it reaches 325°F (160°C). Use a thermometer to monitor the temperature closely.
- Carefully place 3 to 4 pieces of chicken into the hot oil, ensuring you do not overcrowd the pot, which lowers the oil temperature. Fry the chicken in batches.
- Fry the chicken for about 6 to 8 minutes per side, turning carefully with tongs, until the internal temperature reaches 165°F (74°C) and the crust is deep golden brown and ultra-crispy.
- Remove the cooked chicken and place it on a clean wire rack set over a baking sheet to drain excess oil. Do not place it on paper towels, as this can steam the bottom crust and make it soggy.
- Allow the chicken to rest for a few minutes before serving hot.
Notes
- For an extra crunchy coating, consider a double dip: dip the buttermilk-soaked chicken back into the buttermilk briefly, then back into the flour mixture before frying.
- Maintain your oil temperature between 315°F and 330°F (157°C to 165°C) for the best balance of crispy exterior and fully cooked, juicy interior.
- This recipe works well with chicken thighs or drumsticks, which stay juicier than breasts during deep frying.
Nutrition
- Serving Size: 1 piece
- Calories: 450
- Sugar: 1
- Sodium: 650
- Fat: 28
- Saturated Fat: 7
- Unsaturated Fat: 21
- Trans Fat: 0
- Carbohydrates: 15
- Fiber: 1
- Protein: 33
- Cholesterol: 110
