

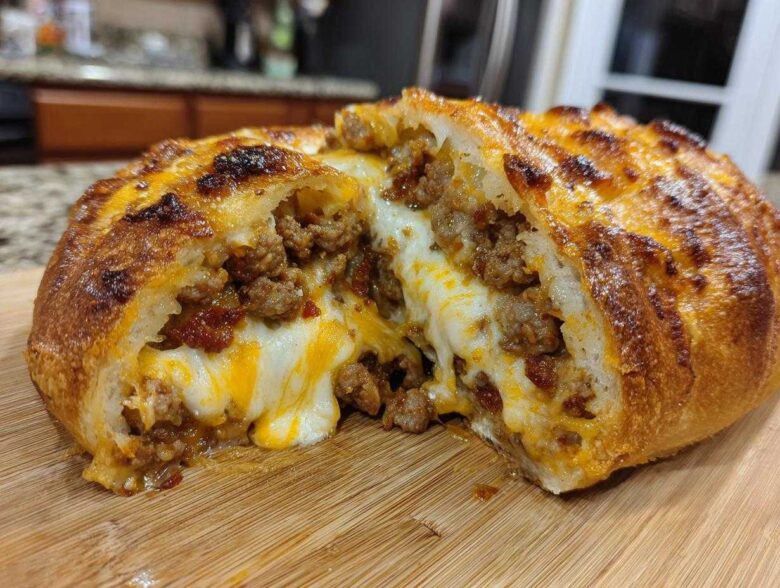
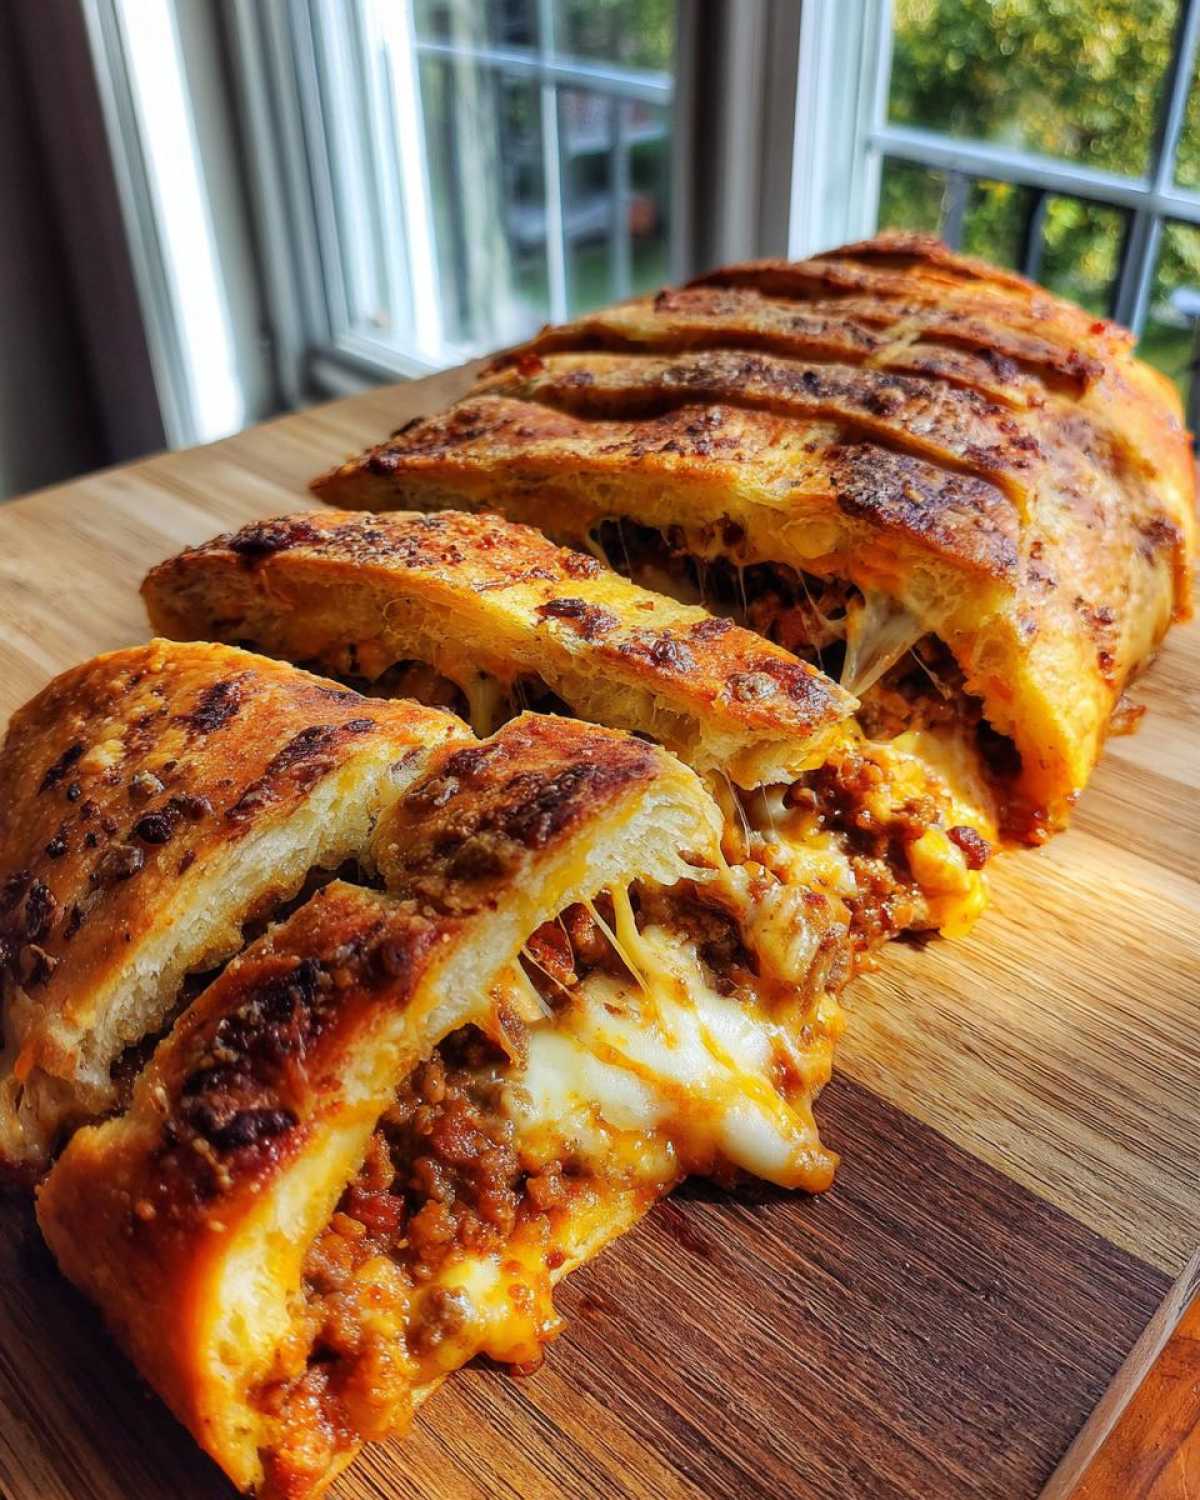
Okay, listen up, because if you think you know comfort food, you haven’t met my legendary garbage bread yet. This isn’t some delicate little pastry; this is a glorious, overstuffed, cheesy mountain of savory goodness wrapped in homemade dough, and I swear it solves at least 80% of the world’s problems. Seriously, back when my brother needed a quick meal after moving into his first tiny apartment, this was the first thing I brought over. It’s the ultimate indulgence because you throw everything good—beef, bacon, tons of cheese—right into the middle. Trust me, this garbage bread recipe is the easiest, most crowd-pleasing, hands-down winner you’ll ever bake for game day or just a Tuesday night when you need a hug in food form.
If you want to see the rest of my tips and tricks, you can always check out my main recipe index!
Why This Ultimate Cheesy Ground Beef and Bacon Garbage Bread Works
If you’re looking for the best cheesy bread appetizer out there, this is it, hands down. It’s not just about piling stuff in dough; it’s about the alchemy that happens when you bake it all together. I’ve spent years perfecting this ratio because a good stuffed bread needs to deliver on flavor and structure! This is truly the definition of an ultimate comfort appetizer.
- The hearty status is well-earned—it’s rich, salty, and totally satisfying.
- It’s the perfect, hearty centerpiece for any snacking table or a really satisfying quick dinner idea.
- We treat this recipe like the king of easy game day food because you assemble it in minutes before it hits the oven.
The Perfect Cheesy Bread Appetizer Foundation
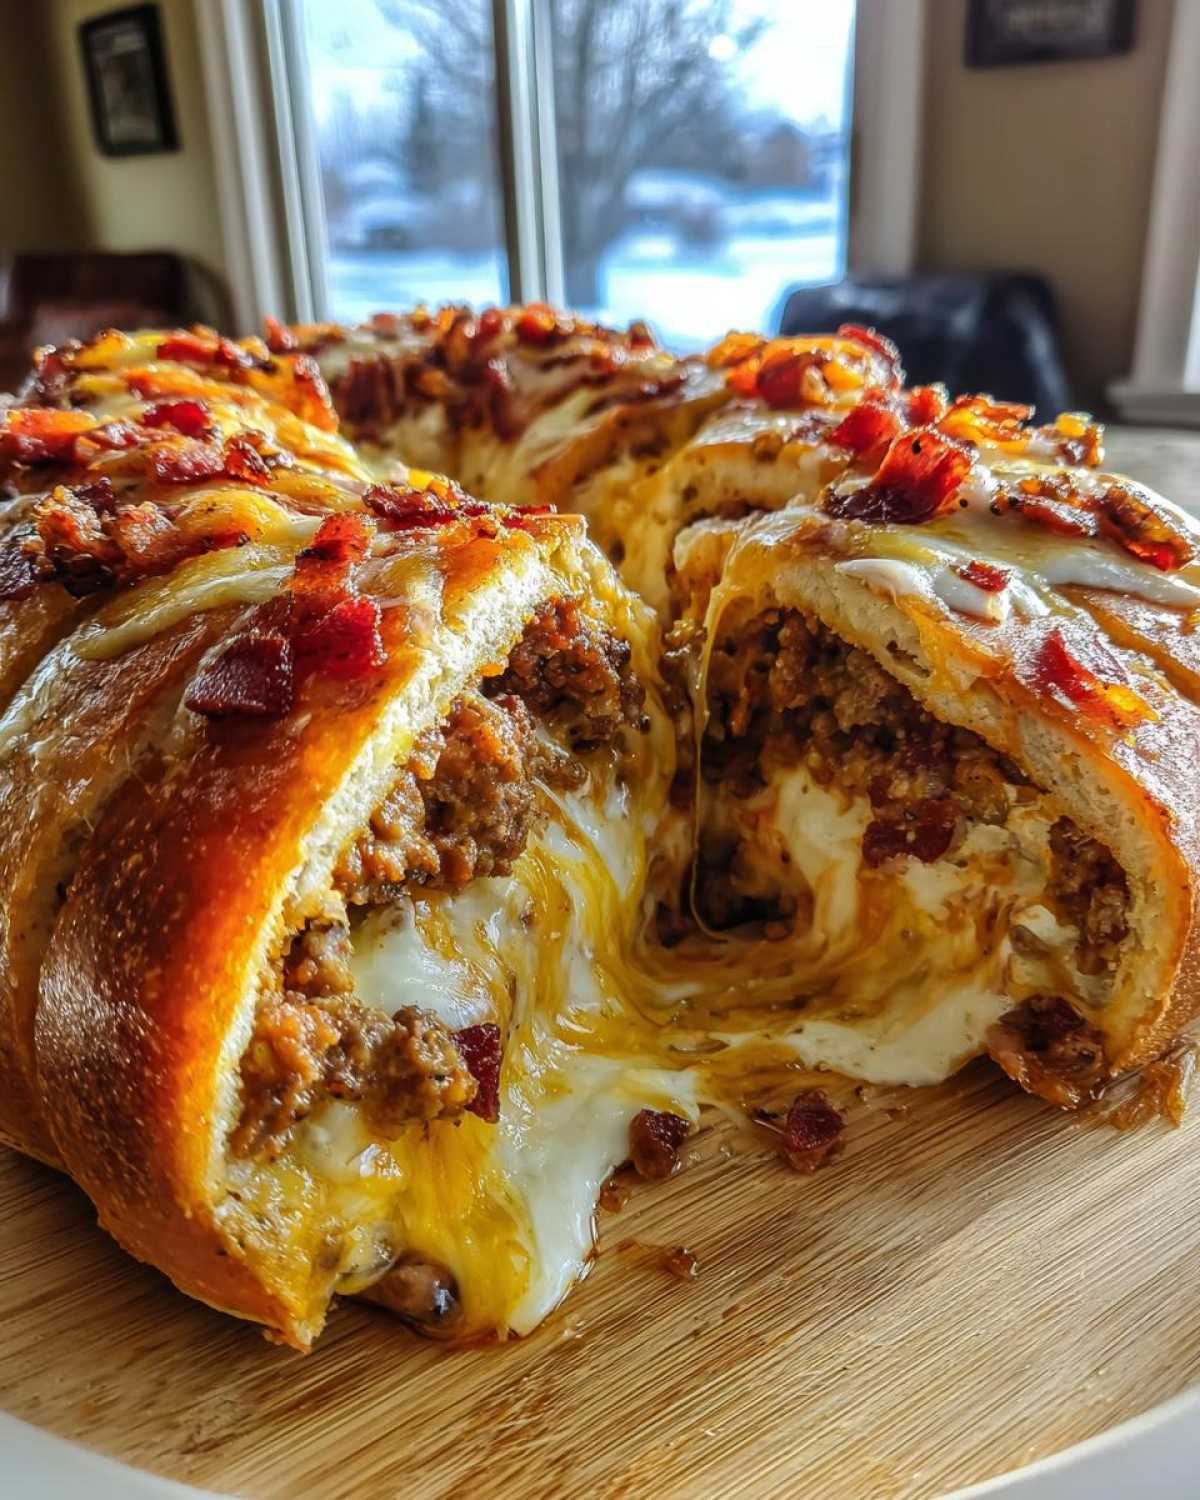
The foundation of why this works so well is the dairy situation. I use three kinds of cheese, but let me tell you, the main structure comes from that beautiful, gooey combination of mozzarella and cheddar. When it melts, it blends perfectly with the salty bacon and the savory beef. It holds everything together so you get that perfect pull when you slice it. It ensures that every bite of this garbage bread is spectacular.
Simple Assembly for Easy Game Day Food
Honestly, the beauty of this recipe is that it uses pre-made dough, which cuts out hours of waiting. You’re basically just mixing the filling and wrapping it up like a beautiful edible present. If you need other super-fast ideas while this is baking, check out my dips; they pair perfectly, like this creamy beer cheese dip! Because it’s so easy, it’s become my go-to when unexpected guests drop by—I always have the dough in the freezer now!
Gathering Ingredients for Your Loaded Savory Bread
Okay, before we get to the fun part—the wrapping!—we need to talk about what goes inside this amazing loaf. Remember, this is your chance to customize, but if you’re making it for the first time, stick close to my list. It’s the perfect mix, trust me! Everything needs to be ready to go before we even think about unrolling that pizza dough. I usually get the meat cooked and cooling while I measure out the cheeses. If you loved my loaded meatloaf casserole, you already know how much flavor we pack into these hearty bakes!
For the dough itself, you’ll need that 13.8-ounce package of refrigerated pizza dough—the kind that comes rolled up in a tube. Don’t try to make your own for this first go; we want the convenience!
For the filling, we’re looking at the star components: the beef, the bacon, and that glorious trio of dairy!
- The Meat Base: You need a full pound of ground beef, which we cook up ourselves, draining off *all* that extra grease—we want savory flavor, not an oil slick! Then comes the half-cup of cooked, crumbled bacon.
- The Seasoning: Keep it simple but potent: onion powder, garlic powder, salt, and pepper. These wake up the beef beautifully.
- The Melt: This is where it gets serious! We’re using a cup each of mozzarella and cheddar, plus a half-cup of Monterey Jack for that extra stretch and unique flavor blend.
- The Moisture Secret: Don’t forget the quarter cup of sour cream. This is the little helper that binds all that cheese and meat together so it doesn’t just fall out when you slice it.
And finally, for the crust that seals the deal, you’ll need one large egg beaten with a tablespoon of water for the wash, plus a tiny bit of olive oil for cooking the meat!
Ingredient Notes and Substitutions for Perfect Garbage Bread
As I said, this recipe is super flexible, which is part of why it earned its fun name! If you have leftovers from chili night, maybe try using that instead of browning plain beef? That’s an advanced move, though!
The most important note is about the meat. If you aren’t a fan of beef, the recipe notes mention you can use ground sausage—oh boy, that spices up the flavor wonderfully! Or, if you have some leftover shredded cooked chicken from a rotisserie bird, that works great too. Just make sure whatever meat you use is fully cooked and drained before it meets the cheese. And hey, if you don’t have Monterey Jack? Just use an extra half cup of cheddar. Nobody’s going to send it back; this is garbage bread, not brain surgery!
Step-by-Step Instructions to Make Garbage Bread
Alright, time to put on my apron! Following the steps for this garbage bread is super straightforward, which is great because we want to get it in the oven fast. Always, always preheat your oven first—375 degrees Fahrenheit is the magic number here. And a little pro tip I learned the hard way: line your baking sheet with parchment paper. It makes cleanup a breeze, and trust me, you don’t want this cheesy mess sticking when you try to slide it off.
If you’re looking for the dough recipe if you want to make it completely from scratch someday, you can check out my tips on making pizza dough from scratch, but today we are keeping it speedy!
Preparing the Filling for Your Ground Beef Bread Bake
First things first, we need that savory base. Get your pound of ground beef sizzling in a skillet over medium heat. You’re cooking it until it’s nice and browned! Once it’s done, you have to drain off all that grease. I mean, really drain it off. We want flavor, not soup!
Once drained, pull it right off the heat and mix in the seasonings: the onion powder, garlic powder, salt, and pepper. Taste a tiny bit (when it’s cool enough!) to make sure it’s seasoned well for your liking. This is the flavor center of our entire garbage bread!
Now for the binding magic. In a separate bowl, you’re going to combine all those beautiful cheeses—mozzarella, cheddar, and Monterey Jack—with the sour cream. Don’t just stir it lightly! You need to mix this until it’s totally combined and creamy. The sour cream really helps hug the meat so it doesn’t sneak out the sides later.
- Add the seasoned beef and the crumbled bacon right into that creamy cheese mixture.
- Stir everything together until it looks completely uniform. Seriously, I mix until I can’t see any plain bits of beef hanging out—it should all look incorporated.
Assembling and Sealing the Ultimate Garbage Bread Loaf
This is where the structure comes in, and yes, sealing it right is critical advice for success. Grab your pizza dough and unroll it onto a floured surface. If it’s fighting you and rolling up too thick, just gently coax it with your rolling pin until you have a rough rectangle shape, say about 12 by 16 inches. Don’t stress about perfection; this is a rustic bake!
Next, you’re spooning that heavy meat and cheese filling right down the center third of the dough. Make sure you leave a good one-inch border clean around all the edges. That border is essential for sealing!
To seal it like a pro, you’re going to fold one long side over the filling to meet the other long side, overlapping them slightly right in the middle. Pinch those seams together really firmly! Then, pinch the ends closed even more firmly. If you skip this, you will end up with leakage, and trust me, scraping baked cheese off your oven floor is not fun.
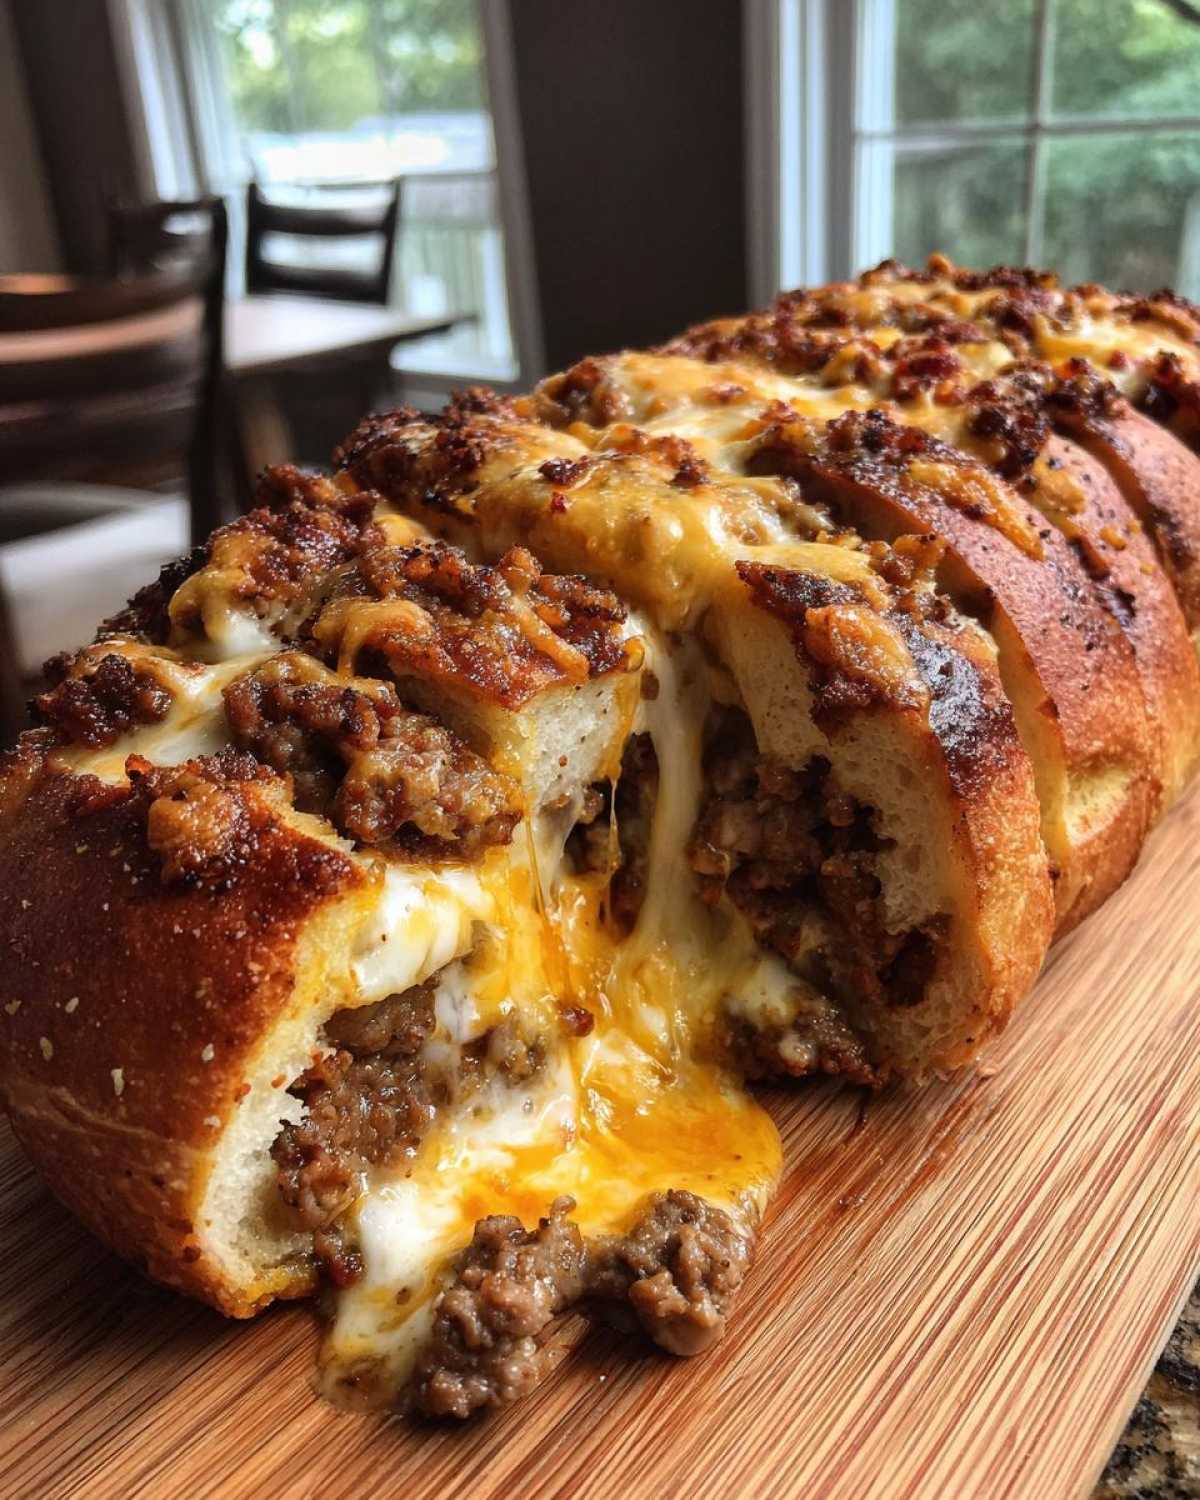
Carefully move your sealed loaf onto that parchment-lined baking sheet. It should look like a giant, fat sausage ready for its hot bath.
Baking and Finishing the Hearty Savory Bake
Almost done! Before it goes into the heat, we have to give it its golden shine. Whisk together that one beaten egg and the water—that’s your egg wash! Brush this mixture generously over the entire surface of the loaf. It creates that beautiful, shiny, golden-brown crust we want on our hearty savory bake.
Pop it into your 375°F oven and let it bake for about 25 to 30 minutes. You’ll know it’s done because the crust will be deeply golden, and if you can peek, you’ll see the cheese bubbling happily inside.
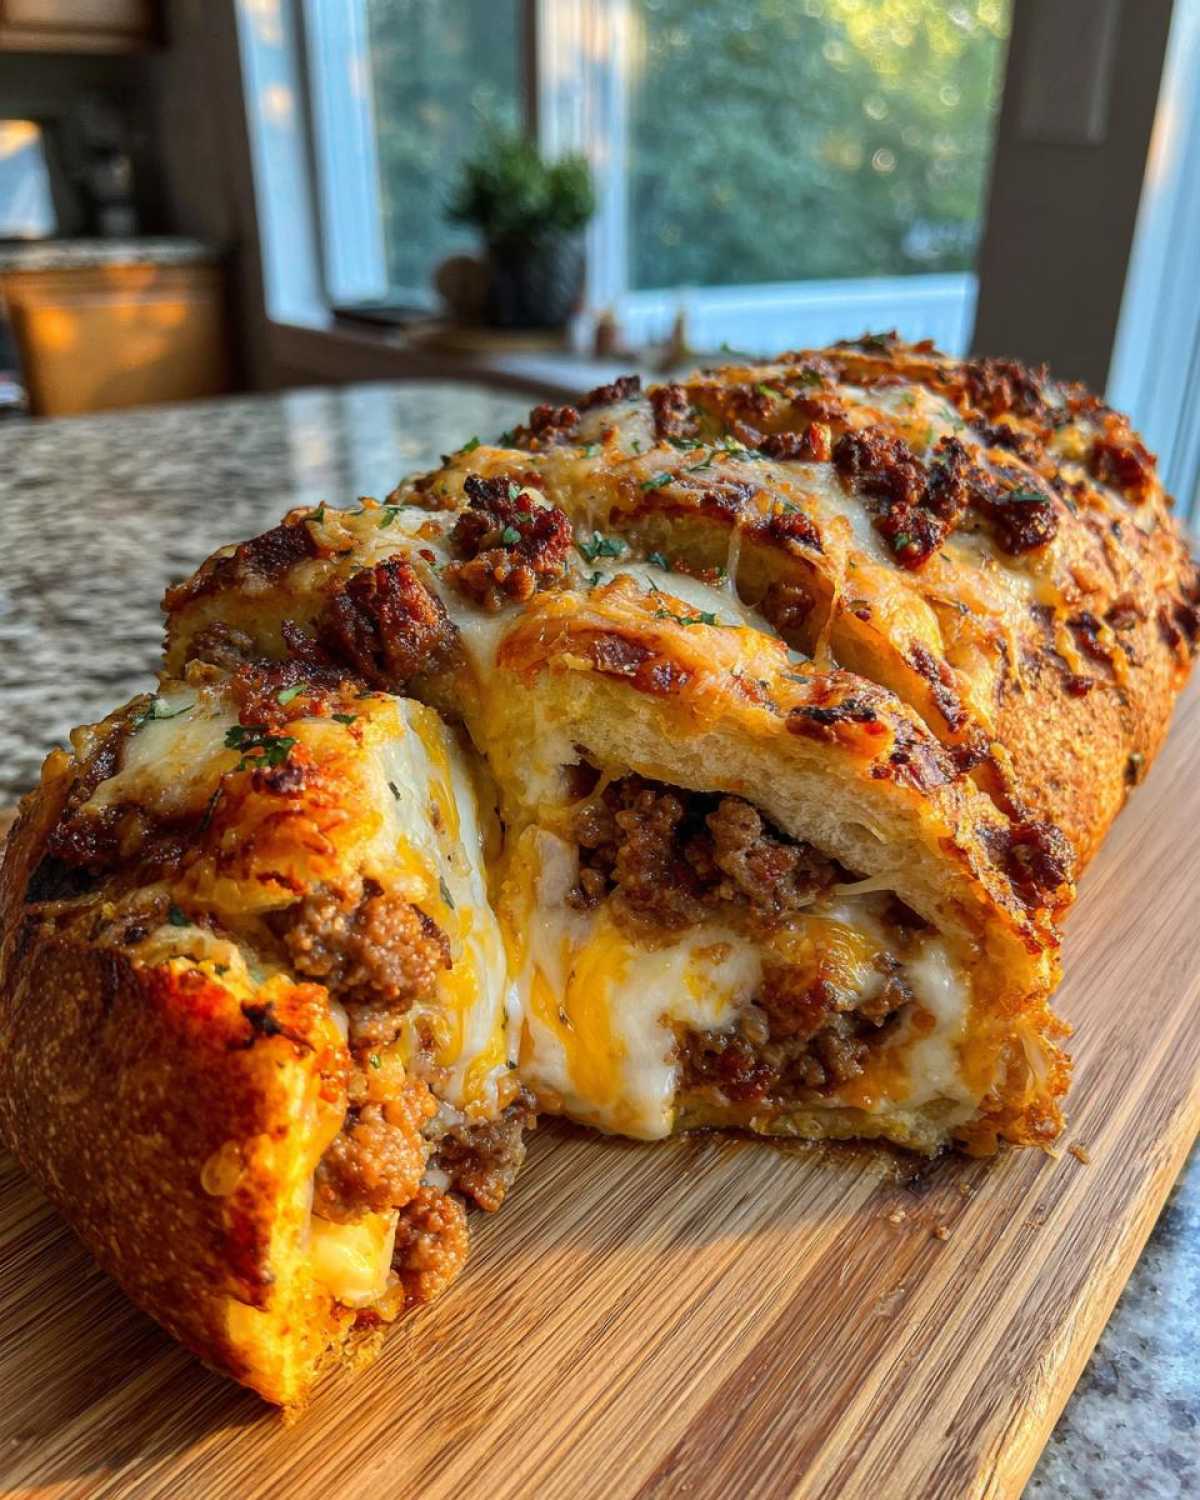
The absolute hardest part? Walking away! Let the loaf rest on that baking sheet for a full five minutes after it comes out. If you try to slice it straight away, all that glorious, molten cheese filling is going to run everywhere. Just a quick rest, then slice it up thick, and dig in!
Tips for Success When Making Customizable Bread Recipe
We’ve got the main instructions down, but if you want this garbage bread to go from great to absolutely legendary, you need a few extra tricks up your sleeve. These aren’t things Grandma wrote down, but they are the little adjustments I’ve picked up making this recipe dozens of times into a perfect homemade stuffed loaf. It’s all about presentation and making sure nothing precious escapes! These tips will help you nail the texture and make it the star of any appetizer spread.
Achieving a Golden, Crisp Crust on Your Garbage Bread
That egg wash we brushed on? It’s super important, but you need to be thorough! I cannot stress this enough: check every single seam, every pinch point, and especially those end caps you sealed up. If you miss even a tiny spot where the dough meets the dough, the steam inside will find that weak spot and try to push the filling out right there. I always go back for a second, light layer right over the seams just before it goes into the oven. That little bit of extra egg ensures a beautiful, even, golden-brown crust that seals in all that beef and cheese.
Slicing Technique for Perfect Party Pull Apart Bread Portions
I know you’re hungry, and the smell right out of the oven is intoxicating, but patience is key here to get those picture-perfect slices. Remember how I mentioned resting it for five minutes? That time allows the molten cheese inside to relax and coagulate just a tiny bit. If you cut into it instantly, you get that run-out mess we talked about. For the best party pull apart bread slices, let it sit, and then use a serrated knife—slicing bread always works better with a gentle sawing motion rather than pressing straight down!
Also, if you want it *really* easy for party guests, try this: Before you put that egg wash on, take a sharp knife and gently score the top of the loaf into even serving squares, maybe 8 or 10 sections. Don’t cut all the way through to the filling, just score the top crust. This guides you perfectly when slicing later, and it makes those pulls even easier for grabbing!
Storage and Reheating Instructions for Leftover Garbage Bread
Now, I hope you have amazing self-control because this amazing garbage bread is so rich, you might end up with leftovers—even if you swore you wouldn’t! Don’t panic if you do; this bake holds up surprisingly well, which is fantastic for quick lunches the next day. The key is wrapping it correctly so it doesn’t dry out while chilling in the fridge. We worked hard for that cheesy, meaty filing, and we need to protect it!
For refrigeration, it’s simple: just let the loaf cool down completely to room temperature first. Once it’s cooled, wrap it up tightly. I use plastic wrap, followed by a layer of aluminum foil. That double layer traps any remaining moisture. You can keep it this way in the fridge for about three, maybe four days tops. Don’t leave it sitting out, though; what’s inside is too much of a party for bacteria!
But listen, if you made this for a huge party—and I know you did—you need to freeze some! My freezer notes say this is a rockstar freezer meal. Once it’s totally cooled, wrap it extra tight—I suggest heavy-duty foil for freezing—and toss it in the deep freeze for up to three months. Seriously, it freezes beautifully.
Reheating Your Hearty Savory Bake
Reheating is where you bring the magic back! Microwave? Absolutely not. You will end up with soggy bread and weirdly textured cheese, and we can’t have that on our watch. We want that crust crispy again, remember?
If you’re reheating a slice or two from the fridge, wrap the slice loosely in foil and pop it into a 350-degree oven for about 10 minutes until it’s hot all the way through. If you’re reheating a big chunk or the whole frozen loaf, you need more love.
For the frozen batch, thaw it in the fridge overnight first—that makes the reheating much more even. Then, wrap that thawed loaf loosely in foil and bake it at 350 degrees Fahrenheit until it’s piping hot internally. That usually takes around 25 to 35 minutes depending on how thick you made it. It tastes almost as fresh as when it first came out of the oven! This method keeps the interior wonderfully moist while crisping up that golden crust you earned making the beef and cheese bake.
Serving Suggestions for This Comfort Food Bread
Okay, so you’ve got this gigantic, cheesy, savory hunk of perfection sitting on the counter, and you’re wondering what on earth you serve alongside it. Remember, this garbage bread is super rich because we packed it with ground beef, bacon, and three kinds of cheese. Because it’s so hearty, you actually don’t need much else, but a little balance never hurt anyone!
I always suggest something bright, acidic, or lighthearted to cut through that richness. It makes the whole meal feel less heavy, even though the main event is pure indulgence! If you need a super satisfying side dish that isn’t another heavy bake, you might check out some of my pasta dishes, like this creamy garlic mushroom pasta—which you can totally make vegetarian if you’re trying to balance out all the meat in the bread!
Light & Bright Salads to Pair With It
A sharp, vinegary salad is heaven next to a slice of warm comfort food bread. Don’t bother making anything fussy! A simple arugula salad with shaved Parmesan, lemon juice, and just a drizzle of olive oil is stunning. The tanginess of the lemon cuts right through the fat from the beef and cheese.
Another winner is a classic chopped tomato and cucumber salad, maybe tossed with a little red wine vinegar and fresh dill. It offers a cool, refreshing crunch that contrasts perfectly with the warm, soft interior of the loaf. Keep it simple; the bread is doing all the heavy lifting flavor-wise in this pairing!
Dipping Sauces That Take It Over the Top
While you definitely don’t *need* a dip because the inside is so fully loaded, who are we kidding? We’re making garbage bread; we want dips! Marinara sauce is a classic choice if you treat it like a giant calzone, but I have a couple of sneaky favorites that work wonders.
First, if you have leftover sour cream (which you probably do from the filling mixer!), thin it just slightly with a tiny splash of milk, add some dried ranch seasoning, and boom—instant, cool ranch dip. It’s so good with the savory beef and bacon.
Alternatively, if you are feeling ambitious, a simple smoky chipotle aioli is amazing. Just mix mayo, a little lime juice, some adobo sauce from a can of chipotles, and a pinch of salt. It gives a little unexpected kick that makes grabbing another slice irresistible!
Frequently Asked Questions About Making Garbage Bread
I know you guys are going to be trying this loaded savory bread recipe right away, and that’s fantastic! Baking questions always come up, especially when you’re dealing with a recipe this indulgent. I tried to keep the steps super clear, but people always ask about getting the cheese right or how to make it even better for a crowd. Here are some of the questions I get most often about this incredible stuffed bread recipe!
Can I use different types of cheese in this stuffed bread recipe?
Oh, absolutely! This is where the ‘garbage’ part really comes into play; it’s all about using what you have, or what you love! If you don’t have Monterey Jack hanging around, just grab an extra cup of cheddar or mozzarella. The main goal is to have good melting cheeses, so things like Pepper Jack, Colby, or even Provolone work beautifully in the mix. Just remember, the more different kinds of cheese you use, the more complex and delicious your final best cheesy bread will be. Don’t shy away from experimentation!
What is the best way to turn this into a party pull apart bread?
That’s a brilliant approach for a crowd! If you want it to be truly easy pull-apart style, you don’t need to change the filling or the dough rolling much. Once you have your loaf sealed onto the parchment-lined pan and brushed with the egg wash, take a sharp knife and score the top crust deeply—not all the way through to the filling, but deep enough so the crust separates easily after baking. Score it into the number of pieces you want to serve, maybe 4 across and 3 down for 12 portions. Once it’s baked and rested, those cuts will be your guide, and people can just tear off perfect little squares! It’s ideal for serving at parties where people are walking around.
Can I make this garbage bread vegetarian?
You totally can, and it’s a great way to keep this recipe handy even if you have vegetarians in the group! You just need to scratch the ground beef and the bacon, obviously. For that hearty, umami flavor that the meat usually brings, I suggest sautéing a cup of finely chopped mushrooms—cremini or button work great—and maybe a cup of finely diced, pre-cooked lentils or black beans. Sauté the mushrooms until they release all their water and start to brown a little bit. Then, mix those cooked veggies right in with the cheeses, sour cream, and seasonings. You might want to add an extra teaspoon of garlic powder or a tiny bit of vegetarian Worcestershire sauce to boost the savory depth back up. It works just as well, giving you a fantastic veggie-loaded option!
If you are looking for other fast mains that are also easy to prep, check out some of my quick dinner bread ideas for more simple, satisfying meals!
Nutritional Estimates for This Beef and Cheese Bake
Now, I always like to throw this in just so you know what you’re getting into when you make this absolutely delicious beef and cheese bake. Remember, these numbers are just estimates, so they can change depending on your exact brand of pizza dough or how much fat you drain off the beef! Don’t take these figures as gospel, but they give you a good idea of how hearty this snack really is. I swear by them, but I always remind folks that baking is more about love than calculus!
We based these figures on dividing the entire recipe into 8 generous servings, which is how I usually cut it for game day appetizers. If you cut it smaller for a party spread, the numbers per slice will drop accordingly. If you want to read about how I handle data privacy while you’re here, you can check out my privacy policy!
Here’s a general breakdown of what you’ll find in one satisfying slice of this garbage bread:
- Calories: Around 450 per slice. See? It’s a meal disguised as an appetizer!
- Fat: About 28 grams total. That’s where all the flavor from the cheese and bacon lives, folks!
- Saturated Fat: Roughly 12 grams.
- Carbohydrates: About 25 grams, mostly coming from that yummy pizza dough.
- Protein: A huge 24 grams! That beef and cheese combo really packs a punch, making this a genuinely hearty snack.
- Sodium: It does clock in around 750mg—that’s the price we pay for bacon and cheese, right?
- Sugar and Fiber: Both are surprisingly low, coming in around 3 grams of sugar and just 1 gram of fiber per serving.
It’s definitely rich, but when you consider this replaces ordering pizza on game day, I think this homemade version wins every time!
Share Your Ultimate Comfort Appetizer Experience
Whew! Now that you have the secrets to making the most ridiculously delicious, over-the-top garbage bread known to humanity, I want to see what you created! This recipe is amazing on its own, but honestly, the best part of blogging is seeing all the fun twists you all come up with.
Did you sneak in some smoked Gouda because you had some leftover? Did you swap sausage for the ground beef? Did you use leftover taco meat? Tell me everything in the comments below!
Seriously, please leave a rating if you tried it out! It helps other hungry folks decide to conquer this amazing comfort food bread. Five stars lets me know I got the cheese-to-meat ratio just right.
And for heaven’s sake, snap a picture! Slathered in sauce or sitting proudly on a platter by itself, I love seeing your bakes. Tag me online so I can marvel at your handiwork. If you ever need to get in touch with me about substitutions, issues, or just to brag about how fast you ate the whole thing, you can always head over to my contact page!
Happy baking, and may your next batch of garbage bread be perfectly cheesy and completely devoured!
PrintUltimate Cheesy Ground Beef and Bacon Garbage Bread
Make this easy, loaded stuffed bread filled with seasoned ground beef, bacon, and three kinds of cheese. It is perfect for game days or a hearty family meal.
- Prep Time: 15 min
- Cook Time: 30 min
- Total Time: 45 min
- Yield: 8 servings
- Category: Appetizer
- Method: Baking
- Cuisine: American
- Diet: Meat
Ingredients
- 1 (13.8 ounce) package refrigerated pizza dough
- 1 tablespoon olive oil
- 1 pound ground beef
- 1 teaspoon onion powder
- 1 teaspoon garlic powder
- 1/2 teaspoon salt
- 1/4 teaspoon black pepper
- 1/2 cup cooked, crumbled bacon
- 1 cup shredded mozzarella cheese
- 1 cup shredded cheddar cheese
- 1/2 cup shredded Monterey Jack cheese
- 1/4 cup sour cream
- 1 large egg, beaten
- 1 tablespoon water
Instructions
- Preheat your oven to 375 degrees Fahrenheit. Line a baking sheet with parchment paper.
- Brown the ground beef in a skillet over medium heat. Drain off any excess grease.
- Stir the onion powder, garlic powder, salt, and pepper into the cooked beef. Remove from heat.
- In a bowl, combine the seasoned beef, crumbled bacon, mozzarella cheese, cheddar cheese, Monterey Jack cheese, and sour cream. Mix well until everything is evenly distributed.
- Unroll the pizza dough onto a lightly floured surface. If the dough is too thick, roll it slightly thinner into a rough rectangle shape, about 12 by 16 inches.
- Spoon the meat and cheese mixture down the center third of the dough, leaving a 1-inch border on all sides.
- Fold the long sides of the dough over the filling, overlapping them slightly in the center to seal the bread. Pinch the ends closed firmly to prevent the filling from escaping.
- Carefully transfer the sealed loaf onto the prepared baking sheet.
- In a small bowl, whisk together the beaten egg and water to create an egg wash. Brush the entire surface of the bread with the egg wash.
- Bake for 25 to 30 minutes, or until the crust is golden brown and the cheese is melted and bubbly inside.
- Let the bread cool on the baking sheet for 5 minutes before slicing and serving.
Notes
- You can substitute the ground beef with ground sausage or shredded cooked chicken for variety.
- For extra flavor, brush the top with melted garlic butter before baking instead of the egg wash.
- This bread freezes well; cool completely, wrap tightly, and freeze for up to three months. Thaw overnight and reheat at 350 degrees Fahrenheit until warm.
Nutrition
- Serving Size: 1 slice
- Calories: 450
- Sugar: 3
- Sodium: 750
- Fat: 28
- Saturated Fat: 12
- Unsaturated Fat: 16
- Trans Fat: 0.5
- Carbohydrates: 25
- Fiber: 1
- Protein: 24
- Cholesterol: 85
