

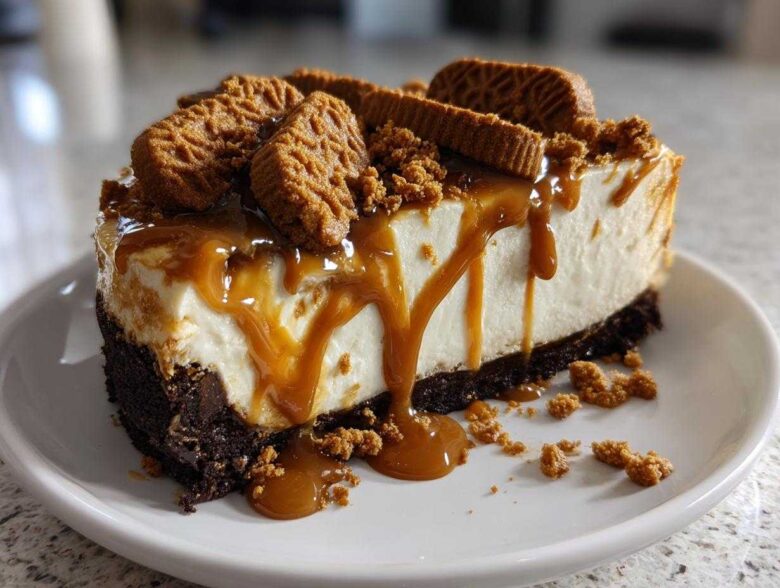
Listen, if you haven’t jumped on the cookie butter trend yet, you are seriously missing out! That caramelized, slightly spiced flavor is just addictive, and I swear, my obsession started the minute I figured out how to turn it into a stunning dessert. Forget waiting around for your oven to preheat; this **Biscoff Cheesecake** recipe is the absolute easiest, creamiest, no-bake dream you can whip up this weekend.
I’m not kidding, this stuff is my go-to when I need an impressive **Lotus Biscoff Dessert** with minimal effort. The secret is in the simplicity—we skip the bake time but keep that signature velvety smooth texture. Trust me, once you master this, you’ll be making it for every potluck. It’s just so rich!
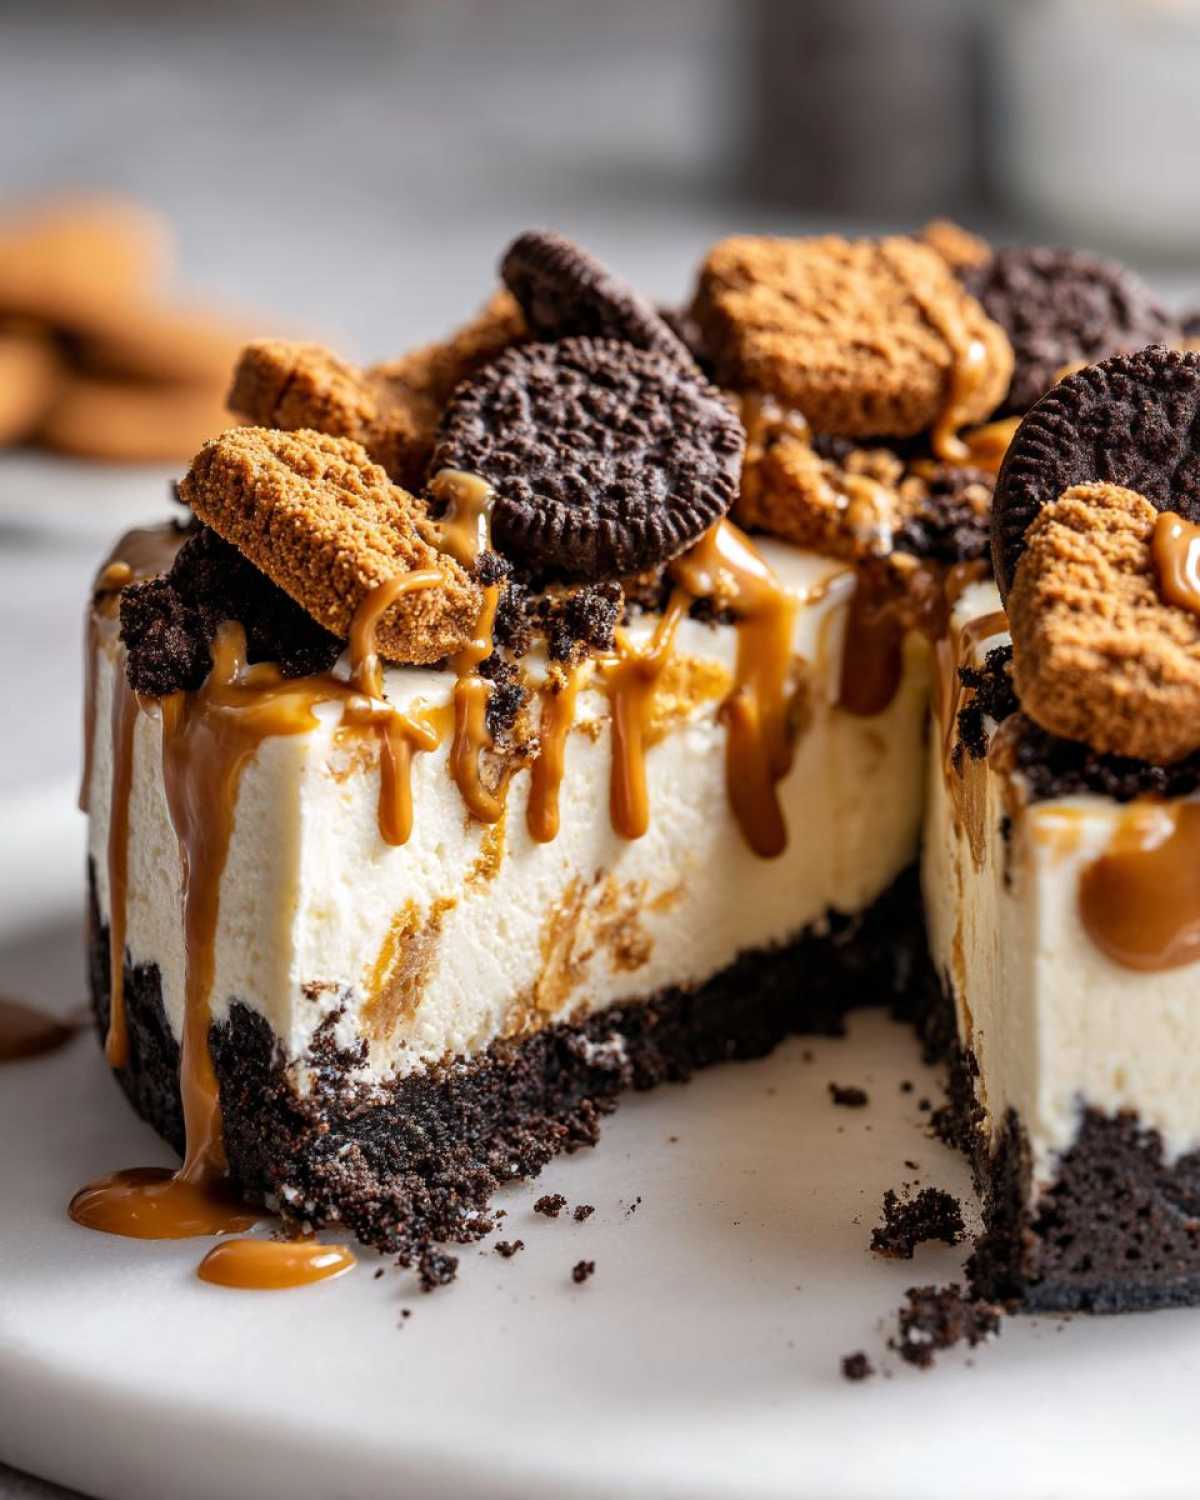
Why This No Bake Biscoff Cheesecake Recipe Works So Well
I love baking, but sometimes you just don’t want to deal with a water bath or worrying about cracks! That’s why this no-bake version is my absolute favorite way to use cookie butter. It delivers all the intense flavor without any of the oven drama. It’s just simple, delicious perfection every single time. If you want more simple recipes like this, check out my main recipe archive!
- The texture is unbelievably light yet decadent, which is tough for a chilled dessert.
- It saves so much time since there’s zero baking involved—it’s perfect for busy weeknights.
- It sets up beautifully in the fridge, making it super sturdy for slicing!
Achieving the Perfect Creamy Cheesecake Recipe Texture
The magic here is definitely the folding of the whipped cream. We whip the heavy cream separately until it gets those stiff peaks, and then we gently fold it into the cream cheese base. This step incorporates air without deflating it, which means no lumps, ever! It’s what gives you those gorgeous, smooth layers when you slice into it. It’s so much easier than trying to get a baked cheesecake just right.
Making the Best Biscoff Cheesecake Crust
You simply can’t have a great dessert without a phenomenal base, right? This **Biscoff Cheesecake** relies on a crust made purely of those glorious crushed cookies and butter. It bakes up perfectly crunchy, and chilling it ensures it holds its shape when you cut it. This buttery, crunchy layer is the ideal counterpoint to the soft, spiced filling.
Ingredients for Your Easy Biscoff Cheesecake
This is where we pull everything together, and honestly, the list is pretty short because most of the flavor comes right from that magical jar of cookie butter! I always make sure my ingredients are ready before I even start mixing, especially since this is a no-bake recipe and things move fast once you get going. If you are looking ahead to other easy recipes, you might want to check out my guide on an Easy Eclair Cake!
Here is what you need for a perfect 9-inch cheesecake that serves about ten people:
- 1 1/2 cups crushed Lotus Biscoff cookies (save some for crunch!)
- 6 tablespoons unsalted butter, melted smooth
- 16 ounces cream cheese, softened completely—this is important!
- 1 cup powdered sugar, sifted if you have time
- 1 teaspoon vanilla extract
- 1 cup heavy whipping cream, gotta be cold straight from the fridge
- 1/2 cup Biscoff cookie butter (the spreadable stuff)
- 1/4 cup Biscoff cookie butter, melted just slightly for the final drizzle
- Extra Biscoff cookies, whole or crushed, for that picture-perfect garnish
Ingredient Notes and Substitutions for Biscoff Cheesecake
Okay, about the cookie butter—you absolutely need the real stuff, Lotus Biscoff, if you can find it. It has a unique spice blend different from generic cookie butter brands, and that difference matters for the flavor profile here. If you only find it hard in the jar, try microwaving a small scoop for about 15 seconds until it’s runny enough to mix, but don’t let it get hot!
For the cream cheese, please, please take it out early. Cold cream cheese means lumps, and lumps are the enemy of a smooth dessert. If you forgot, you can microwave it on 20% power for about 15-second bursts, turning it often, until it feels pliable. That heavy whipping cream must be ice cold; if it’s even slightly warm, you won’t get those beautiful stiff peaks we need for structure.
How to Make Biscoff Cheesecake: Step-by-Step Instructions
I promise you, putting this together is a breeze! Once you get the crust done, the rest is just mixing and chilling. It’s the ideal weekend baking project because most of the time is just waiting for it to set up perfectly in the fridge. If you want to see more of my favorite simple recipes, you can always hop over to my main baking page!
Preparing the Biscoff Cheesecake Crust Base
First up is the crust, which is where all the yummy crunch comes from! You just take your crushed Lotus Biscoff cookies and mix them really well with that 6 tablespoons of melted butter. Make sure every little crumb is coated—don’t leave any dry bits behind. Then, press that buttery mixture firmly into the bottom of your 9-inch springform pan. I use the bottom of a measuring cup to pack it down tight so it doesn’t crumble when slicing later. Pop that pan into the fridge for 20 minutes while you work on the filling.
Assembling the Rich and Creamy Cheesecake Filling
Now for the best part—the filling! Grab your softened cream cheese, and beat it until it looks absolutely smooth. No lumps allowed! Next, slowly introduce the powdered sugar and vanilla. Once that’s blended, grab your cold heavy whipping cream, and beat *that* in a separate bowl until you have nice stiff peaks; this step is key for that light texture we want in this **Rich and Creamy Cheesecake** recipe. Gently fold the whipped cream into the cream cheese base—and I mean gently! Finally, fold in that half-cup of Biscoff cookie butter until everything is one beautiful, silky color.
Chilling and Garnishing Your Biscoff Cheesecake
Pour that lovely filling right over your chilled crust and smooth the top out nice and flat with the back of a spoon or a spatula. This is where patience comes in, my friends. You need to chill this **Biscoff Cheesecake** for at least 6 hours, but honestly, overnight is always better for the absolute firmest set. Once it’s completely firm, warm up that last bit of cookie butter just briefly so it drizzles easily. Drizzle it artistic-style all over the top, and then shower it with a few extra crushed or whole Biscoff cookies for garnish. Look at you go!
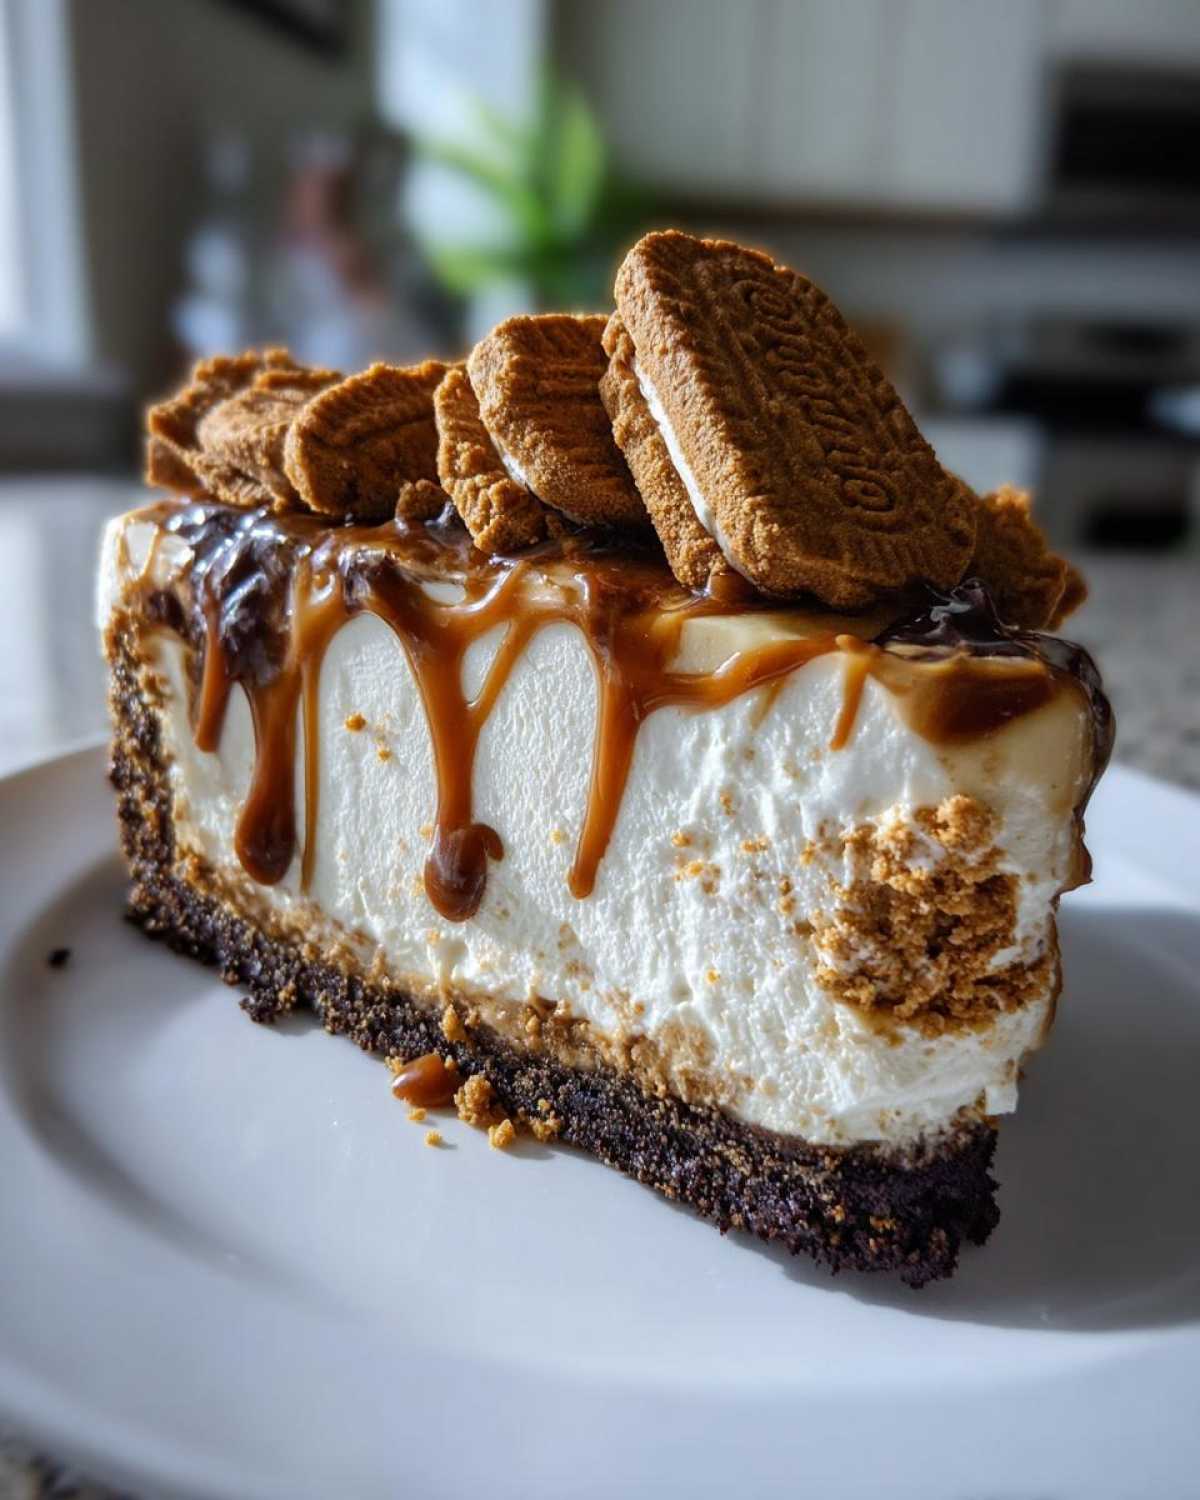
Tips for the Ultimate No Bake Biscoff Cheesecake
I’ve made this recipe enough times—I mean, for quality control, obviously—that I’ve figured out every little trick to make sure your **Biscoff Cheesecake** is flawless. No lumps, no soggy crust, just pure, creamy indulgence. Take it from me; these little details make all the difference between a good dessert and one everyone asks for the recipe for! If you are battling tricky pastry like pie filling, you might want to check out some of my other tried-and-true methods in my guide to chocolate meringue pie secrets.
The number one thing people struggle with is that crust becoming too soft, especially if you slice it before it’s totally set. You can actually bake the crust! It only takes about 8 minutes at 350°F (175°C), and it gives you this wonderfully crisp, sturdy base that holds up even better under the creamy filling. This is especially great if you plan on leaving the cheesecake out for a little while during a party.
Also, remember what I said about the cream cheese? It has to be softened. If you’re in a rush, you can briefly run your mixing bowl under warm water (don’t let water get in the cheese!) or just use that low-power microwave trick I mentioned. Softened cream cheese beats down the risk of lumps immediately, ensuring that amazing, velvety texture we are aiming for.
If you find your filling isn’t quite set enough after 6 hours, don’t panic! Give it a few more hours. This dessert needs time to really firm up properly in the cooler environment of the fridge. A slightly softer **Biscoff Cheesecake** is still delicious, but letting it chill fully guarantees those perfect, clean slices.
Storage and Reheating Instructions for Biscoff Cheesecake
Because this is a no-bake beauty, the storage is super straightforward, which is another reason I love making it for parties. You absolutely must keep leftovers chilled! The structure relies completely on being cold, so don’t leave this sitting out on the counter for too long, or you’ll end up with a puddle instead of a slice.
Once the cheesecake has fully set, cover it tightly with plastic wrap or aluminum foil. I actually prefer using a cake carrier if I have one handy, just to avoid squishing the delicious cookie drizzle on top. You can keep this covered cheesecake in the refrigerator for up to five days. Yes, five days! It stays surprisingly fresh because the filling is so rich.
Now, you can’t really “reheat” a no-bake cheesecake—you wouldn’t want to, right? It actually tastes better the second day because the flavors have more time to mingle! If you happen to bring a slice out too early and it softens up a bit, just pop it back in the fridge for 30 minutes before serving. That quick chill will bring back all that wonderful firmness and crunch from the crust.
Biscoff Cheesecake Variations and Serving Suggestions
Part of the fun of having a killer base recipe like this **Biscoff Cheesecake** is playing around with it! While I love the classic 9-inch style, there are so many easy ways you can switch this up depending on your mood or what treats you have on hand. It’s so adaptable, which is why it never gets boring.
If you want to dial up the complexity, try boosting the flavor in the filling. A tiny splash of strong brewed coffee or espresso powder added right when you mix in the vanilla deepens the spiced flavor beautifully. It complements the brown sugar notes perfectly! Or, for a fun seasonal twist, add a pinch of pumpkin pie spice along with the cinnamon notes already inherent in the cookie butter.
Don’t forget to check out my other Gourmet Cheesecake Recipes for more inspiration on leveling up your dessert game!
Making Individual No Bake Dessert Ideas
Sometimes I don’t want to commit to a whole 9-inch cake, or maybe I’m having a party where everyone needs their own perfect slice. Making mini versions is the answer! Just line a standard muffin or cupcake tin with liners, use about 2 tablespoons of the crust mixture per cup, and then divide the filling evenly.
They set up super fast, usually only need about 4 hours in the fridge, and they look so dainty and impressive on a platter! These individual portions are fantastic for potlucks because cleanup is a snap. They make beautiful individual **No Bake Dessert Ideas** that disappear way too fast!
Frequently Asked Questions About Making Biscoff Cheesecake
I always get a flood of questions whenever I post this recipe because everyone wants to make sure they get it perfect—and I totally get it! When you find a winner like this **Easy Biscoff Cheesecake**, you want to nail it down. It’s smart to ask ahead of time so you avoid any potential baking disasters. If you’ve got more questions after reading this, feel free to check out my general baking tips over at my blog!
Can I use a graham cracker crust instead of a Biscoff Cheesecake Crust?
Yes, you totally can cheat and use a graham cracker crust if you are in a bind or just prefer that flavor profile! However, I have to warn you, half the magic of the **Biscoff Cheesecake** is that crunchy, spiced cookie crust. If you do substitute, make sure you use about 1 3/4 cups of crumbs and increase the butter slightly, maybe to 7 or 8 tablespoons, because graham crackers soak up butter differently than Biscoff cookies do.
What is the best way to soften cream cheese for this Easy Biscoff Cheesecake?
This is the single most important step for keeping your filling lump-free! Don’t even think about trying to beat in cold cream cheese. The best way, truly, is to leave the 16 ounces sitting on your counter for about two hours before you plan to start. It should be soft enough that if you gently push it with your finger, it gives way immediately without resistance. If you forgot, use that low-and-slow microwave trick: 15 seconds at 20% power, stir, repeat. That gentle heat works wonders!
Another common query I get is about setting time. Since it’s a no-bake recipe, we rely on cold! Don’t try to rush the 6-hour chilling time. If you cut it early, your beautiful filling will collapse when you try to serve it.
Estimated Nutritional Data for Biscoff Cheesecake
Now, I know that when we are whipping up something this delicious, we aren’t exactly doing it for a health kick, but some folks like to keep track! Since this is a homemade **Cookie Butter Cheesecake**, the nutrition is always an estimate based on standard measurements and what’s typically in commercial Biscoff spread.
I always tell people to take these numbers with a grain of salt—literally! They are calculated approximations, not lab-verified data. If you make substitutions, the numbers are definitely going to shift on you. I’m just so focused on the creamy texture and the taste, but here’s a rough look at what one slice is packing, based on ten servings:
| Component | Amount Per Slice |
|---|---|
| Calories | 450 |
| Sugar | 35g |
| Fat | 30g |
| Saturated Fat | 18g |
| Carbohydrates | 40g |
| Protein | 5g |
Remember, this is a dessert! It’s rich in fat and sugar, which is what makes it taste so fantastically indulgent. Enjoy responsibly, my friends!
Share Your Biscoff Cheesecake Creations
Whew! We did it! You totally crushed making this incredible **No Bake Biscoff Cheesecake**, and now it’s chilling beautifully in the fridge. I’m already jealous of the slice you’re going to cut!
But seriously, this is where my favorite part comes in—hearing from you guys! I put my heart and soul into making sure this recipe gave you that perfect, easy, creamy result, and I want to know how it turned out for you. Did you stick to the classic drizzle, or did you get fancy with extra toppings?
Please, please leave a star rating right below in the comments section. If you had any tiny questions or wanted to tweak something, jot them down there—I try to check in often to help fellow bakers out! If you took any gorgeous pictures of your final, amazing dessert, you have to tag me on social media. Seeing your creations really makes my day and keeps me inspired to share more simple dessert recipes like this one!
If you need to get in touch about anything else, you can always send me a direct message through the contact page. Happy eating, everyone!
PrintNo-Bake Biscoff Cheesecake
A simple recipe for a creamy, no-bake cheesecake featuring a crunchy Biscoff cookie crust and a smooth cookie butter filling.
- Prep Time: 25 min
- Cook Time: 0 min
- Total Time: 6 hr 25 min
- Yield: 10 servings
- Category: Dessert
- Method: No Bake
- Cuisine: American
- Diet: Vegetarian
Ingredients
- 1 1/2 cups crushed Lotus Biscoff cookies
- 6 tablespoons unsalted butter, melted
- 16 ounces cream cheese, softened
- 1 cup powdered sugar
- 1 teaspoon vanilla extract
- 1 cup heavy whipping cream, cold
- 1/2 cup Biscoff cookie butter (spread)
- 1/4 cup Biscoff cookie butter, melted for topping
- Extra Biscoff cookies for garnish
Instructions
- Mix the crushed Biscoff cookies with the melted butter until fully combined. Press this mixture firmly into the bottom of a 9-inch springform pan. Chill the crust for 20 minutes.
- In a large bowl, beat the softened cream cheese until smooth. Gradually add the powdered sugar and vanilla extract, mixing until just combined.
- In a separate bowl, whip the cold heavy cream until stiff peaks form. Gently fold the whipped cream into the cream cheese mixture until smooth.
- Fold in 1/2 cup of the Biscoff cookie butter into the cream cheese mixture until evenly distributed.
- Pour the filling over the chilled crust and smooth the top with a spatula.
- Refrigerate the cheesecake for at least 6 hours, or preferably overnight, until firm.
- Before serving, drizzle the top with the remaining 1/4 cup of melted Biscoff cookie butter and garnish with whole or crushed Biscoff cookies.
Notes
- For a firmer crust, you can bake the crust at 350°F (175°C) for 8 minutes before chilling.
- Ensure your cream cheese is fully softened to prevent lumps in the filling.
- If you want a stronger Biscoff flavor, you can fold in 2 tablespoons of cookie butter directly into the cream cheese mixture before adding the whipped cream.
Nutrition
- Serving Size: 1 slice
- Calories: 450
- Sugar: 35g
- Sodium: 280mg
- Fat: 30g
- Saturated Fat: 18g
- Unsaturated Fat: 12g
- Trans Fat: 0g
- Carbohydrates: 40g
- Fiber: 1g
- Protein: 5g
- Cholesterol: 95mg
