

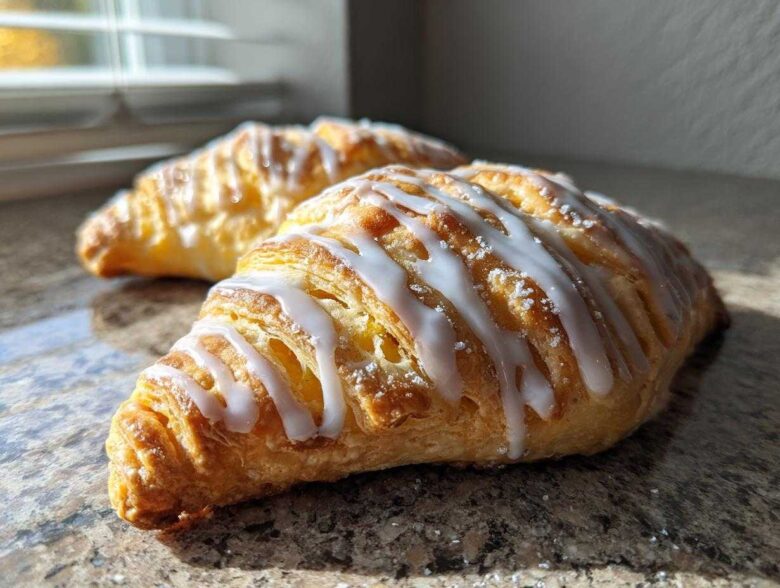
Oh, you know I love the smell of baking that fills the kitchen when I’m making something special for breakfast, but sometimes that laminated puff pastry just feels like too much work, right? Well, I’ve got the secret weapon! Forget struggling with endless folds. My go-to is making **classic apple turnovers with biscuits** dough.
This method gives you layers that are wonderfully flaky, tender, and sturdy enough to hold all that gooey cinnamon-spiced filling without tearing. Seriously, the texture you get from this quick biscuit base rivals anything store-bought, maybe even beats it! I’ve been perfecting this version for years because it cuts down the prep time but never cuts corners on flavor. Trust me, once you try these biscuit-based turnovers, you won’t look back for quick, incredible fruit pastries!
Why You Will Make These Classic Apple Turnovers with Biscuits
I know what you’re thinking: “Flaky crust *and* easy?” Yes! That’s the magic of using a good, sturdy biscuit dough. When you’re looking for something delicious but don’t have all afternoon, this is where you turn. It really checks all the boxes.
-
Flaky Texture Without Lamination
This is my favorite part! You don’t need to spend half an hour folding butter into dough the traditional way. By using very cold butter cut into the flour, you create those little pockets of fat. When the turnovers hit the hot oven, that cold butter steams and pushes the dough layers apart. It results in a lovely, tender, flaky homemade turnover that just melts in your mouth. It’s sturdy enough to handle the filling, too!
-
Quick Prep Time for Breakfast Pastries with Apples
Let’s be honest, sometimes we just need some quick apple turnovers for a weekend family breakfast, and this recipe delivers! Because we skip the fussy chilling and folding required for true puff pastry, the dough comes together in minutes. Once you mix it up, it just needs a little nap in the fridge while you prep the spiced apple filling. It’s easily one of the most approachable and quick dessert turnovers you’ll ever make.
Ingredients for Homemade Biscuit Pastry for Turnovers and Filling
When you’re making something like this, especially a recipe that relies on texture—like these flaky homemade turnovers—you have to be precise about your ingredients. Don’t look at this list and think you can just eyeball things! Measurements matter here, particularly when we’re dealing with cold fats, which are the secret to success. I’ve broken it down so you know exactly what to pull out of the pantry and fridge. If you’re looking for a fantastic guide on general mixing tips, check out my post on how to make easy apple turnovers that covers the basics!
Here is everything you need to gather before you start mixing:
For the Homemade Biscuit Pastry for Turnovers
Remember, your ingredients have to be *ice cold* for the best result. I mean really cold milk and butter!
- 2 cups all-purpose flour
- 1 tablespoon sugar (just regular granulated here)
- 1 teaspoon baking powder
- 1/2 teaspoon salt
- 1/2 cup cold unsalted butter, cut into small pieces
- 3/4 cup cold milk (this is crucial for the texture!)
- 1 tablespoon milk (reserved for brushing the tops later)
For the Cinnamon Apple Filling Recipe
This filling smells like absolute heaven while it bakes. I usually go straight for Granny Smiths because they hold their shape wonderfully, but Honeycrisps work great too!
- 3 medium apples (like Granny Smith or Honeycrisp), peeled, cored, and diced
- 1/4 cup packed brown sugar – the brown sugar adds so much depth!
- 1 teaspoon ground cinnamon
- 1/4 teaspoon ground nutmeg
- 1 tablespoon lemon juice (keeps the apples bright and stops them from browning)
For the Simple Glaze
This glaze is just sweet enough to balance the spice in the filling. It hardens up nicely but stays soft enough to bite through easily.
- 1 cup powdered sugar
- 2 tablespoons milk or water (start with 1.5 tablespoons and add more as needed)
Making the Dough for Your Classic Apple Turnovers with Biscuits
Okay, this is where we start to build the amazing texture difference! Because we are using a biscuit method, our technique here is all about keeping things cold and being super mindful not to overwork the dough. If you work it too much, you’ll end up with tough pastry instead of those gorgeous, flaky homemade turnovers we are aiming for. Mastering this step shows you really know how to handle biscuit dough apple pockets!
I always tell people that this part of the process is almost identical to making my favorite Southern biscuits. It’s fast, but you have to be gentle. When you’re looking for tips on making these delicious pastries at home, I’ve written a whole guide on how to make apple turnovers at home that goes into even more detail!
Mixing the Dough and Butter
First thing’s first: get your dry ingredients—the flour, the little bit of sugar, baking powder, and salt—whisked together in a big bowl. You want that blended really well. Now here comes the crucial bit: the butter. It has to be rock hard and cut into cubes smaller than a pea. You are cutting that cold butter into the dry mix. I usually take my pastry blender and just hack away at it until the mixture looks like coarse cornmeal with some slightly larger, flattened bits of butter still visible. Those melted butter pieces are what create the steam and layers!
Next, pour in that super cold milk. Use a fork or a spatula, and just stir it gently until it starts looking shaggy and barely holds together. Don’t even think about using your hands yet! As soon as it just barely comes together into one mass, stop immediately. Seriously, stop mixing! We’re aiming for a rustic look, not smooth perfection here.
Chilling the Dough for Flaky Homemade Turnovers
Once you’ve turned that shaggy mess out onto your floured counter, you give it maybe three or four gentle turns—just enough to press it into one cohesive ball. If you knead it like bread, you are going to lose all that carefully placed cold butter, and the result will be dense. Wrap that small ball tightly in plastic wrap. Now, it must chill!
You need to let it rest in the fridge for a minimum of 30 minutes. If you try to roll this dough out when it’s warm, the butter smears right into the flour, and you get a tough, cracker-like crust instead of that flaky texture we love so much in our southern style apple turnovers. Thirty minutes is non-negotiable, and honestly, forty-five minutes is even better if you have the time!
Assembling and Shaping the Classic Apple Turnovers with Biscuits
Now that our dough is perfectly chilled and ready to go, it’s time for the really fun part: turning those rounds into beautiful little pockets filled with spiced apples! This stage is important because we want to lock that delicious, gooey filling inside completely. We are aiming for that fantastic, sturdy shape that makes it easy to handle these pastries without the filling leaking out everywhere. If you want to see some fantastic examples of the finished glazed apple pastry recipe, take a peek at my guide on that!
Rolling and Cutting the Dough Squares
Take half of your chilled dough and put it on a lightly floured surface. I like to roll this out kind of thin, about 1/8 of an inch thick. Don’t fuss too much if the edges look a little rough—that’s what helps create lovely flaky homemade turnovers anyway! I usually aim for a long rectangle because it gives me the most surface area to work with.
Once it’s rolled out, grab a sharp knife or a pizza cutter. You want to slice the dough into 4 equal squares. If you prefer circles, a small bowl works fine, but squares are perfect for that classic triangular look. Remember, you divide the dough in half, and each half yields 4 turnovers, giving you 8 turnovers total from the whole batch. Perfectly sized for sharing, or not sharing, I don’t judge!
Sealing for Best Apple Turnover Texture
This is the make-or-break moment for avoiding leaks! Lay out one dough square. Scoop about two generous tablespoons of that cinnamon apple filling right onto one half of the square. You must leave a clear border, about half an inch, around the edges. If your filling touches the edge, it’ll glue the dough shut incorrectly.
Take a small pastry or silicone brush and lightly dab the empty edges of the dough with a tiny bit of milk—this acts like edible glue. Then, take the empty side of the dough and carefully fold it over the filling to create a perfect triangle. Now, press those edges together really firmly with the tines of a fork. Don’t just press lightly; I mean really mash that fork down across the entire seam! This crimping step is your insurance policy against a sticky, messy baking sheet. A strong seal gives you that ideal apple turnover texture that stays intact from the sheet to your plate.
Baking Instructions for Golden Brown Classic Apple Turnovers with Biscuits
This is where the magic happens! All that dedication to getting the butter cold and sealing those edges is about to pay off with the most gorgeous breakfast pastries with apples you’ve ever pulled from your oven. We need high heat to get that initial puff and flakiness into the biscuit dough quickly.
Make sure your oven is fully preheated to 400°F (200°C). I always line my baking sheet with parchment paper. Not only does it make cleanup a breeze, but baking the turnovers on parchment also helps them cook evenly on the bottom, so you don’t have to worry about that soggy bottom issue rearing its ugly head.
Once your turnovers are assembled and sitting nicely spaced out on the prepared pan, give the tops a very light brush with that last bit of milk you reserved. If you want that extra rustic, sugary crunch—and who doesn’t?—sprinkle them with a tiny bit of granulated sugar right now. Remember those slits you make in pies? These need them too! Using a sharp knife, cut two small vents right into the center of the top triangle. This is essential; those vents let the steam build up by that warm cinnamon apple filling escape. If the steam gets trapped, it can blow your seals apart, and we certainly don’t want any apple lava erupting!
Pop them into the hot oven and bake them for about 15 to 18 minutes. You’re looking for two things here to know they are done: the tops should be gloriously golden brown, and you should see the apple filling bubbling gently up through those steam vents or oozing just a tiny bit from the sides. That bubbling means the apples are tender and the pastry is cooked through. And just a little extra tip I learned from making simple fruit turnovers—if one side looks way browner than the other, you can quickly rotate the pan halfway through!
When they come out, they’ll smell incredible. Let them cool on the pan for just five minutes before you move them to a wire rack. If you try to move them too soon, the hot, soft dough might tear. We let them cool just enough so they aren’t scorching hot before drizzling on that sweet sugar glaze we whipped up!
Tips for Success to Achieve the Best Apple Turnovers Texture
Look, even with a great recipe like this for our classic apple turnovers with biscuits, sometimes things pop up in the baking process, right? But don’t worry, mastering these tips is how you go from “pretty good” to “Oh my gosh, you made these?!” These little insights are what I’ve learned over tons of batches to guarantee that perfect, flaky texture every single time. It’s all about paying attention to the details that transform good into great. To see some of the final beauties, check out my post on how to get the best apple turnovers texture!
Preventing Soggy Bottoms in Biscuit Dough Apple Pockets
This is a common fear when you’re dealing with fruit fillings, especially when using a biscuit dough apple pocket instead of a traditional pie crust. A soggy bottom is just the worst! Luckily, we have two simple defenses ready for the job.
First, as I mentioned before, never skip the parchment paper. Putting the turnovers directly on an unlined metal baking sheet can cause the bottom crust to cook too fast in the direct heat, leading to that dreaded dampness, especially right where the filling sits.
Second, and this is key: always bake your turnovers on the middle rack of your oven. This position gives you the most balanced circulation of heat. It heats the top nicely for browning while giving the underside steady heat to cook through completely before the butter melts out too much. This combination helps our biscuit dough crisp up beautifully underneath!
Achieving a Perfect Glazed Apple Pastry Recipe
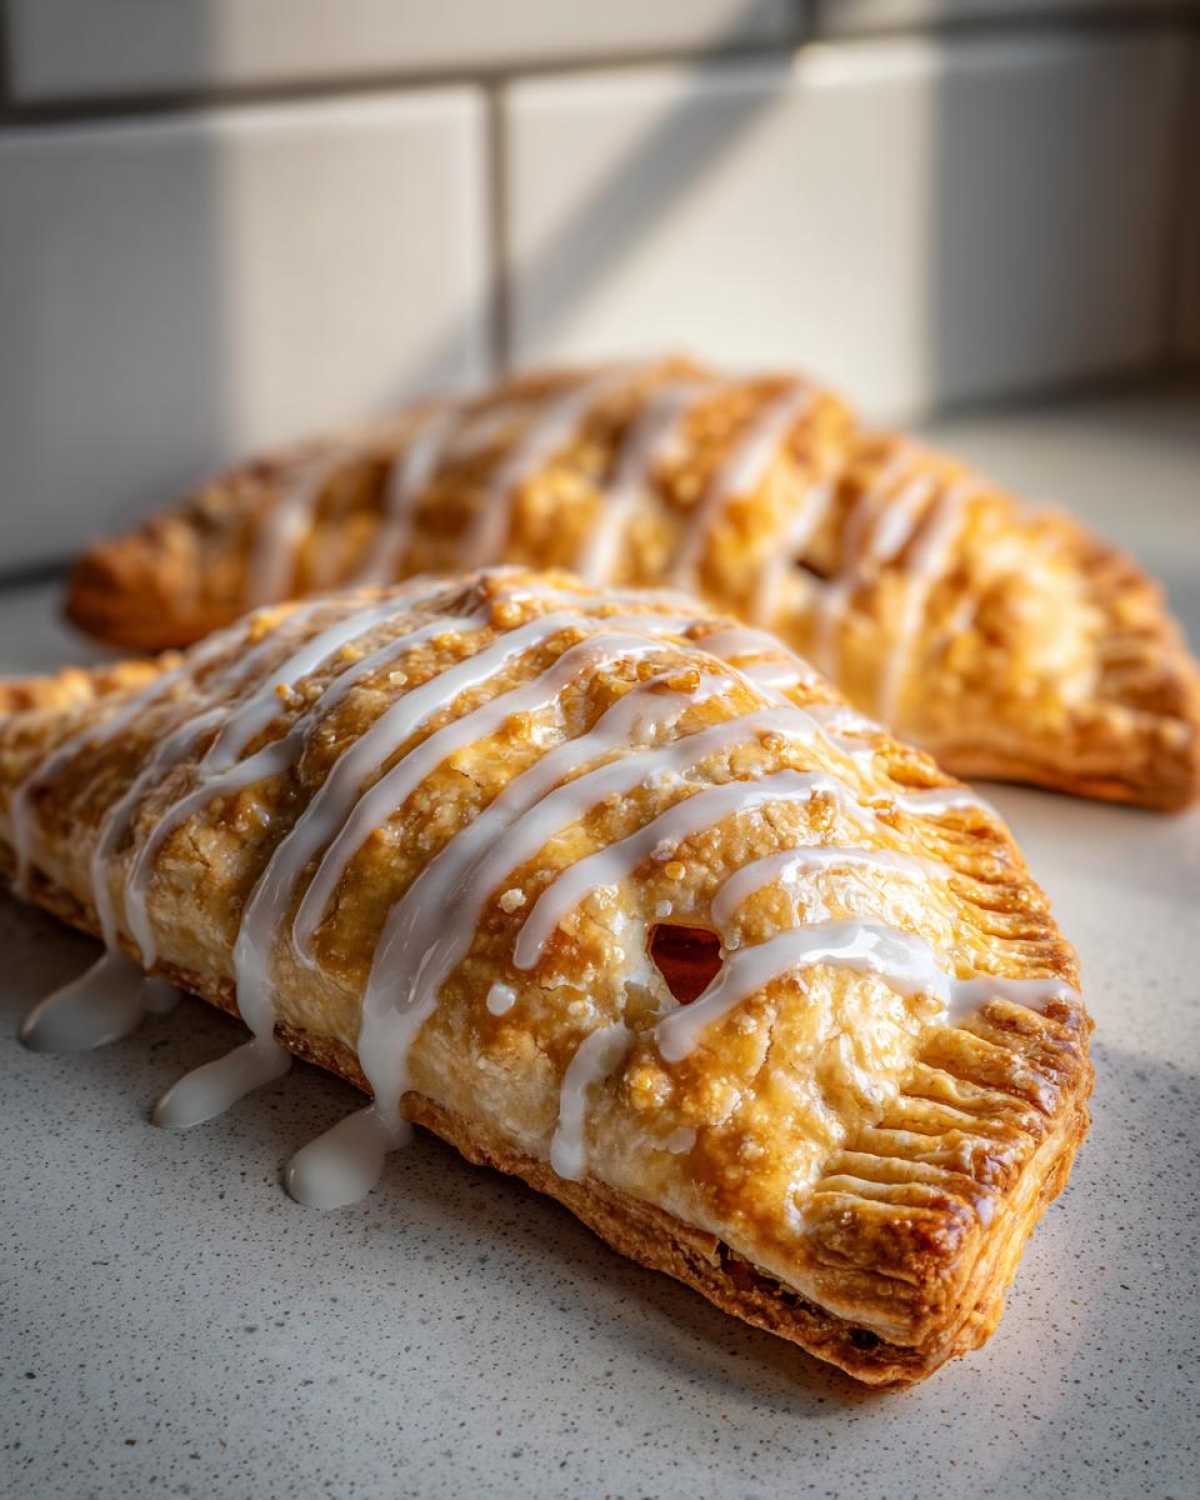
The glaze is the finishing touch on our glazed apple pastry recipe, and when you apply it matters for both look and taste. If you try to glaze the turnovers when they are piping hot straight out of the oven, the glaze will just melt instantly and disappear into the crust, becoming slightly transparent and sticky instead of that beautiful, opaque white pattern we want.
However, if you wait until they are completely cold, the glaze can become too thick to drizzle nicely, resulting in chunky application. My sweet spot? Wait until the turnovers have cooled down for about 10 to 15 minutes. They should still feel warm to the touch, but not hot enough to burn your fingers. At this temperature, the sugary glaze thins out just enough to run beautifully down the sides when you drizzle it on, but it sets up quickly enough to stay a bright, lovely white blanket over your pastry. It truly makes them look professionally done!
Storage and Make Ahead Apple Turnovers Options
I know these turnovers are dangerous when they’re fresh, but sometimes you just can’t eat 8 of them in one sitting! Or maybe you want to have some ready for an early morning gathering without scrambling. Good news—these are fantastic for making ahead, and freezing them before they bake is my absolute favorite trick for quick weekend breakfasts. If you are planning ahead, I wrote a whole guide about the best methods for freezing and thawing in my post on make ahead apple turnovers!
For storing the baked ones, they are best the day they are made, of course! But if you have leftovers, just seal them in an airtight container at room temperature. They should stay perfectly good for about two days. If you try to refrigerate them, the biscuit pastry can sometimes get a little tough or dry out faster, so room temperature is better for that flaky texture.
If you need them to last longer than two days, you can freeze the *baked* turnovers. Let them cool completely, wrap each one tightly in plastic wrap, and then place them all inside a freezer-safe bag or container. They keep well for up to three months!
Freezing the Unbaked Turnovers for Later
This is the real game-changer, in my opinion. You assemble the whole classic apple turnover with biscuits—fill them, crimp them with the fork, the whole deal—but you stop before the egg wash and baking. You just place the assembled, unglazed turnovers on the baking sheet, pop that sheet into the freezer until the turnovers are rock hard (about an hour), and then transfer them to a freezer bag. They won’t stick together this way!
When you decide it’s time to bake those easy apple turnovers, just pull them out of the freezer, brush them with your egg or milk wash, maybe sprinkle on that extra sugar, and pop them straight into the 400°F oven. You’ll need to add about 5 to 8 minutes to the baking time since they are starting frozen, but the result is the same glorious, flaky pastry!
Reheating Baked Leftovers for Crispness
If you stored your freshly glazed apple pastry recipe leftovers in that airtight container and they’ve lost a little bit of their fresh-baked crunch, don’t use the microwave unless you absolutely have to! Microwaving warms them, yes, but it steams the biscuit dough and makes it soggy again, which ruins the lovely texture we worked so hard for.
Instead, try warming them in a conventional oven set to about 300°F (150°C) for about 5 to 7 minutes. This gentle heat warms the filling all the way through and brings back the crispness to the biscuit crust beautifully. If you have an air fryer, even better! A quick 3 minutes at 325°F feels like they just came out of the oven moments ago. They’ll be perfect and ready for dessert or breakfast!
Frequently Asked Questions About Classic Apple Turnovers with Biscuits
I knew you’d have questions! When you find a recipe that seems almost too good to be true—flaky results made simple—you naturally want to check the fine print. I’ve gathered the questions I get asked the most about making these perfect little pockets of joy. I want everyone to feel confident baking these easy apple turnovers!
Can I use store-bought biscuit dough for this recipe?
Oh, I totally get the appeal of wanting to cut corners here! Yes, you absolutely *can* use store-bought refrigerated biscuit dough if you’re in a real pinch for time. If you do, just make sure you unroll the biscuits and then usually roll them out a little thinner so you have enough surface area to get a good turnover shape.
But here’s my honest, straight-from-the-kitchen answer: these specific turnovers are special because of that homemade flavor and texture we talked about. The canned dough tends to stay softer and more cake-like after baking, whereas our homemade biscuit pastry gives you that distinctly flaky lift, much closer to true southern style apple turnovers. For the best result, stick to the scratch recipe!
What are the best apples for this cinnamon apple filling recipe?
If you use the wrong apple, you end up with mushy filling rather than perfectly tender, chunky pieces. For this cinnamon apple filling recipe, you want apples that are firm and tart because they hold their structure beautifully when baked at high heat. My top two picks—and the ones I always insist on—are Granny Smith apples (for that wonderful tartness that cuts the sweetness) or firmness champions like Honeycrisp or Braeburn.
Avoid softer apples like McIntosh unless you plan on cooking the filling down on the stovetop first. We want those apples to stay distinct when you bite into the finished pastry!
How do I reheat leftover easy apple turnovers?
This is important! If you have any extra, you want to treat them gently so they retain that flaky crunch. Please, for the love of golden pastry, do not rely on the microwave for reheating these! The microwave reheats the moisture inside the dough and turns that beautiful, flaky crust immediately soft and chewy—and not in a good way.
Instead, try warming them in a conventional oven set to about 300°F (150°C) for about 5 to 7 minutes. If you have an air fryer, even better! Just 3 minutes at 325°F will crisp up the exterior perfectly. It takes almost no time and makes them taste nearly as good as fresh.
Nutritional Estimates for Homemade Dessert Turnovers
Now, I have to preface this by saying my kitchen isn’t a lab, so these numbers are just an estimate for one turnover based on the ingredients listed in the recipe. They are definitely a treat! When calculating the nutrition for these homemade dessert turnovers, remember that the exact figures will vary based on the type of butter and milk you use. Enjoying them warm with that sweet glaze is totally worth it!
- Serving Size: 1 turnover
- Calories: 350
- Sugar: 25g
- Fat: 18g
- Carbohydrates: 45g
- Protein: 5g
Nutritional Estimates for Homemade Dessert Turnovers
Now, I have to preface this by saying my kitchen isn’t a lab, so these numbers are just an estimate for one turnover based on the ingredients listed in the recipe. They are definitely a treat! When calculating the nutrition for these homemade dessert turnovers, remember that the exact figures will vary based on the type of butter and milk you use. Enjoying them warm with that sweet glaze is totally worth it!
- Serving Size: 1 turnover
- Calories: 350
- Sugar: 25g
- Fat: 18g
- Carbohydrates: 45g
- Protein: 5g
Classic Apple Turnovers with Homemade Biscuit Dough

Make flaky, spiced apple turnovers using a simple homemade biscuit dough base instead of traditional pastry.
- Prep Time: 30 min
- Cook Time: 18 min
- Total Time: 48 min
- Yield: 8 servings
- Category: Breakfast
- Method: Baking
- Cuisine: American
- Diet: Vegetarian
Ingredients
- 2 cups all-purpose flour
- 1 tablespoon sugar
- 1 teaspoon baking powder
- 1/2 teaspoon salt
- 1/2 cup cold unsalted butter, cut into small pieces
- 3/4 cup cold milk (plus 1 tablespoon for brushing)
- 3 medium apples (like Granny Smith or Honeycrisp), peeled, cored, and diced
- 1/4 cup packed brown sugar
- 1 teaspoon ground cinnamon
- 1/4 teaspoon ground nutmeg
- 1 tablespoon lemon juice
- 1 large egg, beaten (for egg wash)
- 1 cup powdered sugar (for glaze)
- 2 tablespoons milk or water (for glaze)
Instructions
- Prepare the biscuit dough: In a large bowl, whisk together the flour, sugar, baking powder, and salt. Cut in the cold butter using a pastry blender or your fingers until the mixture resembles coarse crumbs. Gradually stir in the cold milk until a shaggy dough forms. Do not overmix. Turn the dough onto a lightly floured surface and gently knead 3 or 4 times. Wrap the dough in plastic wrap and chill for at least 30 minutes.
- Prepare the apple filling: In a medium bowl, combine the diced apples, brown sugar, cinnamon, nutmeg, and lemon juice. Mix well to coat the apples evenly.
- Preheat your oven to 400°F (200°C). Line a baking sheet with parchment paper.
- Roll out the dough: Divide the chilled dough in half. On a lightly floured surface, roll one half of the dough into a rectangle about 1/8 inch thick.
- Cut the dough: Use a knife or pizza cutter to cut the dough into 4 equal squares (or circles, if preferred). Repeat with the second half of the dough for a total of 8 turnovers.
- Assemble the turnovers: Place about 2 tablespoons of the apple filling onto one half of each dough square, leaving a 1/2-inch border clear. Brush the edges of the dough lightly with milk. Fold the other half of the dough over the filling to create a triangle shape. Press the edges firmly together with a fork to seal.
- Bake: Place the turnovers on the prepared baking sheet. Brush the tops lightly with the remaining milk and sprinkle with a little extra granulated sugar, if desired. Cut two small slits in the top of each turnover to allow steam to escape.
- Bake for 15 to 18 minutes, or until the tops are golden brown and the filling is bubbling.
- Make the glaze: While the turnovers cool slightly, whisk together the powdered sugar and 2 tablespoons of milk or water until smooth.
- Glaze and serve: Drizzle the glaze over the warm turnovers. Let them cool slightly before serving.
Notes
- For extra flaky dough, keep the butter and milk as cold as possible during mixing.
- If you prefer a thicker crust, roll the dough to 1/4 inch thickness.
- Bake the turnovers on the middle rack for even browning on the bottom.
Nutrition
- Serving Size: 1 turnover
- Calories: 350
- Sugar: 25
- Sodium: 250
- Fat: 18
- Saturated Fat: 11
- Unsaturated Fat: 7
- Trans Fat: 0
- Carbohydrates: 45
- Fiber: 2
- Protein: 5
- Cholesterol: 55
