

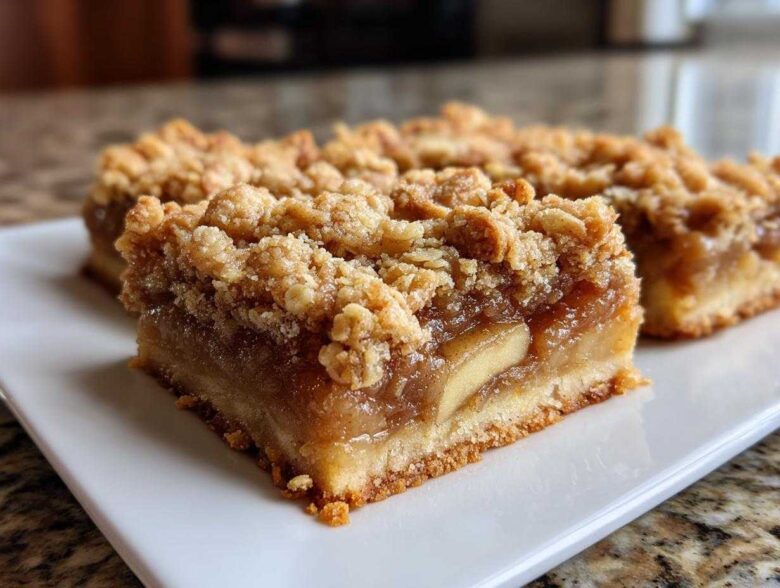
Oh, pie crust. I love pie, I really do, but sometimes you just don’t have the time (or the patience!) for all that chilling, rolling, and fussing with a double crust. If you ever feel that exact way—craving that warm, spiced apple flavor but dreading the pie dish drama—then I have the absolute answer for you. These are my famous delicious & easy apple pie bars!
I spent an entire autumn trying to figure out how to capture that perfect pie moment in an afternoon bake. The trick, I discovered, was ditching the pie tin entirely and building everything right in a simple baking pan with a buttery, press-in crust. Trust me, these bars are foolproof. They give you the sweet and tart filling, that warm cinnamon hug, and a seriously satisfying crumble topping, all without ever needing a rolling pin. They are incredibly easy, yet taste like they took hours!
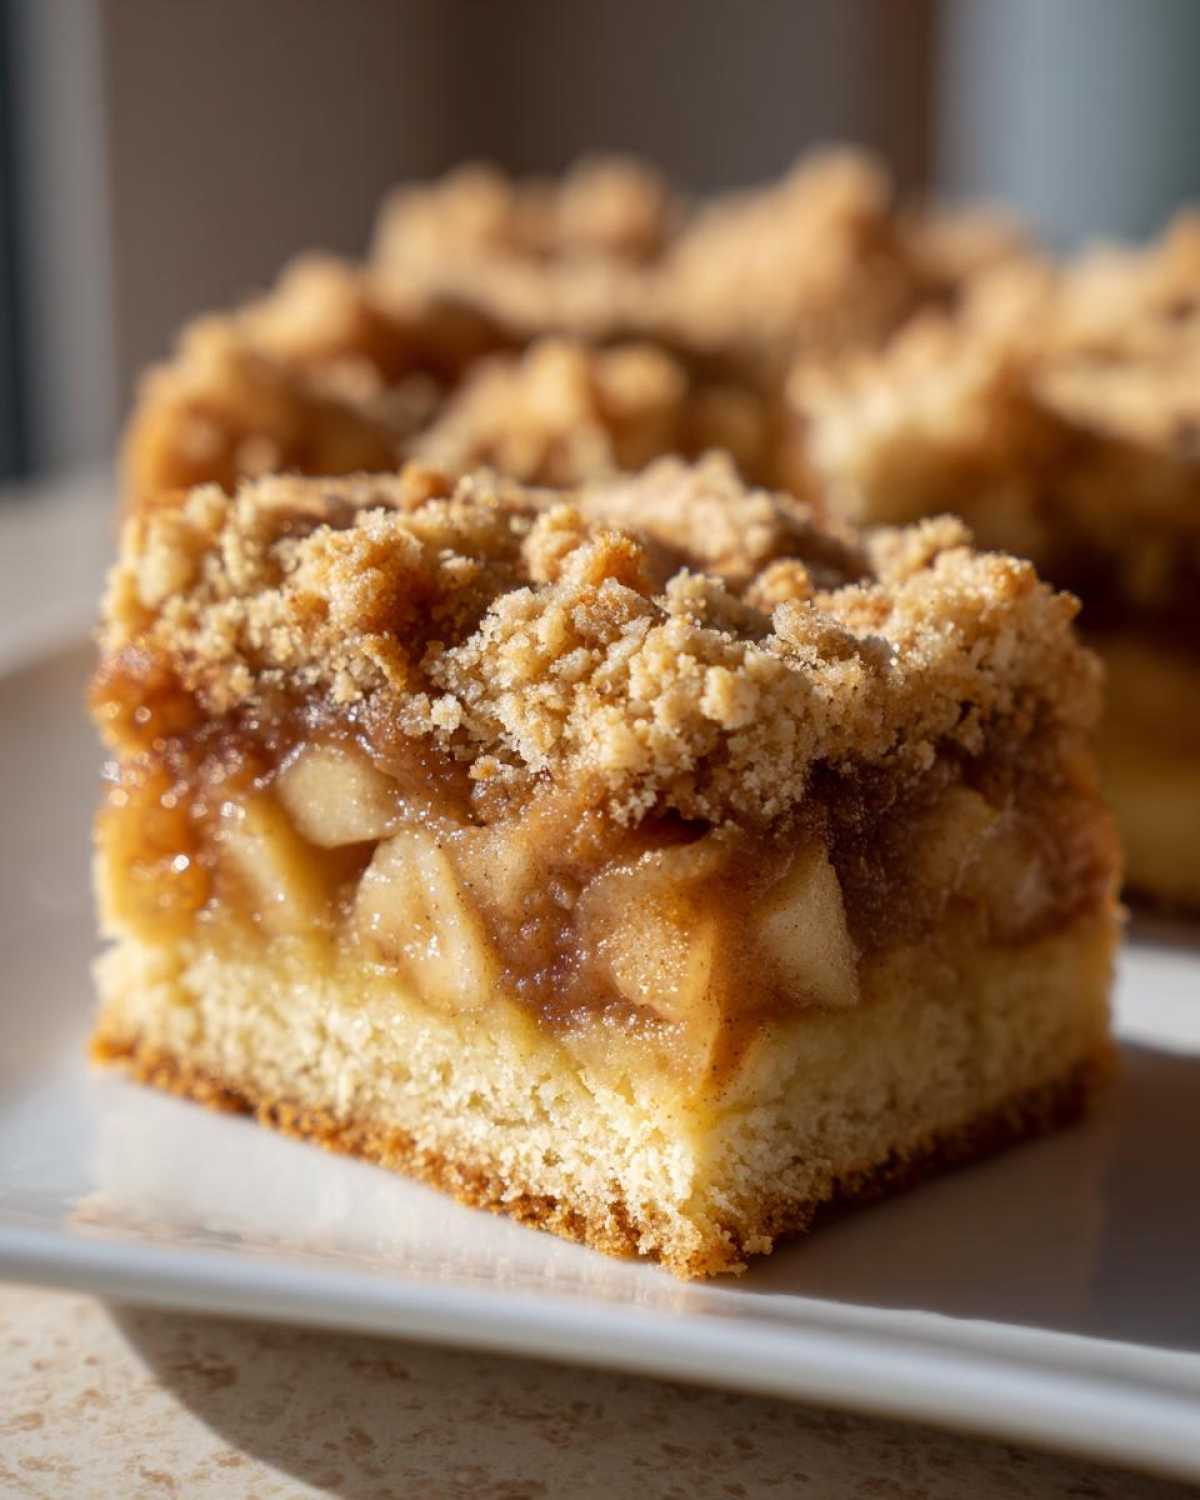
We’re going to use that shortcut to get you the absolute best apple flavor fast. Because who says comfort food has to be complicated? I included a link here to my classic apple crumble recipe if you ever want a different format, but for pure convenience and crowd-pleasing potential, these bars are my go-to.
Why These Are the Best Delicious & Easy Apple Pie Bars
Honestly, what I love most is that this recipe completely knocks out the big reasons people avoid making homemade apple pie. You get all the comfort, but zero stress! It’s my secret weapon for a fast weeknight treat or when I need a crowd pleasing apple bake.
Here’s why I think you’ll fall in love with these:
- They are lightning fast! Our total active time is just over 20 minutes.
- Forget rolling pastry—the crust is a simple mix-and-press dough.
- We nail the texture every time: a wonderfully buttery shortbread apple bars base topped with a crisp sprinkle.
- The sweet-tart apple filling sets up perfectly; no more soupy messes!
If you’re looking for other quick treats that don’t require a rolling pin, check out my recipe for soft apple pie cookies. But for true apple pie flavor in a square, these bars win every time!
Gathering Ingredients for Delicious & Easy Apple Pie Bars
Okay, time for the fun part—gathering our ingredients! Since these are delicious & easy apple pie bars, we are sticking to things you probably already have in your pantry. The absolute genius of this recipe is that we use one simple dough mixture for both the bottom crust AND the crumbly top. That cuts down on dishes and ensures a consistent, buttery flavor throughout.
I always lay everything out before I start mixing; it makes the whole **quick apple crumble bars** process glide by. And remember, preparation is everything when you’re aiming for that perfect flavor balance we talked about!
If you are looking for another lovely, easy fall bake, my moist applesauce cake recipe is another great one for minimal fuss!
For the Buttery Shortbread Crust and Crumble Topping
This is the base we use for the bottom layer that gets pressed in, and also the handful we save to sprinkle on top as the beautiful, crisp blanket! Because it’s all the same dough, your crust will automatically be perfectly balanced with the filling.
- 1 cup (2 sticks) unsalted butter, softened (make sure it’s soft, not melted!)
- 1 cup granulated sugar
- 2 cups all-purpose flour
- 1/2 teaspoon salt
- 1/2 cup rolled oats (we need the old-fashioned kind, not the instant mushy stuff!)
- 1 teaspoon vanilla extract
For the Sweet and Tart Apple Filling
This part is where we nail that amazing traditional apple pie flavor without spending an hour dicing and stirring! Make sure your apples are cut into small, uniform pieces so they cook evenly.
- 4 medium apples (I swear by Granny Smith or Honeycrisp—they hold their shape and give that perfect sweet/tart punch) – peeled, cored, and diced small
- 1/2 cup packed light brown sugar (this adds that deep molasses note!)
- 2 tablespoons all-purpose flour (this is crucial for thickening the juices!)
- 1 teaspoon ground cinnamon
- 1/4 teaspoon ground nutmeg
- 1 tablespoon lemon juice (keeps things bright!)
Step-by-Step Instructions for Perfect Delicious & Easy Apple Pie Bars
Alright, this is where the magic happens! Even though these are the easiest apple bar recipe you’ll ever find, we still need to treat our dough with a little respect to guarantee that crisp bottom and that gorgeous crumble top. Since we’re aiming for no fuss apple dessert perfection, preparation is key. Get your baking pan ready first, because we want to move fast once the dough is formed!
If you’ve ever struggled with pie dough sticking to the counter, you’ll appreciate the next set of steps. Don’t worry about any fussy techniques here; we’re keeping the steps super simple. I’ve got a link to my easy Salisbury steak recipe if you need something savory to balance out all this sweetness later!
Preparing the Pan and Crust Base
First thing: get that oven humming at 350°F (175°C). Now, grab your 9×13 inch pan and line it completely with parchment paper. I always leave big overhangs on the sides—that’s your handle later when you lift the whole thing out to slice. Don’t skip that part!
Now for the dough: Cream that softened butter and granulated sugar together until it looks pale and fluffy. Think light, cloudy, not just mixed. Once that’s done, mix in the 2 cups of flour, oats, salt, and vanilla. It will look dry and crumbly, which is exactly right. Take about two-thirds of that mixture and firmly press it down into the bottom of your prepared pan. That’s the foundation for our buttery shortbread apple bars.
Assembling the Apple Filling Layer
In a separate bowl—I told you this was easy, only one extra bowl!—toss those diced apples with the brown sugar (so good!), the 2 tablespoons of flour (this stops the juices from running everywhere!), the cinnamon, nutmeg, and lemon juice. Keep tossing until every single apple piece is shiny and coated. Seriously, count how many times you toss it! We want even coverage.
Once everything looks perfectly coated, spread that sweet apple mixture evenly right over your pressed-in crust. Try to make it level; it helps with even baking.
Creating the Crumble Topping and Baking
Take that remaining one-third of the dough mixture we set aside earlier. Don’t knead it! Just pinch and fluff it with your fingertips right over the apples. We want loose crumbs, not another solid layer. If you press it down, you lose that lovely crunchy texture we’re aiming for!
Pop the whole thing into that 350°F oven for about 40 to 45 minutes. You’re looking for two things: the topping should be beautifully golden brown, and you should see the apple filling bubbling up around the edges. Then, and this is huge, let it cool completely—at least two hours—before you even *think* about cutting. The cooling process is what lets that filling set properly, giving you beautiful squares!
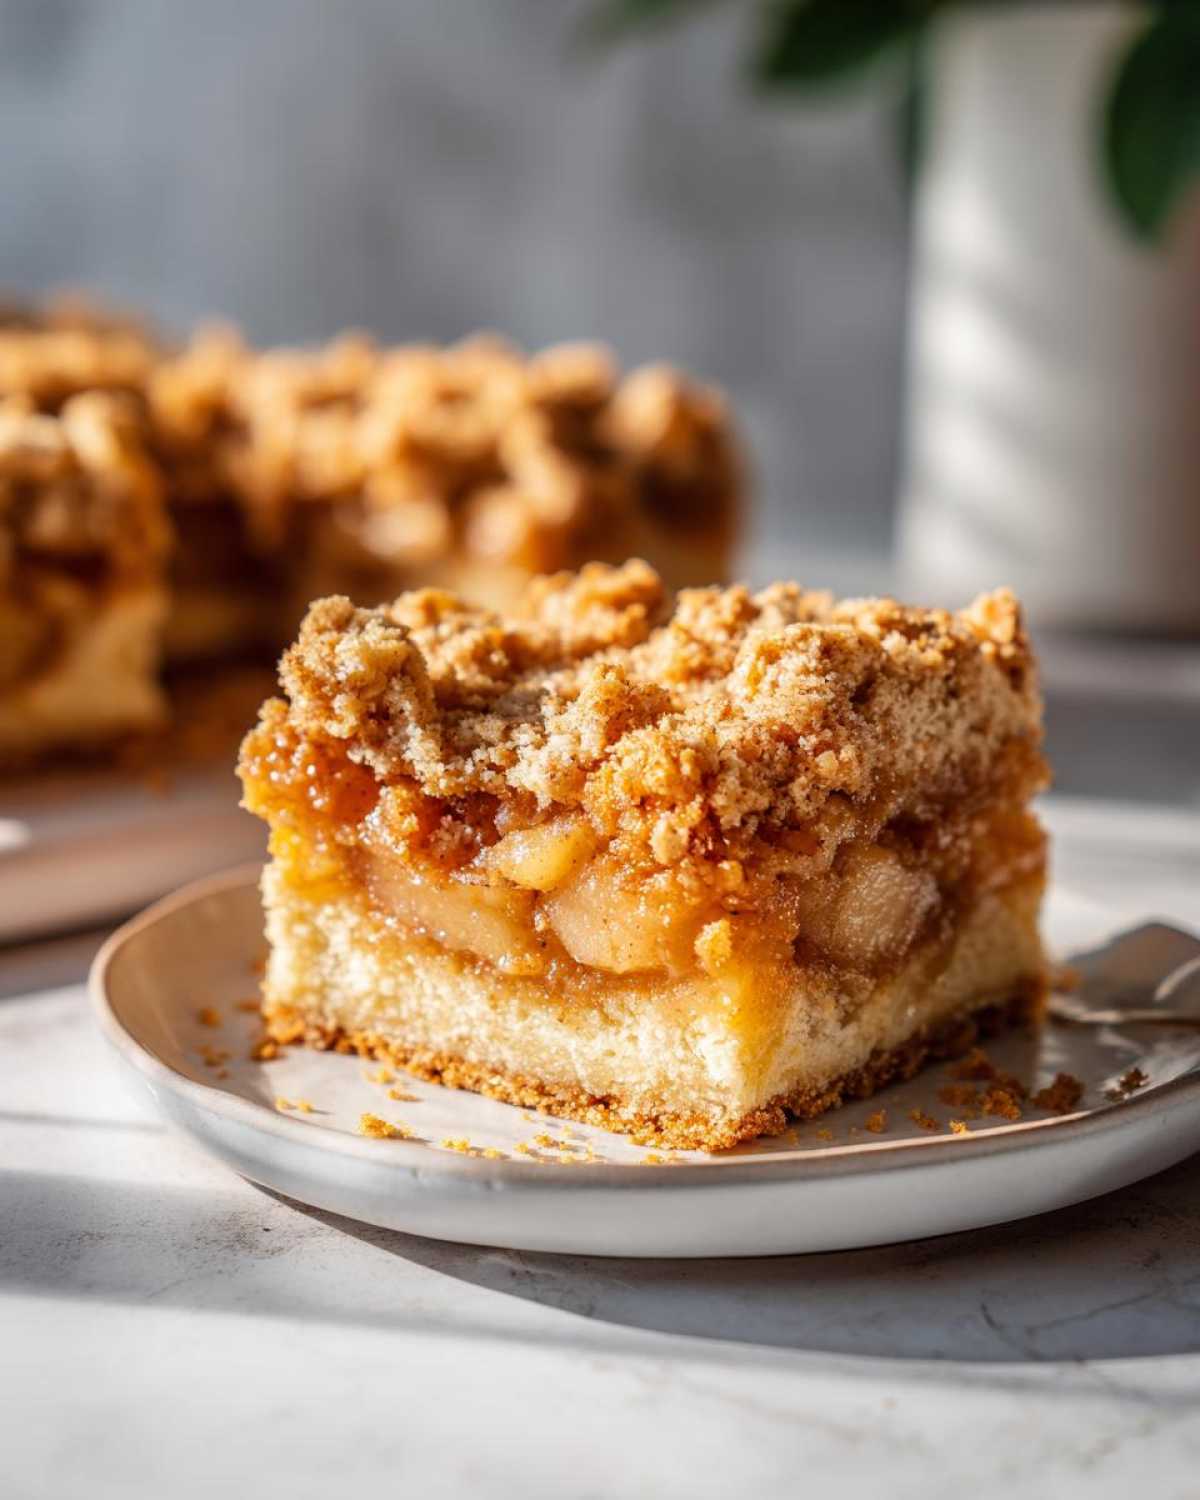
Tips for Success with Your Delicious & Easy Apple Pie Bars
Since we’re aiming for incredibly delicious & easy apple pie bars, sometimes a little insider knowledge goes a long way to ensure success. I’ve baked these dozens of times, especially when I need a quick weeknight apple dessert, and I’ve learned a few tricks to keep the crust buttery and the filling set just right!
Here are my must-dos so you get that perfect texture every single time:
- To avoid a runny center, don’t skimp on the 2 tablespoons of flour in the filling. That’s our secret weapon for setting those apple juices! If you’re worried, you can actually microwave the tossed apples for two minutes before spreading them—it gives them a head start cooking.
- When mixing the crust, make sure your butter is softened but still cool. If it gets too warm or greasy, the final texture won’t have that nice shortbread bite.
- Resist the urge to cut them warm! I know, they smell amazing straight from the oven, but if you cut them hot, they collapse into a gooey mess. Patience truly pays off! If you want them warm later, just reheat the slices individually.
For more cookie-like, buttery goodness, you should totally check out my thick and chewy oatmeal cookie recipe—it shares a lot of the same love for butter and brown sugar!
Ingredient Notes and Substitutions for Your Apple Bar Recipe
When you’re making something called delicious & easy apple pie bars, every ingredient really needs to pull its weight, right? Since we are keeping things simple, we can’t hide behind complex techniques, so we rely on great ingredients. Let’s talk apples first, because that’s the heart of this whole thing!
I always recommend using a mix of apples if you can—maybe two tart Granny Smiths and two sweeter Honeycrisp or Fuji. Granny Smiths give you that amazing zing that cuts through the buttery crust, while the sweeter ones soften up nicely. If you only have one type, stick to something slightly tart so the bars don’t taste overly sweet.
Now, about those oats in the crust? Those are essential! They contribute to the slight chewiness of the base and give it that hearty, rustic feel that makes these more than just a plain shortbread square. If you skip them, the crust will be too delicate, which isn’t what we want in a grab-and-go bar.
For quick swaps to keep things easy, here are my go-tos:
- Can’t find nutmeg? No problem! Just use an extra quarter teaspoon of cinnamon, or better yet, use a pre-mixed jar of apple pie spice if you have it—it saves you measuring two separate things!
- If you don’t have rolled oats, you can substitute with an equal amount of finely chopped nuts (like pecans or walnuts) for crunch in the crust/topping, though the texture will change slightly.
If you love the way oats bake into things, I highly recommend checking out my recipe for thick and chewy brown sugar cookies too! But for these bars, don’t switch out the butter; real butter is what makes that crust melt in your mouth.
Serving Suggestions for Delicious & Easy Apple Pie Bars
Once these delicious & easy apple pie bars have completely cooled—yes, I know, it’s probably the hardest part of the whole process—the real enjoyment begins! Because they are so sturdy and delicious on their own, you don’t need a ton of fuss, but I definitely have a few ways I like to serve them up depending on the mood.
The key here is enhancing that apple pie flavor we worked so hard to capture in a simple square form. I think of it this way: if you serve them straight from the counter at room temperature, they are perfect for packing up or taking to a potluck. They hold their shape beautifully, making them the ultimate fast apple dessert bars for potluck.
However, if you’re making these fresh in your kitchen for a cozy family dessert, warming them up just slightly makes the cinnamon aroma bloom all over again. Try microwaving a single square for about 15 or 20 seconds until it’s just warm through and the filling is gooey again—not hot, just warm!
What goes great with warm apple bars? Well, I’m a simple girl, so a big scoop of vanilla ice cream is usually my first choice. The contrast between the warm, spiced bar and the cold, creamy ice cream is just heaven. If you want something a little fancier but still simple, a tiny drizzle of something sweet really pushes these over the top. If you have some of my vanilla buttercream frosting lying around, whip up a very thin glaze—just add a tablespoon of milk to a cup of powdered sugar—and drizzle it quickly over the top!
For a more sophisticated, sweet and tart square, try chopping up some candied pecans or walnuts and sprinkling them over the top right before serving. It adds a lovely crunch that complements the buttery crust wonderfully!
Storage and Make Ahead Options for Delicious & Easy Apple Pie Bars
One of the best things about making these delicious & easy apple pie bars is that they are fantastic for planning ahead! Since we used that sturdy crust and the flour in the filling did its job setting up the juices, these are far less delicate than a traditional slice of pie. That means you can totally bake them on the weekend and enjoy them all week long.
I often make a double batch when I break out the 9×13 pan. Why not, right? It’s all the same effort! Knowing I have a quick, comforting dessert ready to go is seriously satisfying. If you’re looking for other things you can bake ahead for simple mornings or snacks, you have to see my recipe for make-ahead breakfast burritos—though baking bars is definitely more fun!
Here’s what you need to know about keeping these perfect:
- Room Temperature Storage: These bars keep wonderfully at room temperature. Once they are completely cooled, I just leave them right in the baking pan (covered tightly with foil or plastic wrap) for up to three days. Since they are low-moisture compared to a standard cake, they stay fresh, and that crust stays wonderfully crisp.
- A Quick Note on the Fridge: You can put them in the fridge if your kitchen is super hot or humid, but honestly, I don’t recommend it! The cold air tends to harden that buttery crust and make it a little less tender. If you do refrigerate them, let them sit out on the counter for about 30 minutes before serving so they can soften up again.
- Freezing for Later: Yes! These freeze like a dream. This is the ultimate way to save them for when you really need a comfort food apple bar in a pinch. After they are completely cooled, cut them into individual squares. Wrap each square tightly in plastic wrap, and then place all the wrapped squares into a large freezer-safe bag or an airtight container. They stay great in the freezer for up to two months. When you want one, just let it thaw on the counter for an hour or two, and it tastes almost exactly like it was baked fresh!
The fact that these are such good make ahead apple squares is part of why I call them my favorite simple apple dessert recipe!
Frequently Asked Questions About Delicious & Easy Apple Pie Bars
I know when you’re trying out a new recipe, especially one promising quick results, you always have a few questions swirling around! These delicious & easy apple pie bars are a lifesaver for busy bakers, and I’ve covered the most common things people ask me about making them perfect time after time. If you’re looking for more ideas that fit the bill, check out my suggestions for other simple apple dessert recipes!
Can I use pre-made pie filling instead of fresh apples?
Oh, you certainly can! That fits the ‘easy’ goal perfectly, doesn’t it? If you’re in a huge rush, using canned apple pie filling is totally fine to make these quick apple crumble bars. However, I have to give you a tiny warning: most canned fillings are already quite saucy. Because our recipe relies on the flour we add to the fresh apples to thicken up the juices, you might find your bars are a little looser after cooling. If you use canned filling, make absolutely sure you let those bars cool for at least four hours before cutting. They need that extra time to firm up!
How do I prevent the bottom crust of my apple bar recipe from getting soggy?
This is the number one concern when you’re putting a juicy fruit filling right on top of a delicate shortbread crust! The trick here is really in the assembly. First, make sure you’re using the 2 tablespoons of flour mixed right in with your apples and brown sugar. That flour absorbs the moisture as it bakes, turning the liquid into a thick sauce instead of watery runoff. Second, don’t over-press the bottom crust; you want it packed firmly, but leaving a few tiny air pockets helps prevent it from compacting too much and absorbing all the moisture like a sponge. Bake it until you see those filling bubbles!
Are these considered beginner friendly apple desserts?
Absolutely, yes! If you’ve ever been nervous about making a traditional pie, these bars are your friendly introduction to apple baking. The biggest complication in pie making is the crust—rolling it out thinly and keeping it cold. Since these bars use a mix-and-press dough for both the shortbread base and the crumble top, you get that rich, buttery flavor that screams ‘homemade’ without any of the fancy skills. If you can cream butter and sugar, you can totally master these squares!
Nutritional Estimates for Your Apple Bar Treat
Okay, so we all know these delicious & easy apple pie bars are packed with buttery goodness and sweet apples, so they are definitely a treat! I always try to keep track of what goes into my baking, but I want to stress that these numbers are just very rough estimates. Seriously, the exact amount of butter soaking into your crumb topping versus what stays on the parchment paper can change things!
I ran these through my standard calculator based on the ingredient measurements we used, assuming you get 16 beautiful squares out of the batch. If you’re looking for something lower in calories that still features fruit, you could check out my quick avocado toast recipe—though that’s breakfast, not dessert!
Here are the approximate numbers, just to give you an idea of what you’re indulging in:
- Serving Size: 1 bar
- Calories: 280
- Sugar: 20g
- Sodium: 110mg
- Fat: 15g
- Saturated Fat: 9g
- Unsaturated Fat: 6g
- Trans Fat: 0g
- Carbohydrates: 35g
- Fiber: 2g
- Protein: 3g
- Cholesterol: 38mg
Just remember, these estimates are based on using all the ingredients listed in the recipe above, prepared as directed (so, no extra caramel drizzle on top!). Enjoy them knowing you made something wonderfully comforting from scratch—that’s worth way more than the calorie count!
PrintDelicious and Easy Apple Pie Bars with Brown Sugar Crumble
Prepare simple, delicious apple pie bars featuring a buttery shortbread base, a sweet-tart apple filling, and a crisp brown sugar crumble topping. This recipe avoids the fuss of a traditional pie.
- Prep Time: 20 min
- Cook Time: 45 min
- Total Time: 65 min
- Yield: 16 servings
- Category: Dessert
- Method: Baking
- Cuisine: American
- Diet: Vegetarian
Ingredients
- 1 cup (2 sticks) unsalted butter, softened
- 1 cup granulated sugar
- 2 cups all-purpose flour
- 1/2 teaspoon salt
- 1/2 cup rolled oats (not instant)
- 1 teaspoon vanilla extract
- 4 medium apples (like Granny Smith or Honeycrisp), peeled, cored, and diced small
- 1/2 cup packed light brown sugar
- 2 tablespoons all-purpose flour
- 1 teaspoon ground cinnamon
- 1/4 teaspoon ground nutmeg
- 1 tablespoon lemon juice
Instructions
- Preheat your oven to 350°F (175°C). Line a 9×13 inch baking pan with parchment paper, leaving an overhang on the long sides for easy removal.
- Prepare the crust: In a large bowl, cream together the softened butter and granulated sugar until light and fluffy. Mix in 2 cups of flour, salt, oats, and vanilla extract until a crumbly dough forms.
- Press about two-thirds of the dough mixture evenly into the bottom of the prepared pan to form the base. Set the remaining one-third of the dough aside for the topping.
- Prepare the filling: In a separate bowl, toss the diced apples with the brown sugar, 2 tablespoons of flour, cinnamon, nutmeg, and lemon juice until the apples are evenly coated.
- Spread the apple mixture evenly over the crust layer in the pan.
- Prepare the crumble topping: Take the reserved one-third of the dough mixture and crumble it loosely over the apple layer using your fingers. Do not press it down.
- Bake for 40 to 45 minutes, or until the topping is golden brown and the filling is bubbly.
- Let the bars cool completely in the pan on a wire rack before lifting them out using the parchment paper overhang. Cut into squares.
Notes
- For a firmer filling, you can microwave the diced apples with the sugar and spices for 2 minutes before spreading them on the crust.
- If you prefer a less sweet bar, reduce the granulated sugar in the crust by 2 tablespoons.
- These bars keep well stored in an airtight container at room temperature for up to 3 days.
Nutrition
- Serving Size: 1 bar
- Calories: 280
- Sugar: 20g
- Sodium: 110mg
- Fat: 15g
- Saturated Fat: 9g
- Unsaturated Fat: 6g
- Trans Fat: 0g
- Carbohydrates: 35g
- Fiber: 2g
- Protein: 3g
- Cholesterol: 38mg
