

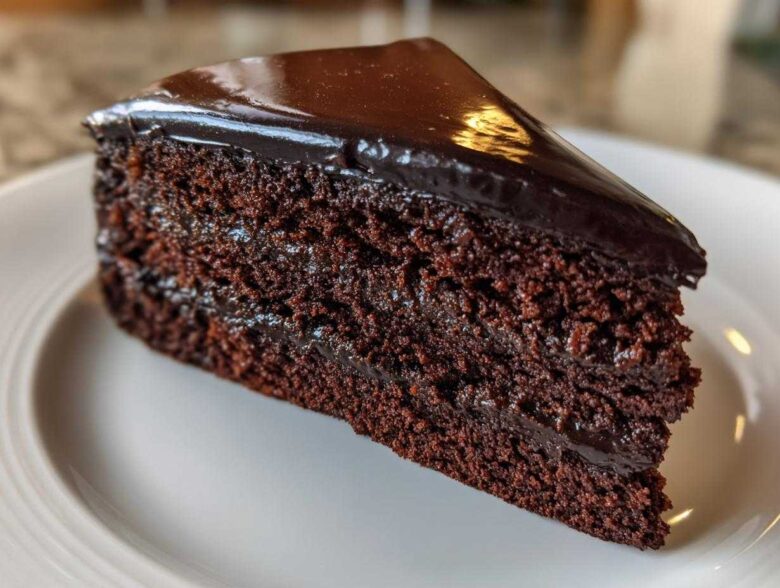
Oh, honey, let’s just agree right now: dry chocolate cake is a crime. It’s a tragedy that happens far too often in home kitchens, and frankly, I’ve banished weak, crumbly sponges from my realm forever. I spent years chasing that perfect bite—you know, the one that melts in your mouth and tastes like pure, intense dark chocolate? Well, I finally cracked the code. This isn’t just another chocolate cake recipe; this is the ultimate blueprint for an exceptionally Moist & Unique Chocolate Cake Design that will actually stop people in their tracks.
We’re talking about a shockingly rich, fudgy interior that stays moist for days, paired with a sleek, contemporary finish. Forget the old tired swirls! We’re elevating the look entirely using a show-stopping mirror glaze. If you’ve ever struggled with dry results, you need to check out my tips on getting an easy moist chocolate cake recipe—but this one takes that moisture to the next level! Trust me when I say that achieving the perfect texture has become my personal obsession, and this recipe—with its specific blend of liquids, buttermilk, and hot coffee—guarantees that velvety smooth chocolate cake you’ve always dreamed about. Get ready to make something truly memorable.
Achieving the Ultimate Moist & Unique Chocolate Cake Design: Ingredients Breakdown
Okay, so the aesthetic part—the mirror glaze—is truly stunning, but let’s be honest, looks mean nothing if the cake underneath tastes like cardboard. We focus on moisture first! This recipe gets its incredibly deep color and that promised rich fudgy interior from two superstars: buttermilk and dark processed cocoa powder. Don’t substitute! The buttermilk reacts beautifully, keeping everything tender, while the dark cocoa gives us that dramatic, gorgeous color. We’re using hot coffee, too, which sounds wild, but it ‘blooms’ the cocoa, making the chocolate flavor insanely intense without leaving any coffee taste behind. It’s my secret for a cake that stays incredibly moist, even after a day or two.
The real showstopper, though, is that glaze. It turns a regular layer cake into that architectural chocolate cake everyone chases online. It takes a few special items, especially the gelatin, but trust me, the shine is worth it. If you want to see more ideas on keeping things fudgy, check out my tips for a moist chocolate cake recipe that’s also easy!
For the Deep Dark Moist Chocolate Sponge
- 2 cups all-purpose flour
- 2 cups granulated sugar
- 3/4 cup unsweetened cocoa powder, make sure it’s dark processed!
- 2 teaspoons baking soda
- 1 teaspoon baking powder
- 1 teaspoon salt
- 1 cup cold buttermilk (don’t skimp here!)
- 1/2 cup vegetable oil
- 2 large eggs, room temperature is best
- 1 teaspoon vanilla extract
- 1 cup piping hot strong brewed coffee
For the Unique Mirror Glaze Finish
- 1/2 cup heavy cream
- 1 cup white chocolate chips
- 1/2 cup sweetened condensed milk
- 1/4 cup water (for blooming)
- 2 teaspoons gelatin powder (this is vital for the ‘mirror’)
- 1/2 cup granulated sugar
- 1/4 cup cocoa powder
- Black food coloring gel (a generous amount is needed for that deep black)
Step-by-Step Guide to Your Moist & Unique Chocolate Cake Design
This is where the magic happens, and I promise it’s easier than it looks! Remember, we are building a showstopper chocolate layer cake foundation here, so timing is everything. Don’t rush the cooling stage—that’s the key to a perfect application later on. If you want more prep advice on advanced techniques leading up to something like this, you might find some great pointers in my guide on chocolate meringue pie secrets; technique matters across the board!
Baking the High Quality Chocolate Sponge Recipe
First things first: preheat that oven to 350°F (175°C). Get your two 8-inch pans greased up really well and line those bottoms with parchment paper. Trust me, lifting a baked cake is tough enough without it sticking!
In a big bowl, you want to whisk together all the dry stuff: flour, sugar, that gorgeous dark cocoa, baking soda, baking powder, and salt. Whisk until it looks uniform. Next, pour in those wet ingredients—buttermilk, oil, eggs, and vanilla. Beat that on medium speed for two full minutes. That two-minute beat is important; it starts building the crumb structure we want.
Now, the crucial part for moisture: carefully pour in the piping hot coffee. Mix it on low speed just until everything comes together. The batter will be thin, almost soupy—don’t panic! That’s exactly what makes it so fudgy later. Divide it evenly and bake them for about 30 to 35 minutes. Stick a toothpick in the center; when it comes out clean, they’re done. Let them sit in the pans for just 10 minutes before carefully flipping them out onto a wire rack to cool completely.
Preparing the Architectural Chocolate Cake Base
While the cakes cool, you can start thinking about the glaze, but patience is key with the cake itself. Once they are totally cool—and I mean *totally* cool, not even slightly warm—you might need to level them off with a serrated knife just to get perfectly flat tops. Stack those layers up with a simple, thin layer of chocolate buttercream (just enough to stick them together, we call this a crumb coat). Wrap the whole thing snugly in plastic wrap and pop it into the freezer or fridge for at least 30 minutes. Chilling solid is non-negotiable for getting that smooth, reflective finish.
Mastering the Visually Stunning Chocolate Bake Glaze Application
This is where we go from ‘good cake’ to ‘wow cake’! Start the glaze by sprinkling your gelatin over the cold water and letting it sit for about five minutes—that’s blooming. In a saucepan, heat the cream, white chocolate chips, condensed milk, and the remaining sugar until everything is smooth and the chocolate has melted. Remember, we don’t want a boil here, just hot enough to combine.
Take it off the heat and stir in that bloomed gelatin till it vanishes completely. Now, whisk in the extra cocoa powder and your black food coloring gel until you have a deep, uniform black color. Run this mixture through a fine-mesh sieve—this step catches any sneaky lumps and ensures that glass-like finish. Let that glaze cool down to exactly 90°F (32°C). If it’s too hot, it will melt your chilled cake; too cool, and it won’t pour right.
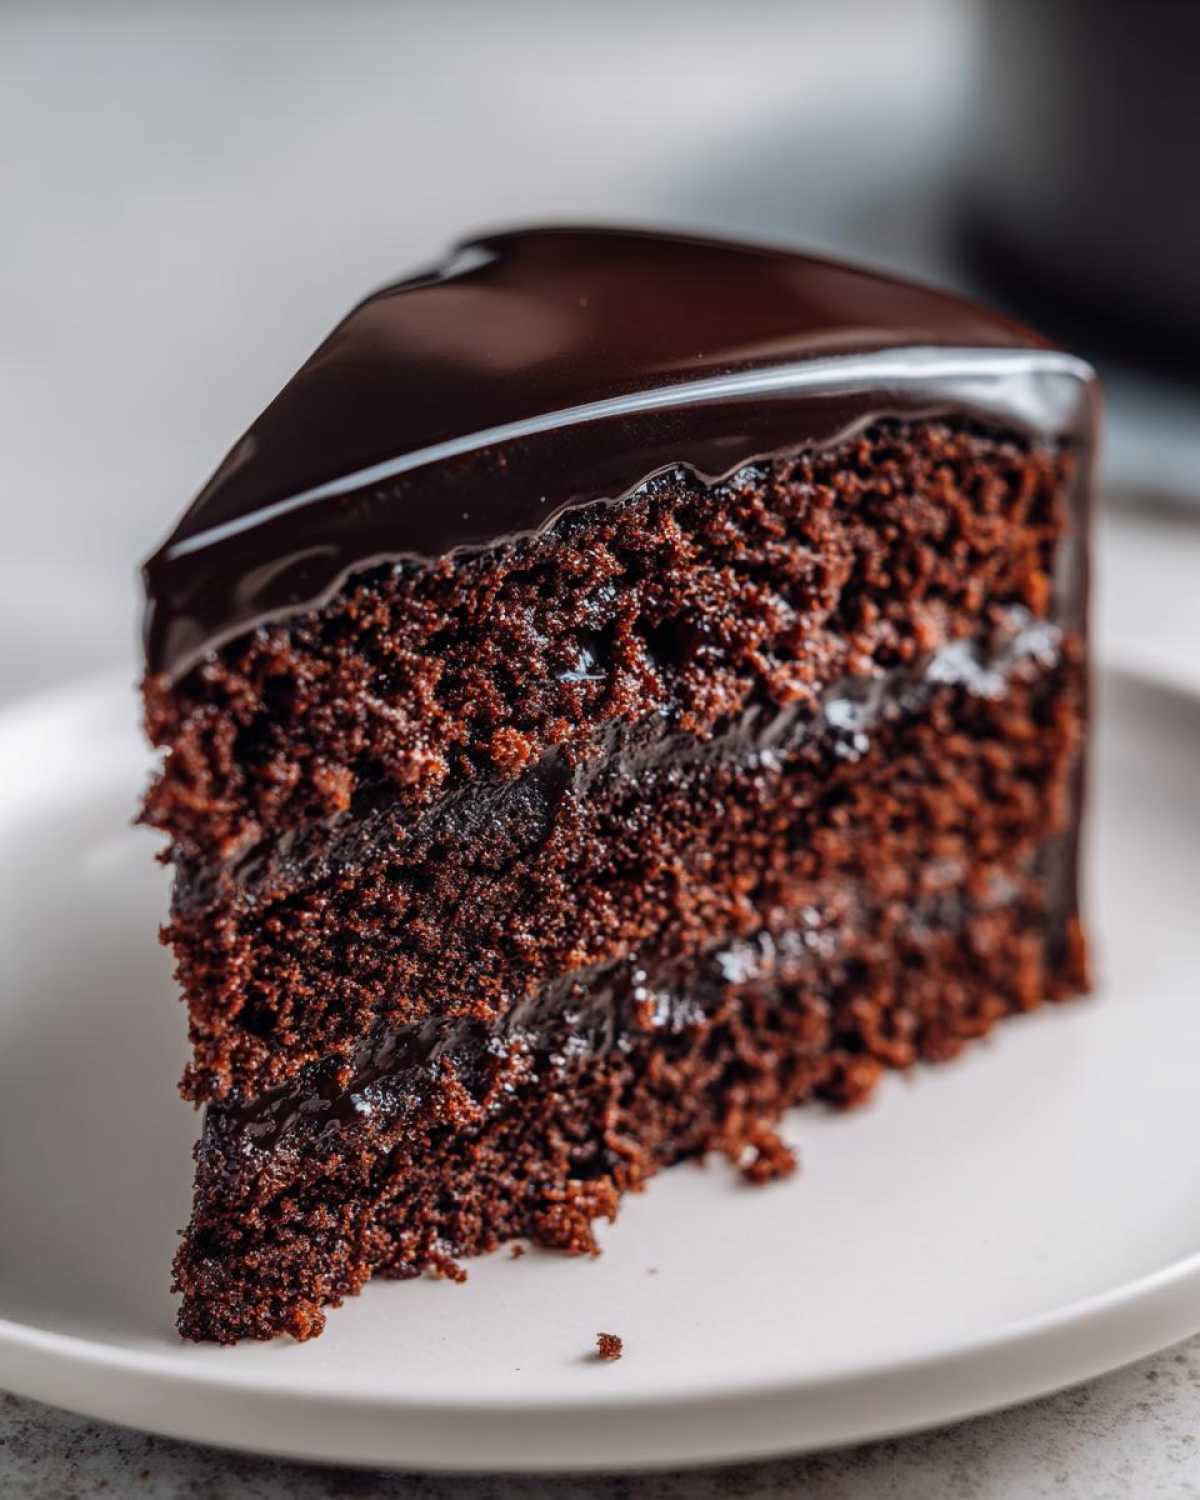
Place your cold, crumb-coated cake on a wire rack over a baking sheet (this catches all the glorious drips!). Pour that cooled glaze right over the center of the cake, letting it happily flow over the top and down the sides. Work quickly and gently! Let it sit for about 15 minutes to set up, and then, using a thin spatula, carefully slide it onto your fancy serving plate. Wow, what an elevated chocolate cake presentation!
Tips for a Showstopper Chocolate Layer Cake Success
Getting this cake this far is already an accomplishment, but we need to make sure it’s perfect, right? We’re aiming for a showstopper chocolate layer cake, not just a good cake. The biggest factor, honestly, is temperature control, especially when dealing with that gorgeous mirror glaze. If your cake isn’t thoroughly chilled before you pour, you’re going to end up with streaks, and nobody wants a messy masterpiece!
If you find your glaze is setting up too fast while you pour—maybe your kitchen is a little cool—gently warm the bowl of glaze in a larger bowl of warm (not hot!) water for just a minute. This reactivates the gelatin enough to let it flow smoothly. Conversely, if you see little air bubbles pop up on the surface after you pour, you can carefully use a toothpick or a small kitchen torch waved very quickly over the top to pop them. This helps achieve that perfect, velvety smooth chocolate cake look we’re after.
And while we’re talking moisture: never, ever skip the cooling time completely. If you cut into these layers too early, that beautiful steam rushes out, and you’re shrinking your future moisture retention! For extra insurance, wrap those cooled layers tightly in plastic wrap before you even think about the crumb coat. That seals in all the goodness from the hot coffee and buttermilk. For more tips on keeping things rich and buttery, you should definitely check out my secrets for a moist caramel cake recipe; the principles of keeping the fat and sugar happy applies everywhere!
Ingredient Spotlight: Why Dark Process Cocoa Matters for Moist & Unique Chocolate Cake Design
I know, I know, you just want chocolate cake, but stay with me for a quick second because this is the secret sauce for that unique chocolate cake design! Most recipes call for regular cocoa, but for this depth of color and flavor, we absolutely need dark processed, or Dutch-process, cocoa powder. It’s been treated to reduce acidity, which is a huge deal here.
Regular cocoa powder reacts strongly with baking soda, which gives immediate lift. But because we’re using both baking soda *and* baking powder in this recipe, the lower acidity of the Dutch-process powder ensures that our leavening agents aren’t fighting each other. This careful chemical reaction gives us a beautiful, even crumb structure that stays flat enough for glazing, while boosting the dark color we want for that dramatic visual effect.
This deep, almost black tone is what makes the final mirror glaze look so incredible and professional—it really sells the whole gourmet moist chocolate dessert vibe. It’s subtle but powerful, helping us achieve that visually stunning bake without changing the fundamentals we worked so hard on!
Storage and Reheating Instructions for Your Designer Chocolate Layer Cake
So you’ve made this absolute stunner of a cake—your designer chocolate layer cake is flawless! Now, let’s talk about keeping it perfect until serving time. Because we have that beautiful, delicate mirror glaze, refrigeration is a must. The high fat and sugar content in the glaze helps keep things stable in a cooler spot, but don’t just toss it unwrapped into the fridge door!
Covering it loosely with plastic wrap or a cake dome is important, but you have to be careful that the plastic doesn’t actually touch that shiny surface. If it does, you’ll end up with condensation streaks, and nobody wants to smudge that hard work! Store it like that on a flat shelf in the fridge for up to three days. It holds up surprisingly well thanks to that amazing buttermilk and oil base.
Now for the really important bit to maintain that melt-in-your-mouth texture. You cannot serve a mirror glaze cake straight from the fridge! It’ll taste cold and dense. About an hour before you plan to cut into it, take the whole cake out and let it sit on the counter, still loosely covered. This allows the cake to come up to room temperature, which wakes up all that incredible moisture and makes the crumb so soft. It truly brings back that beautiful, velvety smooth chocolate cake experience we fought so hard for! If you’re looking for something equally fudgy but easier to store (no glaze needed!), you might want to bookmark my easy homemade chocolate fudge recipe for later.
Serving Suggestions for Your Impressive Homemade Chocolate Cake
You’ve pulled off the impossible—a genuinely moist cake with a finish that looks like it came from a high-end pastry shop! Now, how do we present this beauty to truly emphasize that elevated chocolate cake presentation? Because the cake itself is so intensely rich and fudgy, you absolutely need something to cut through that deep, dark flavor. We need contrast!
My absolute favorite thing to serve alongside this is something bright and slightly tart. Think about a homemade raspberry coulis drizzled right alongside the slice on the plate—the acid from the berries just sings next to the sweet richness of the dark chocolate. It looks incredible next to that black, reflective glaze, too!
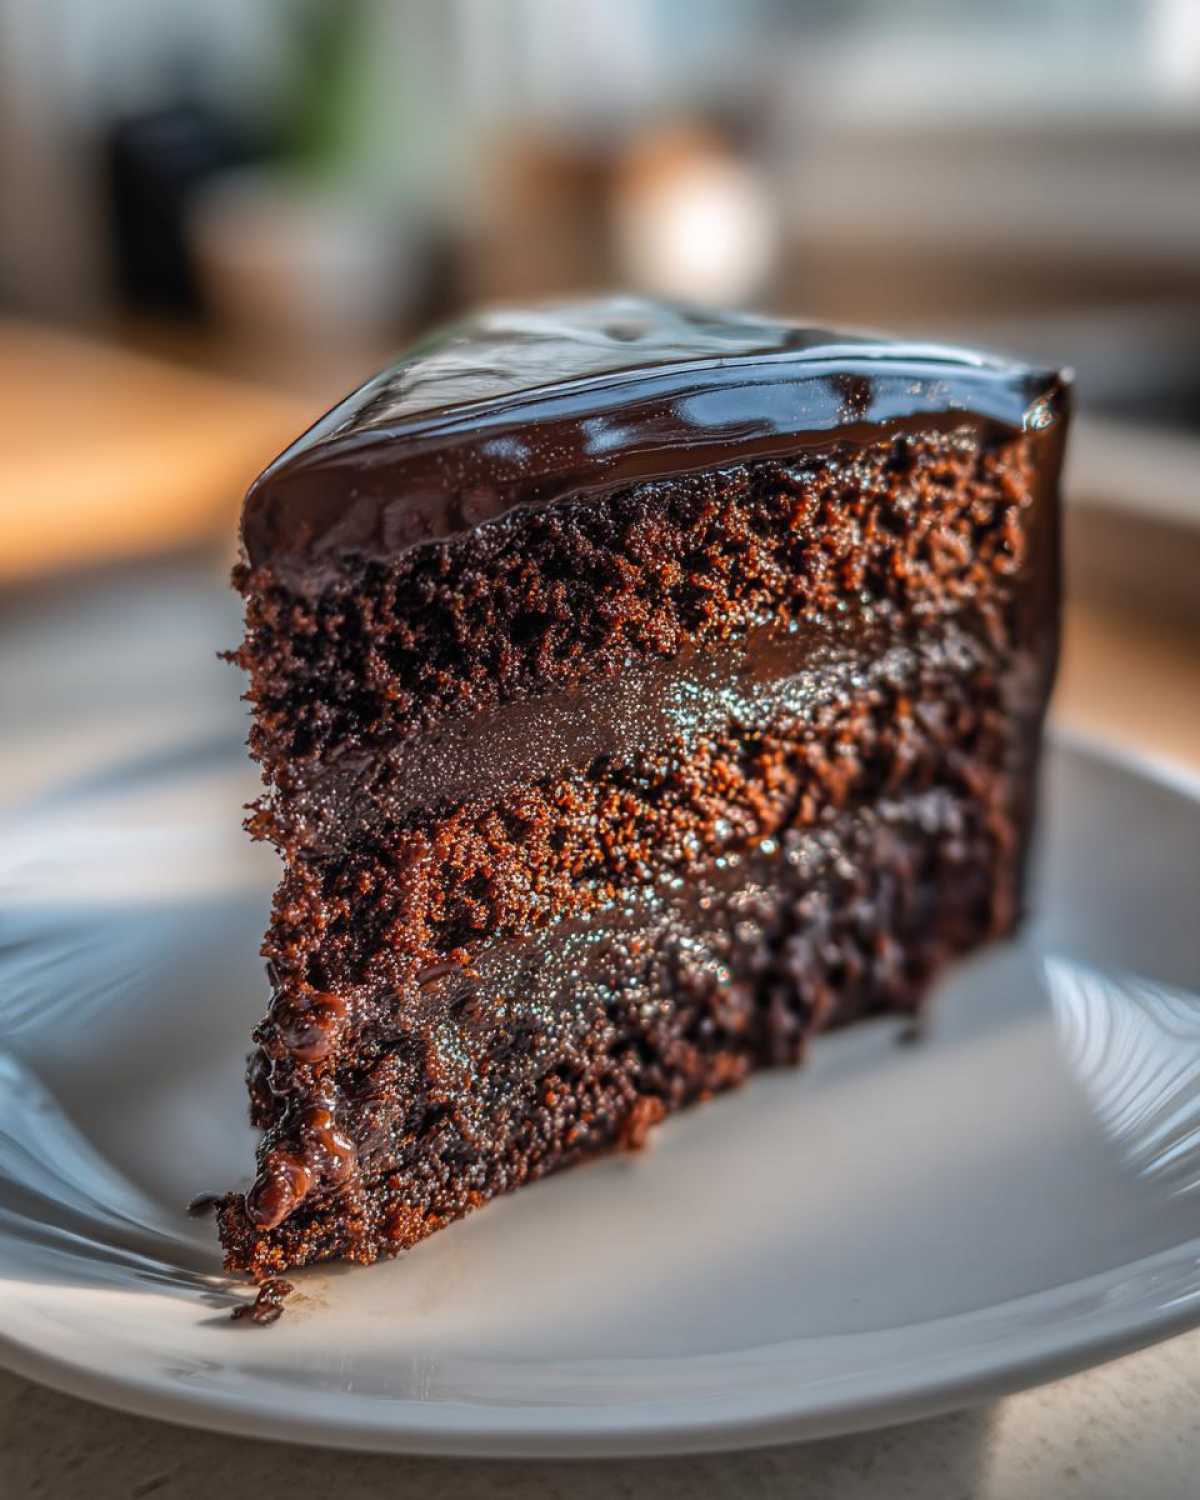
If you want a creamy element, avoid heavy whipped cream. Instead, go for a slightly tangy crème fraîche or maybe even a scoop of vanilla bean gelato that’s just starting to melt. The temperature contrast between the slightly warmed cake (remember to let it sit out!) and the cold ice cream is heaven. For something that feels a little more approachable but still fancy, try serving it with thinly sliced, fresh orange segments. The citrus notes really play well with the bitter cocoa. If you’re serving something lighter for parties, you might want to check out my recipe for chocolate dip with creamy fruit—a totally different vibe, but just as satisfying!
Frequently Asked Questions About This Moist & Unique Chocolate Cake Design
I know you’re excited to get baking, but sometimes those little details trip us up, right? That’s totally normal when you’re attempting something as fancy as this architectural chocolate cake! Don’t stress; I’ve gathered the answers to the things I get asked about most often when people tackle this gorgeous bake.
Can I skip the mirror glaze and use standard frosting for this Moist & Unique Chocolate Cake Design?
Yes, you absolutely *can* skip the mirror glaze, but then we lose the ‘unique design’ factor that makes this recipe so special! If you aren’t ready for the glaze, I strongly suggest making a simple chocolate ganache instead. You just heat heavy cream and pour it over high-quality chopped chocolate. Let it sit for 5 minutes, whisk until smooth, and then let it cool slightly until it’s spreadable. Ganache will still give you a lovely, rich coating without the fuss of gelatin, though it won’t be nearly as reflective or smooth. It keeps the cake supremely moist, though!
How do I guarantee a rich fudgy interior cake texture?
This is the million-dollar question! To guarantee that rich fudgy interior, you need two things, and frankly, you can’t compromise on them. First, use the buttermilk and the hot coffee—they create the perfect acidic balance with the baking agents to keep the crumb tender, not tough. Second, and this is massive, *do not overbake it*. Seriously, pull the cakes out right when the toothpick comes out with moist, clinging crumbs, not dry ones. A tiny bit of visible wetness is actually perfect because the cake continues to cook a tiny bit on the rack. That’s how we secure the best texture for this best moist chocolate cake recipe.
If you’re looking through my tips and still have other baking questions, feel free to browse around my main blog archive; sometimes seeing other recipe techniques helps unlock the answer for this one!
Recipe Metrics and Yield for This Gourmet Moist Chocolate Dessert
Okay, I know looking at a recipe with a mirror glaze can feel intimidating, and you might be thinking this is going to take up your entire weekend, but it honestly doesn’t! I designed this to be manageable for a dedicated home baker, even with the glazing steps involved. Think of the time spent chilling the cake as downtime where you can clean up or just admire your work!
When you plan your bake, keep these timings in mind. You’ll see why I call this an amazing gourmet moist chocolate dessert—it packs a huge flavor punch for the effort.
Here are the essential logistics you need for planning:
- Prep Time: About 45 minutes. This covers your mixing, getting the pans ready, and preparing the glaze ingredients.
- Cook Time: Roughly 35 minutes for the actual baking of the two layers.
- Total Time: Including the necessary cooling and the glaze chilling/setting time, plan for about 1 hour and 55 minutes active and inactive time.
- Yield: This recipe is perfect for 10 generous servings, or maybe 12 if you’re serving smaller slices after dinner.
If you want to try another beautifully layered bake that is surprisingly fast once you have the technique down, check out my recipe for easy eclair cake; sometimes keeping timings simple really helps the process!
Share Your Visually Stunning Chocolate Bake Experience
Alright, my friend, you’ve done it! You’ve tamed the temperamental mirror glaze, you’ve celebrated the depth of that incredibly moist chocolate cake, and now you have this absolutely jaw-dropping creation sitting on your counter. I seriously want to see it!
This whole process, taking a simple cake and turning it into something so visually stunning, is such a rewarding feeling. Once you’ve cut that first slice and everyone gasps at how fudgy it is, I want to hear about it! Don’t keep this beauty to yourself.
Please snap a picture of your finished unique chocolate cake design! Tag me on social media so I can cheer you on. I love seeing how you’ve made this recipe your own, whether you stuck exactly to the black mirror glaze or maybe added your own flair with edible gold dust or something else!
And if you loved this recipe—if it finally vanquished the dry cake goblin from your kitchen—please leave a rating right down below. Your feedback helps other bakers feel confident enough to try this showstopper! If you’re already looking for your next project, you can browse my other favorite bakes, like this fun cookie cake recipe, but I have a feeling this dark, dramatic number is going to be your new favorite standby.
PrintArchitectural Dark Chocolate Cake with Mirror Glaze
This recipe yields a deeply dark, intensely moist chocolate cake featuring a rich, fudgy interior, topped with a modern, reflective mirror glaze for a unique presentation.
- Prep Time: 45 min
- Cook Time: 35 min
- Total Time: 1 hour 55 min
- Yield: 10 servings
- Category: Dessert
- Method: Baking and Glazing
- Cuisine: American
- Diet: Vegetarian
Ingredients
- 2 cups all-purpose flour
- 2 cups granulated sugar
- 3/4 cup unsweetened cocoa powder, dark processed
- 2 teaspoons baking soda
- 1 teaspoon baking powder
- 1 teaspoon salt
- 1 cup buttermilk
- 1/2 cup vegetable oil
- 2 large eggs
- 1 teaspoon vanilla extract
- 1 cup hot strong brewed coffee
- 1/2 cup heavy cream (for glaze)
- 1 cup white chocolate chips (for glaze)
- 1/2 cup sweetened condensed milk (for glaze)
- 1/4 cup water (for glaze)
- 2 teaspoons gelatin powder (for glaze)
- 1/2 cup granulated sugar (for glaze)
- 1/4 cup cocoa powder (for glaze)
- Black food coloring gel (for glaze)
Instructions
- Preheat your oven to 350°F (175°C). Grease and line two 8-inch round cake pans with parchment paper.
- In a large bowl, whisk together the flour, sugar, cocoa powder, baking soda, baking powder, and salt.
- Add the buttermilk, oil, eggs, and vanilla extract to the dry ingredients. Beat with an electric mixer on medium speed for two minutes.
- Carefully pour in the hot coffee and mix on low speed until just combined. The batter will be thin.
- Divide the batter evenly between the prepared pans. Bake for 30 to 35 minutes, or until a wooden pick inserted into the center comes out clean.
- Let the cakes cool in the pans for 10 minutes before inverting them onto a wire rack to cool completely.
- Prepare the mirror glaze: Sprinkle gelatin over the cold water in a small bowl and let it bloom for 5 minutes.
- In a saucepan, combine the heavy cream, white chocolate chips, condensed milk, and 1/2 cup sugar. Heat over medium heat, stirring until the chocolate is melted and the mixture is smooth. Do not boil.
- Remove the mixture from the heat. Stir in the bloomed gelatin until fully dissolved. Whisk in the 1/4 cup cocoa powder and black food coloring gel until the glaze is a deep, uniform black.
- Strain the glaze through a fine-mesh sieve to remove any lumps. Let the glaze cool to 90°F (32°C) before pouring.
- Once the cakes are completely cool, level the tops if necessary. Stack and frost the layers with a thin layer of chocolate buttercream (not included in main ingredients list) to create a crumb coat. Chill for 30 minutes.
- Place the chilled cake on a wire rack set over a baking sheet. Pour the cooled mirror glaze evenly over the top of the cake, allowing it to drip down the sides for a smooth, reflective finish.
- Allow the glaze to set for 15 minutes before carefully transferring the cake to a serving plate.
Notes
- For the moistest result, use dark processed (Dutch-process) cocoa powder.
- The coffee intensifies the chocolate flavor without making the cake taste like coffee.
- Chill the cake thoroughly before applying the mirror glaze; this helps the glaze set quickly and evenly.
- If you want sharp edges, use a cake collar or acetate strip around the cake before pouring the glaze.
Nutrition
- Serving Size: 1 slice
- Calories: 450
- Sugar: 55g
- Sodium: 320mg
- Fat: 24g
- Saturated Fat: 14g
- Unsaturated Fat: 10g
- Trans Fat: 0.5g
- Carbohydrates: 60g
- Fiber: 3g
- Protein: 6g
- Cholesterol: 75mg
