

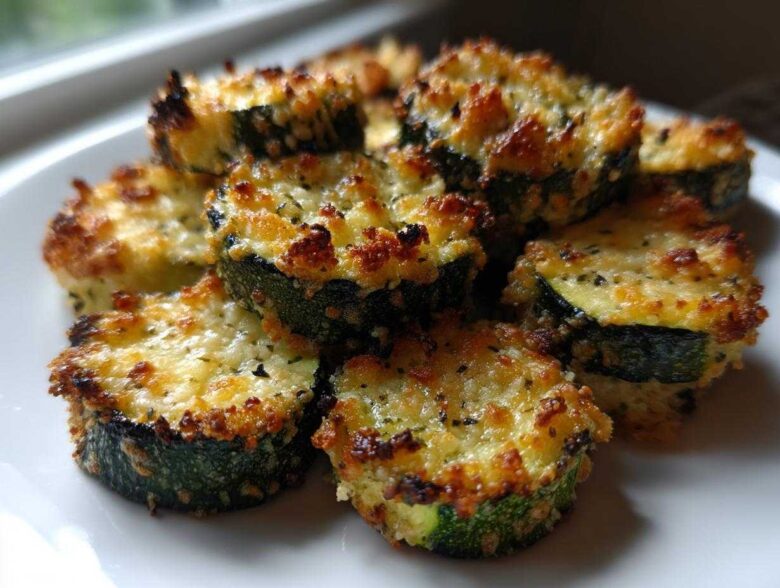
Oh, I know the struggle! You load up a sheet pan with vegetable slices, you pray to the kitchen gods, and what do you pull out? A sad, steamed, watery mess. It’s the veggie betrayal we all know too well! But listen, I’ve cracked the code, and I’m so excited to share my ultimate secret for truly ovencrisped zucchini slices that taste almost like they came out of a fryer. It’s all about getting the water out first, trust me. Once you master this one trick, you’ll never settle for soggy side dishes again. Making crunchy zucchini in the oven is faster and way less oily than frying, and these Parmesan-dusted gems are ridiculously addictive. Get ready for the crunch!
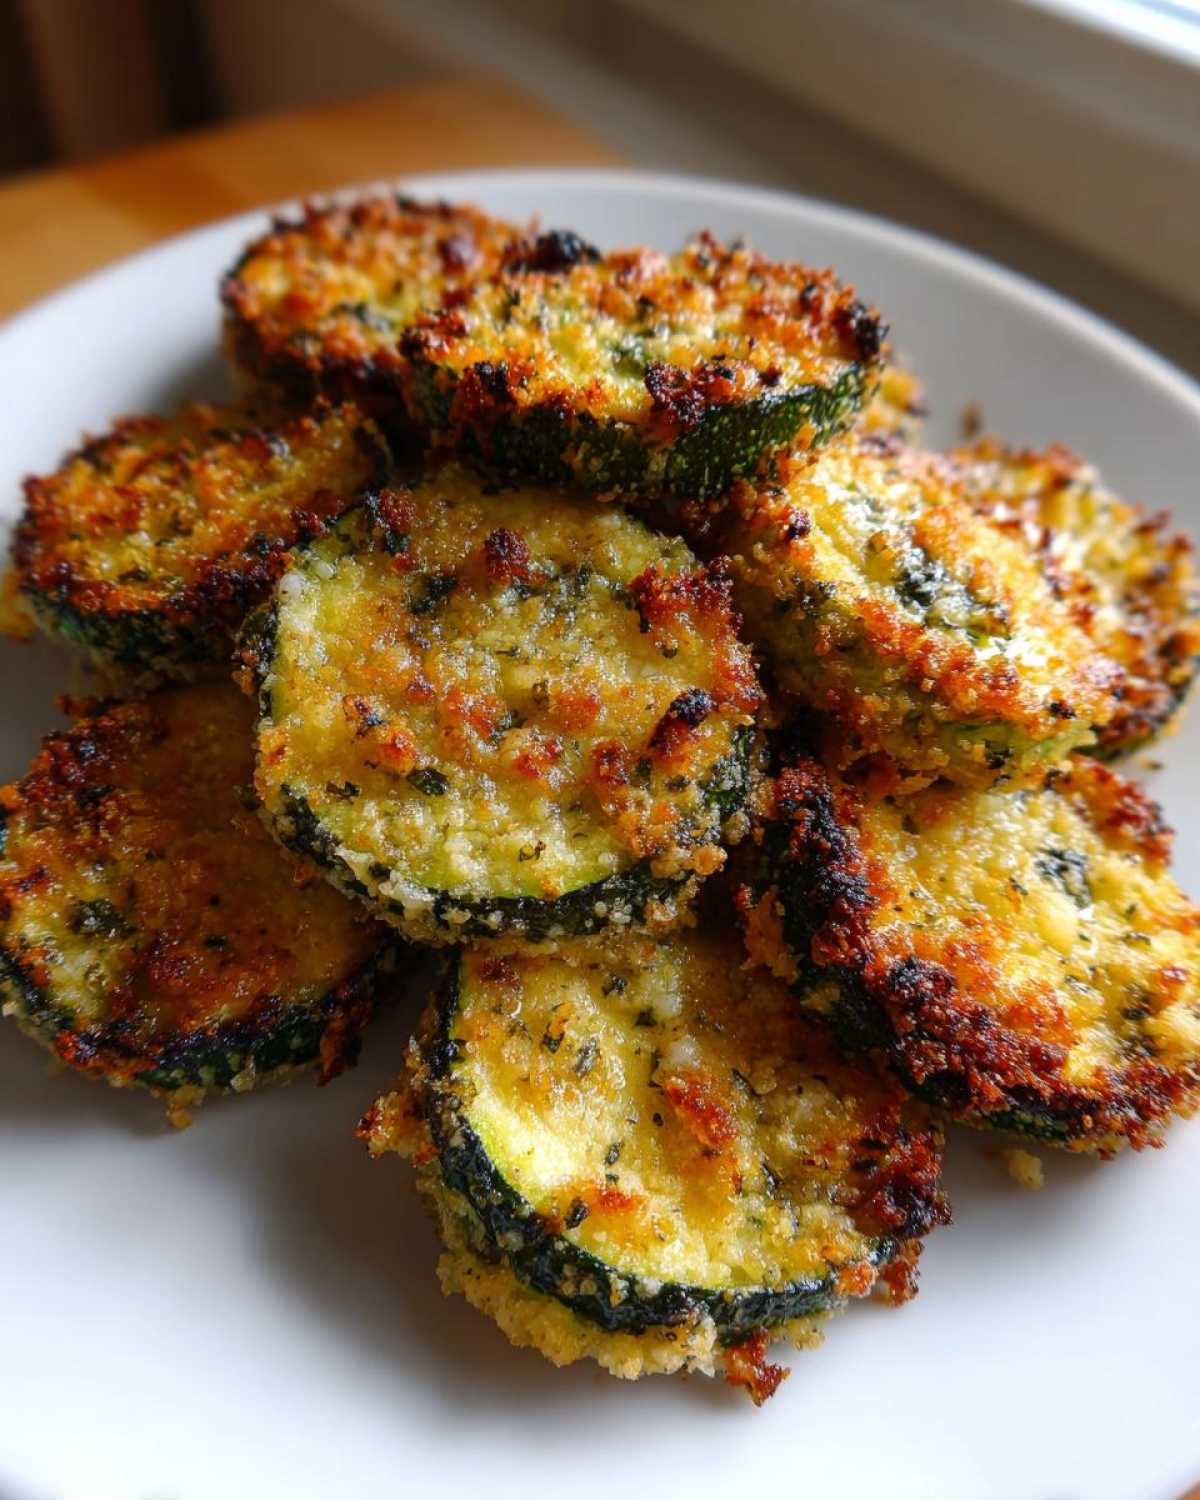
Why You Need This Recipe for ovencrisped zucchini slices
If you’re tired of zucchini releasing all its liquid and turning your beautiful baking sheet into a swamp, this is your salvation! This method fundamentally prevents that watery outcome. It’s simple, but it works every single time.
- You get an intensely satisfying crunch that rivals deep frying.
- The high heat creates a beautiful, golden brown exterior without excess oil.
- It’s a healthy way to satisfy that craving for something crispy without breaking out the fryer, check out our baked zucchini fries recipe for another great option!
Essential Ingredients for Perfect ovencrisped zucchini slices
Okay, the ingredient list for these crispy beauties is super short, which is what I love about quick weeknight sides! But wow, that salt is doing some heavy lifting here. Don’t skip our pre-salting ritual; that’s 90% of how we beat the dreaded soggy monster. You’ll need three medium zucchini, cut precisely into rounds about 1/4 inch thick. Yes, measuring matters if you want even cooking!
Then we dredge them gently in a mix of flour, pepper, and garlic powder. That little bit of flour helps the oil stick, which in turn helps the Parmesan crisp up in the heat. Speaking of cheese, grating your own Parmesan is a non-negotiable for me; the pre-shredded stuff just doesn’t melt and crisp right. For a super easy flavor booster, check out my Garlic Parmesan Zucchini Fries recipe!
Step-by-Step Instructions to Make ovencrisped zucchini slices
This is where the magic starts—and where we wage total war on sogginess! You have to follow these steps exactly, especially the waiting part. Don’t try to rush the zucchini while it’s resting; that’s its spa treatment before the oven torture! Head over to Baked Parmesan Zucchini for a slight variation if you’re feeling adventurous, but for crispness, stick to this plan.
Preparation and Moisture Removal for ovencrisped zucchini slices
First things first: Slice those zucchini rounds evenly, aiming for about 1/4 inch thick. Any thinner and they burn; any thicker and they steam! Now, the vital step: toss those slices with a tablespoon of salt and let them chill out in a colander for 20 minutes. Seriously, 20 minutes! You’ll see water pooling below, and that’s evidence of your success. Once the time is up, grab a huge stack of paper towels—or better yet, a clean kitchen towel—and blot every single slice completely dry. I mean bone dry! They must not be damp at all if you want that oven roasted zucchini not soggy result.
Coating and Baking for Golden Brown ovencrisped zucchini slices
Now that they are dry, toss them with just enough olive oil to coat them lightly. In another dish, mix your flour, pepper, and garlic powder. Dredge each oiled slice lightly in that dry mix, shaking off the extra flour—we want coating, not a thick crust! Arrange them on parchment-lined sheets in a single layer. Do not let them touch; they need space to breathe and crisp up. Finally, sprinkle the Parmesan cheese over the top of everything. Pop these babies into a screaming hot 425°F oven for 15 minutes, flip them carefully, and bake for another 5 to 10 minutes until they look perfectly golden brown oven zucchini. That high heat is what truly tells you how to make crunchy zucchini in oven!
Expert Tips for the Best oven roasted zucchini not soggy Results
Okay, you’ve salted and dried like a pro, but let’s talk about airflow—this is the secret sauce for anyone asking how to make crunchy zucchini in oven. The biggest enemy besides moisture is steam escaping from the zucchini getting trapped underneath the slices. We want that steam to escape immediately!
So, my absolute favorite trick, if you plan on making these often, is to use a wire rack set directly on top of your baking sheet. This allows air to circulate all the way around the slice, heating it from the bottom as well as the top. If you don’t have a rack, promise me you’ll flip them exactly halfway through.
And please, please, please, serve these right away! As they cool on the counter, they will naturally start to soften up again, even if they were perfectly crisp when they came out. They are best eaten hot! For more great zucchini recipes for crisp texture, definitely check out the guide over here.
Ingredient Notes and Substitutions for ovencrisped zucchini slices
I get asked all the time about changing up the dredge mix. If you’re trying to make these a low carb crispy vegetable oven treat, you absolutely can swap out the standard flour! Almond flour or even crushed pork rinds (if you aren’t strictly vegetarian) work wonders as a coating instead of all-purpose flour. It changes the texture slightly—a bit more crumbly—but it gets wonderfully crisp.
What if Parmesan isn’t your jam? Well, that’s a tragedy, but we can work around it! If you skip the Parmesan, you will definitely miss out on that salty, savory crust that really helps hold the structure. To compensate for flavor, boost your garlic powder and add a little extra black pepper or even some dried oregano to the flour mix. If you skip the flour entirely and just use oil and Parmesan, you’ve got to use something like my friend’s technique for quick veggie side dishes, but I promise the flour really helps them hold together!
Whole wheat flour is okay, but it’s denser, so it might absorb more oil and potentially lead to a slightly heavier slice rather than a super light, airy crisp. If you use it, just be extra meticulous when shaking off the excess after dredging. Remember, every little bit of extra coating means more things sitting on the pan that could cause steaming instead of crisping!
Serving Suggestions for this simple zucchini side dish oven recipe
Because these ovencrisped zucchini slices are packed with salty Parmesan and garlic, they go with almost anything, but in my opinion, they shine brightest next to lean proteins. Since they are so quick to make, they’re perfect for last-minute additions to a weeknight setup!
Seriously, the number one rule is to serve them straight from the oven! If you wait even five minutes, that incredible texture starts to soften just a touch—and we worked too hard on the salting and the high heat for that to happen!
I love pairing these crispy rounds with simple grilled chicken or baked salmon. The rich, subtle flavor of the fish holds up perfectly against that garlicky crunch. They also make a fantastic companion to spaghetti and meatballs, especially if you want to skip the heavier garlic bread. Think of them like incredibly flavorful, healthier chips for dipping!

For a full veggie spread, these slices are a beautiful textural component next to creamy dishes, like mashed sweet potatoes or a light quinoa salad. If you need more inspiration for quick ways to bulk up your meal plan, you have to check out my list of easy weeknight vegetable sides. These zucchini coins are definitely topping that list right now!
Storage and Reheating Instructions for ovencrisped zucchini slices
This is the tough part, you guys. These ovencrisped zucchini slices? They are purely a moment-in-time food. They are meant to be eaten hot, right off the tray, when that gorgeous Parmesan crust is perfectly brittle. I won’t lie to you—refrigeration is the enemy of crispness. Once those salty little guys cool down completely and sit in the fridge, they absorb ambient moisture, and they get soft again. It’s science, and it’s sad.
If you absolutely have leftovers—maybe you successfully hid a few slices from your family (smart move!)—the refrigerator is the only short-term spot. Pop them in an airtight container, but know that when you pull them out the next day, they are going to feel more like tender zucchini rounds than chips.
But don’t toss them! We can resurrect them. Since we’re dedicated to the no fry zucchini recipe lifestyle, we bring them back to life in the oven, not the microwave. A microwave just steams them instantly, turning them back into mush. Instead, spread them out on a parchment-lined cookie sheet, just like you did the first time.
Crank your oven back up to about 375°F. You just need a quick blast—maybe 5 to 8 minutes. Keep an eye on them, though, because that Parmesan crust will go from crispy to burnt pretty fast! The goal is just to heat them through and dry out the surface tension that happened in the fridge. They won’t be *exactly* as perfect as the first bake, but they’ll be crispy enough to be totally satisfying. If you need ideas to use up extra zucchini in ways that *don’t* require crispness, check out my guide on quick veggie side dishes!
Frequently Asked Questions About ovencrisped zucchini slices
Can I use baking powder instead of flour for crispiness?
That’s a smart question if you’re trying to cut down on carbs! Baking powder definitely helps achieve crispness in some fried coatings, but for this specific dredging process, I really push the standard flour. The flour mixed with the oil creates a slightly pasty “glue” that adheres the Parmesan cheese firmly to the zucchini surface. Baking powder alone tends to puff up and then collapse, especially after moisture is added, which can leave you with a slightly dusty, less cohesive crust. If you are looking for a true air fryer zucchini slice alternative, baking powder can work better in dry-style coatings, but here, the flour is your friend for sticking power!
What is the ideal temperature to bake zucchini slices to avoid sogginess?
If you want truly ovencrisped zucchini slices, you need high heat, period. I’m talking no less than 425°F! If you choose anything lower, like 375°F, the heat doesn’t jump high enough quickly enough to evaporate the moisture the zucchini releases. Instead, the zucchini just sits there, steaming slowly in its own liquid, and you end up with that soggy mess we are desperately trying to avoid. That high heat immediately starts caramelizing the flour and Parmesan, locking in flavor before the water has a chance to ruin the texture. You want that fast, intense blast!
Can I make these healthy baked zucchini chips ahead of time?
You can prep ahead, which always helps on a busy night, but you cannot successfully bake them ahead of time if you want that perfect *crunch*. I would recommend doing the slicing and the full 20-minute salting/patting process hours early, keeping the dried slices covered in the fridge. When you’re ready to eat, toss them with the oil, dredge them, coat them with Parmesan, and bake them immediately. The moment they cool down completely after baking, they start losing that beautiful, airy crispness. For the best experience, these healthy baked zucchini chips must hit your plate piping hot!
Estimated Nutritional Data for Garlic Parmesan Oven Zucchini
If you’re counting macros or just curious about what you’re eating alongside your main course, here’s the rough breakdown for one serving of these wonderful garlic Parmesan zucchini slices. Remember, because we’re not deep-frying these, the fat content is quite low, making this a fantastic simple zucchini side dish oven option!
Please keep in mind these are just estimates based on the ingredients listed. If you use extra oil or a different type of cheese, the numbers will shift a bit. I calculated this based on 4 equal servings from the batch.
| Nutrient | Per Serving |
|---|---|
| Calories | 145 |
| Fat | 8g |
| Saturated Fat | 3g |
| Carbohydrates | 15g |
| Fiber | 3g |
| Protein | 6g |
| Sodium | 580mg |
See? Pretty great for something this satisfyingly crunchy! It fits right into any healthy eating plan. Enjoy!
PrintOven-Crisped Parmesan Zucchini Slices
A simple recipe for baking zucchini slices until they are golden brown and crispy, avoiding a soggy texture.
- Prep Time: 25 min
- Cook Time: 20 min
- Total Time: 45 min
- Yield: 4 servings
- Category: Side Dish
- Method: Baking
- Cuisine: American
- Diet: Vegetarian
Ingredients
- 3 medium zucchini
- 1 tablespoon salt
- 1/2 cup all-purpose flour
- 1/2 teaspoon black pepper
- 1/4 teaspoon garlic powder
- 1/2 cup grated Parmesan cheese
- 2 tablespoons olive oil
Instructions
- Preheat your oven to 425 degrees Fahrenheit. Line two large baking sheets with parchment paper.
- Slice the zucchini into rounds about 1/4 inch thick.
- Place the zucchini slices in a colander and sprinkle with the salt. Let them sit for 20 minutes to draw out excess moisture. Pat the slices completely dry with paper towels. This step is important for crispiness.
- In a shallow dish, whisk together the flour, pepper, and garlic powder.
- In a separate bowl, toss the dried zucchini slices with the olive oil until lightly coated.
- Dredge each oiled zucchini slice in the flour mixture, shaking off any excess.
- Place the coated slices in a single layer on the prepared baking sheets. Do not overlap them.
- Sprinkle the grated Parmesan cheese evenly over the tops of the zucchini slices.
- Bake for 15 to 20 minutes, flipping the slices halfway through, until they are golden brown and crisp.
Notes
- For extra crispiness, you can lightly spray the tops of the zucchini with cooking spray before adding the Parmesan.
- Use a wire rack set inside the baking sheet if you want air circulation underneath the slices for even crisping.
- Serve immediately after removing from the oven for the best texture.
Nutrition
- Serving Size: 1 serving
- Calories: 145
- Sugar: 3
- Sodium: 580
- Fat: 8
- Saturated Fat: 3
- Unsaturated Fat: 5
- Trans Fat: 0
- Carbohydrates: 15
- Fiber: 3
- Protein: 6
- Cholesterol: 10
