

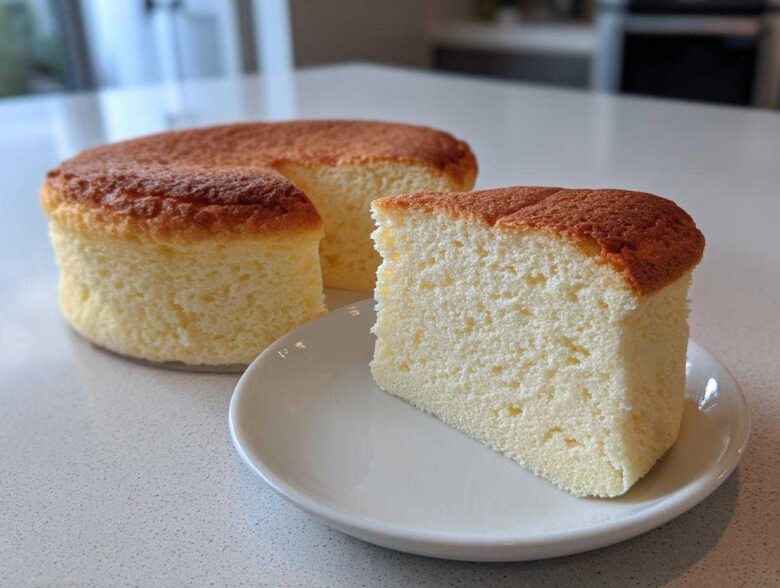
Oh my gosh, I remember the first time I tried to make one of these—it looked like a collapsed pancake! But don’t you worry one bit, because I’ve cracked the code! We are talking about achieving that legendary, almost unbelievable, jiggly texture that makes the Japanese Cotton Cheesecake famous. Forget dense, heavy desserts; this recipe is all about air and dreaminess. I’m sharing my absolute best guide for making a truly soft and fluffy japanese cotton cheesecake. Seriously, the secret weapon here is treating the egg whites like fragile little clouds. Once you nail that meringue folding technique, you’ll pull this light and airy dessert out of the oven and think you’ve invented magic! If you want to dive deeper into other baking adventures, check out my full archive here at Savory Skies.
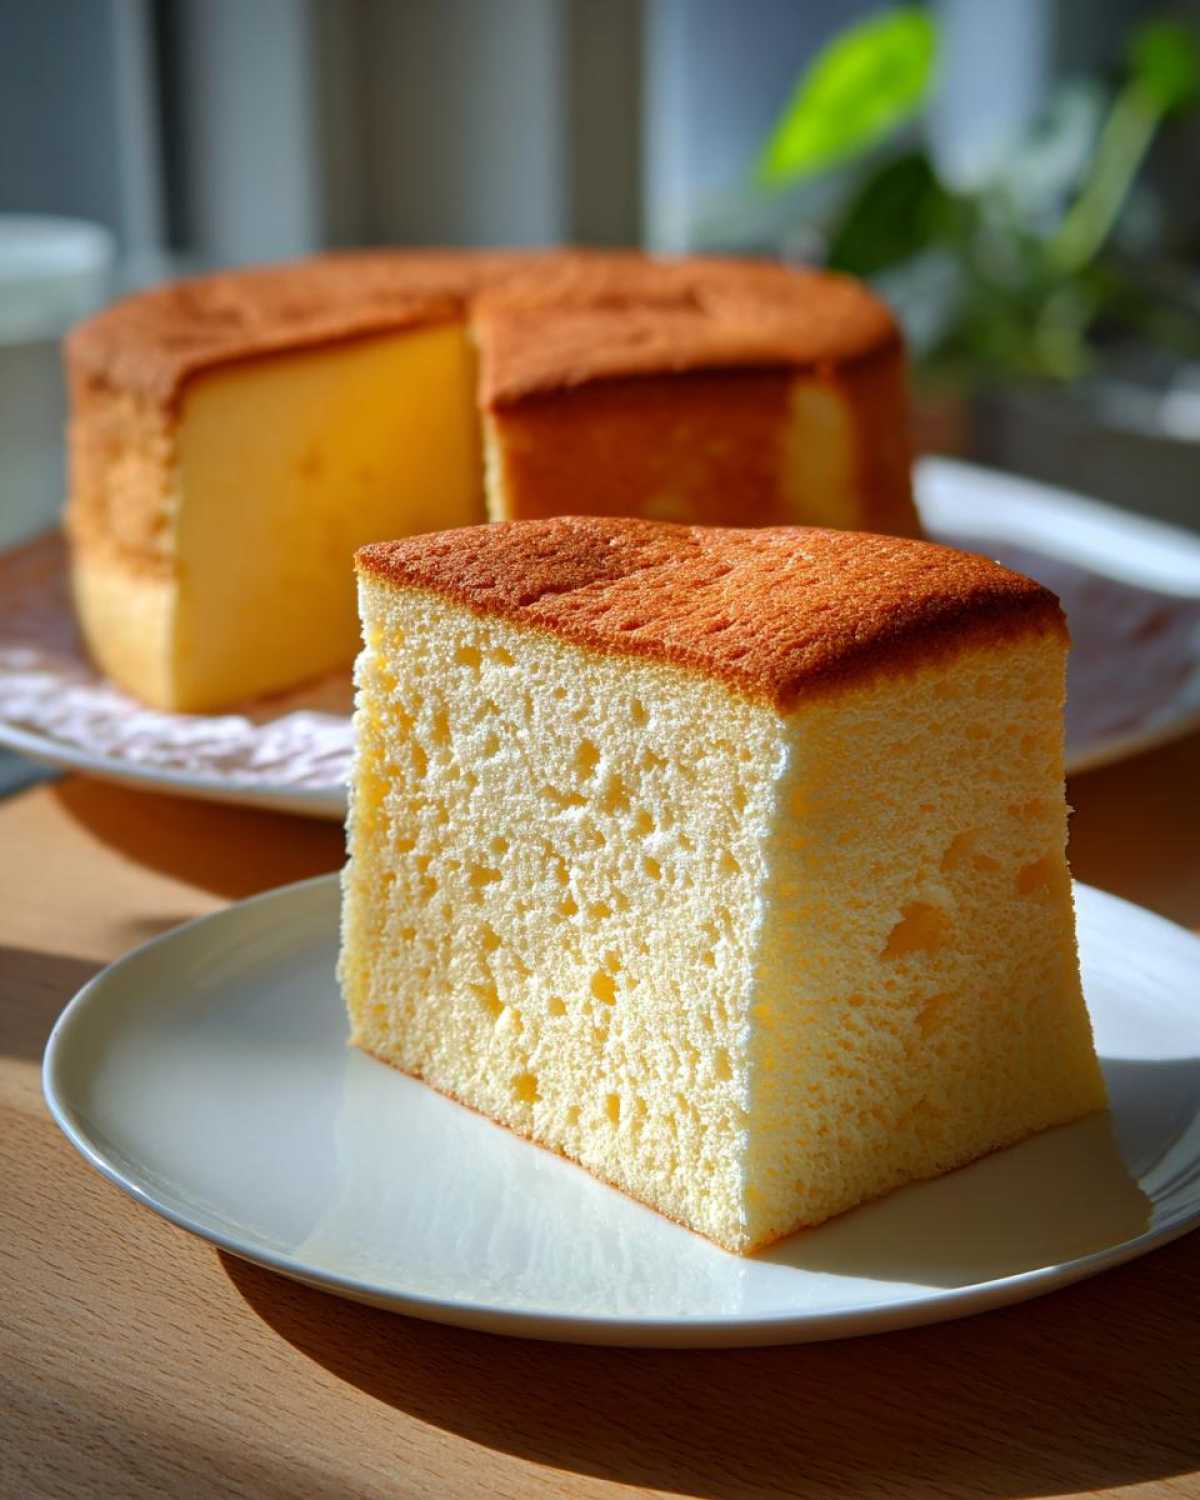
Why This is the Best Soft and Fluffy Japanese Cotton Cheesecake Recipe
This recipe isn’t just another cheesecake; it’s the roadmap to the cloud-like dessert you’ve been dreaming about! I’ve tested so many versions that ended up dense or cracked, but this specific method eliminates those headaches. We are aiming for that signature ‘jiggle’ that proves you nailed it.
- No cracked tops! We manage the heat perfectly so the surface stays smooth.
- Guaranteed light texture—you won’t feel weighed down after one slice.
- It holds its shape beautifully after cooling, unlike some recipes that just deflate into puddles!
We achieve that incredible result because we treat this cake like a delicate soufflé. You can find some of my other light baking successes when you check out my fluffy pancake guide, but here, the technique is everything!
Achieving True Souffle Cheesecake Texture
The reason this cheesecake is so light is twofold: it relies almost entirely on perfectly whipped egg whites for its rise, and we bake it gently using a water bath. That bath keeps the environment humid and ensures the heat rises slowly and evenly around the delicate batter. That’s the secret to a true souffle cheesecake!
Essential Ingredients for Soft and Fluffy Japanese Cotton Cheesecake
Okay, for this cake, we don’t mess around with substitutions, especially on the dry goods. Since we are aiming for maximum fluffiness, every little bit of measurement matters. I’ve listed out exactly what you need below, and trust me, weigh your ingredients if you can—it makes such a difference when dealing with something this delicate, like my chocolate meringue pie recipe. These ratios create that signature lightness!
- 6 large egg yolks
- 60 ml whole milk
- 40 g unsalted butter
- 40 g cake flour
- 20 g cornstarch
- 6 large egg whites
- 1/4 tsp cream of tartar
- 100 g granulated sugar
- 1 tsp lemon juice
Ingredient Notes and Substitutions
Let’s talk flour first. You absolutely MUST use cake flour here. All-purpose flour has too much protein, which develops too much gluten when mixed, and that will make your beautiful cloud cake turn into a heavy sponge. Cake flour keeps things super tender!
Also, when it comes to the eggs—YOLKS AND WHITES SEPARATE! Get those six whites into a totally clean, grease-free bowl. The temperature is key for the meringue volume. Make sure those six eggs are at room temperature before you start whipping; cold whites just won’t whip up to the stiff, glossy peaks we need to hold all that air. If you skip the cream of tartar, your meringue might weep later on, so don’t leave it out!
The Cotton Cheesecake Technique: Step-by-Step Instructions
Alright, this is where the magic happens, and frankly, where most people get nervous! Don’t be afraid of these steps; think of it like following a really detailed map to dessert nirvana. We move carefully through the yolk batter, build that meringue sky-high, and then treat the whole thing like a baby in a warm bath. If you’ve ever tried to make an angel food cake, some of these folding concepts—which you can review more about here—will feel familiar. Precision is our friend here, especially when cooking, so make sure you’re ready before you mix!
Preparing the Pan and Water Bath for Your Fluffy Baked Cheesecake
First things first: pan prep! You need a 7-inch springform pan, and you have to go heavy-duty on the waterproofing. I use at least three layers of thick aluminum foil wrapped securely around the bottom and sides. If even a single drop of water gets in there, the bottom will get soggy and the cake won’t set right. Trust me on triple-wrapping! Line the bottom and sides with parchment paper first. Then, when you set this wrapped pan inside a larger roasting pan, you’ll pour in hot water until it’s about an inch high up the side. This water bath is non-negotiable; it creates that steamy, humid environment we need so the cake cooks gently instead of burning on the edges.
Mastering the Meringue for the Soft and Fluffy Japanese Cotton Cheesecake
This is the moment of truth for aeration! Get those room temperature egg whites, cream of tartar, and lemon juice going. Start whipping. When it gets foamy, slowly stream in your sugar. You want stiff, glossy peaks. I mean it—when you pull the whisk out, the peak shouldn’t flop over! If you stop too soon, the cake will sink immediately because the structure isn’t strong enough. If you over-whip them until they look dry and clumpy, they won’t fold nicely into the batter and you’ll get chunks. A tiny sprinkle of grease in that bowl is the enemy of stiff peaks, so make sure everything is spotless!
Folding the Batter: The Key to a Light and Airy Dessert
Once your yolk mixture (which should be velvety smooth after sifting the flour/starch in) is ready, we incorporate the air. Take a big scoop—about one-third—of that glorious meringue and fold it in vigorously. This step is called ‘sacrificing’ the meringue because it loosens up that heavy yolk base so the rest of the air doesn’t deflate when you add it. Then, add the rest of the meringue in two separate additions. Use a spatula and cut straight down the middle, scrape along the bottom of the bowl, and lift it up and over. Turn the bowl a quarter turn and repeat. Stop mixing the absolute second you see no white streaks remaining. Seriously, ‘just combined’ means stop. Overmixing is the fastest way to a sad, dense cake!
Baking and Slow Cooling for a Perfectly Smooth Cheesecake
Pour that gorgeous, fluffy batter into your prepared pan and gently tap it on the counter—just once or twice—to coax out any massive air pockets. Pop it into that water bath setup. We bake in two stages, which is key to preventing cracking! Start high at 325°F (160°C) for just 15 minutes to set it up, then drop that temperature down to 285°F (140°C) for 50 to 60 minutes. You’re looking for it to be set but still have a little wobble in the very center. Now, for the most important part: cooling! Turn the oven OFF, prop the door open an inch, and leave the cheesecake inside to cool down slowly for a full hour. This gradual cool-down convinces the cake not to collapse in shock. After that hour, you can take it out to finish cooling on a rack. You can find some other baking wisdom over at my main blog page!
Troubleshooting Your Japanese Cheesecake Recipe Failures
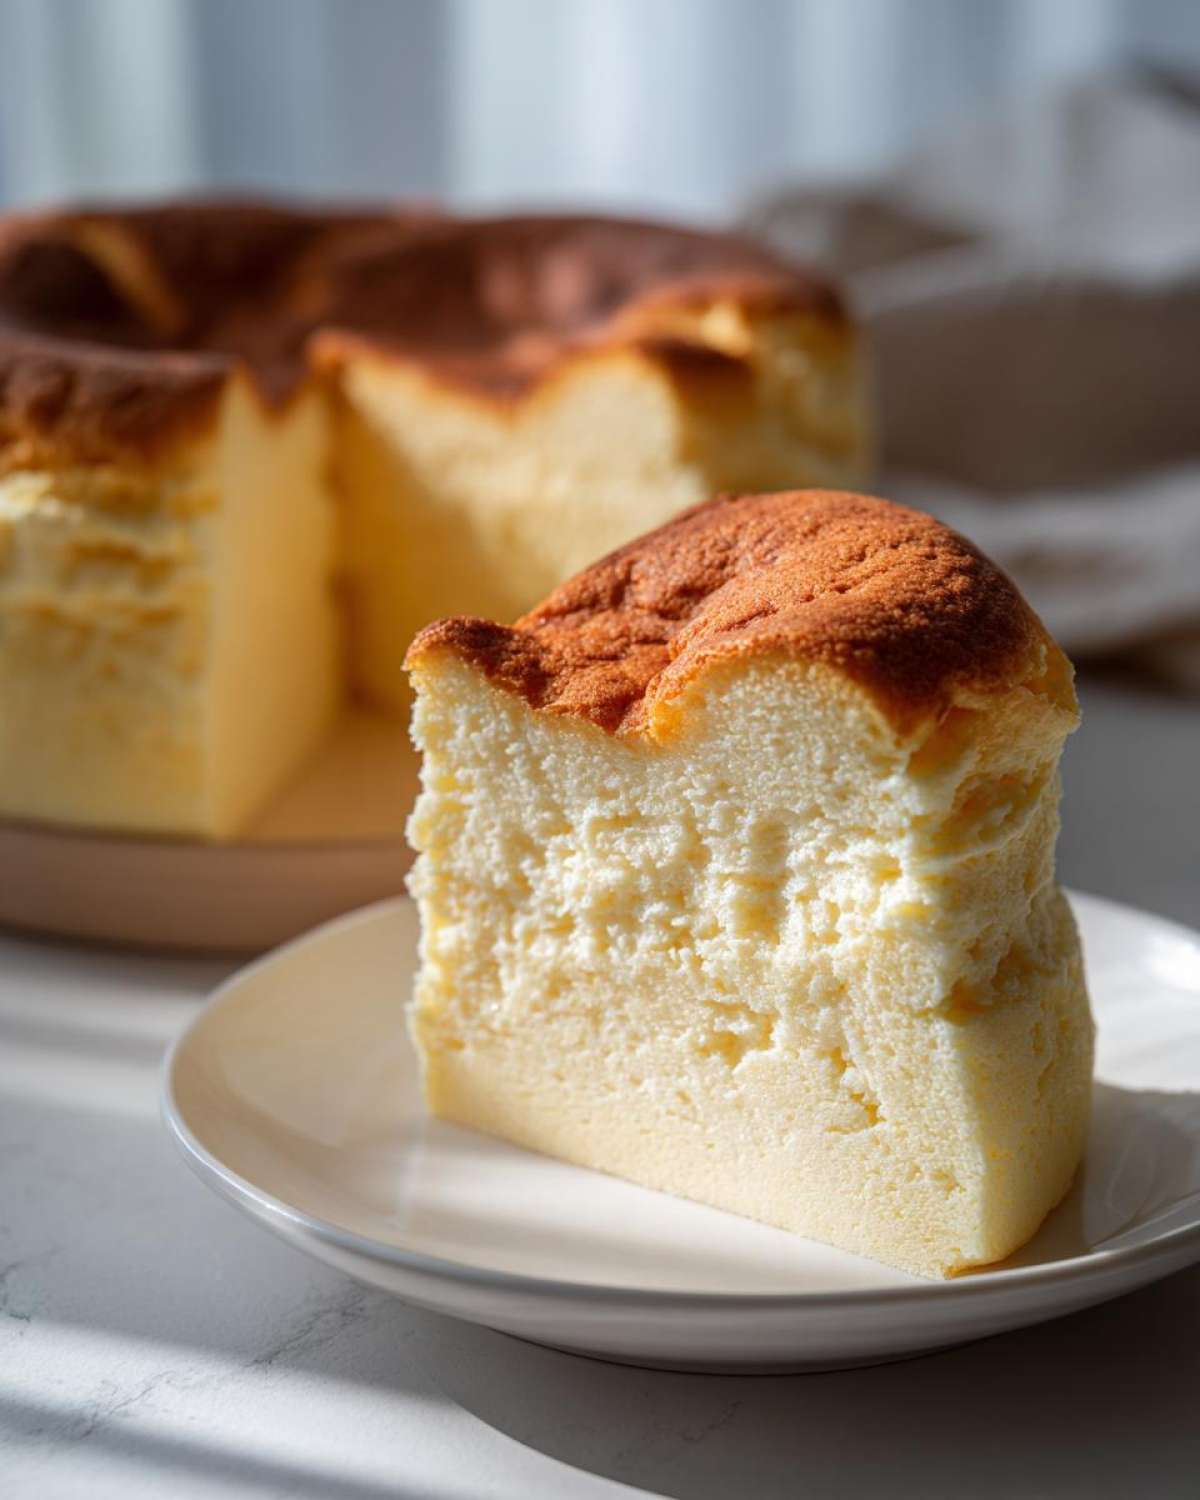
Okay, let’s be real: sometimes baking is more science experiment than art, right? If you followed every step perfectly and still ended up with a cake that looks sadder than you feel, don’t throw it out! Most problems with the Japanese Cheesecake Recipe come down to three things: heat, air, or water. I’ve seen it all—cracks, massive sinkholes, and that dense, rubbery texture that screams, “I am NOT fluffy!” Let’s fix those issues right now so your next attempt at a light and airy dessert is perfect.
Why Did My Soft and Fluffy Japanese Cotton Cheesecake Sink?
This is the number one heartbreaker for anyone attempting a souffle cheesecake. A big sinkhole usually means one of two things happened right at the end, or your structure wasn’t strong enough to begin with. If the cake cools too fast—like taking it straight from a hot oven to a cool counter—the steam trapped inside condenses too quickly and the whole cake deflates hard. That’s why that slow cooling period in the turned-off oven is so vital; it’s your insurance policy!
Another big reason for sinking is an underbaked center. If you pull it out even slightly too early, the middle hasn’t developed enough structure yet. It might look set on the edges, but that wobble needs to be controlled. Remember, even after you turn the oven off, it’s still baking gently!
Finally, if you deflated your meringue while folding the batter, the cake simply won’t have the necessary air pockets to hold its own weight once it starts cooling. Go back to that folding step next time and remember: gentle hands! If you want to see some other high-stakes baking tips, I’ve got more advice over on my blog.
If the cake cracked rather than sinking, that usually means the heat was too aggressive right away, drying out the top layer too fast before the inside was ready to expand. Next time, drop that initial temperature a touch faster!
Serving and Storing Your Homemade Souffle Cheesecake
Finally, the anticipation! You’ve handled the heat, you’ve mastered the fold, and you’ve done the slow cooling dance. Now you have this perfect, delicate creation—your homemade souffle cheesecake. But you can’t just slice into it right away, no sir! This cake needs to settle down completely before being introduced to a knife, otherwise, you’ll tear that beautiful, fluffy side.
The absolute minimum chilling time required before slicing is four hours in the refrigerator. I know, waiting is the hardest part when something smells this good! But trust me, once it’s fully chilled, the texture firms up just enough. It loses that almost too-delicate, eggy feel and transforms into a beautifully smooth, light slice. That’s when you get that wonderful, subtle ‘bounce’ when you touch it!
When you serve it, if you’re using a springform pan, make sure the sides are completely cool before you try to release the ring. Sometimes the edges stick a tiny bit because of the moisture, so I often run a thin offset spatula around the edge *after* it’s chilled but *before* I snap the ring open. This prevents that disastrous tearing.
For leftovers—which I hope you have!—storage is easy but be aware of the texture change. Because this cake gets so much of its fluffiness from the air incorporated into the meringue, it will naturally lose a bit of its jiggly bounce the next day, even when stored correctly. That’s just the nature of an airy cake!
Wrap the cooled cake tightly in plastic wrap—or pop the remaining slices into an airtight container—and keep it in the fridge. It stays perfectly fine for about three days. If you want to “re-fluff” it slightly, let a slice sit out on the counter for about 15 minutes before eating. It brings back just a hint of the soft texture it had right out of the oven. Happy eating, and don’t forget to peek at more baking expertise on my site!
Variations on the Classic Japanese Baked Souffle
Now that you have the foundational recipe mastered—and I know you did, because you are now a master of the water bath and meringue folding!—you might be wondering how to switch things up a little bit. This cake is so versatile because the base flavor is wonderfully light and milky, perfect for a little boost of complementary flavor. You don’t want to do anything too heavy, or you risk that lovely airy structure collapsing, so we keep the additions small and impactful.
I’ve tried a few things over the years that really enhance the experience without weighing down the cake. If you’re feeling adventurous after you’ve nailed the basic version, try one of these simple tweaks. I’ve got a guide on my site for a much moodier bake, like my lemon blueberry cheesecake, but for this Japanese style, less added flavor is usually more!
Here are my two favorite ways to jazz up the classic Japanese Baked Souffle:
- Zingy Citrus Swirl: Before you fold in the last bit of meringue, add the finely grated zest of one lemon or one orange directly into the yolk batter. The oils from the zest wake up the milky base flavor beautifully. Just make sure you only use the colorful zest, not the white pith underneath, or it can add a bitter note!
- Matcha Powder Finish: This is my go-to for anyone who loves that slightly earthy green tea flavor. Once the cake is completely cooled—and I mean totally chilled after its 4-hour rest—just use a fine mesh sieve to dust the top with high-quality matcha powder. It creates a gorgeous color contrast and cuts through the sweetness perfectly. Don’t add it before baking, or it will bake right into the top layer and dull the color terribly.
- Vanilla Bean Boost: If you are feeling fancy, scrape the seeds from half a vanilla bean and whisk them right into the warm milk and butter mixture in Step 2 of the recipe. Real vanilla adds a depth that extract just can’t match. You’ll smell the difference the second it starts baking!
See? You don’t need heavy crusts or thick streams of chocolate to make this cake exciting. Sometimes, just a hint of brightness is all a truly light and airy dessert needs!
Frequently Asked Questions About Making Soft Cheesecake at Home
I know you might still have a few burning questions! When you’re dealing with something as delicate as a soft cheesecake at home, you need to be sure about the details. I’ve gathered the ones people ask me the most after they try to whip up a classic Japanese style cheesecake. I want you to feel completely confident before you even turn on the oven!
Can I skip the water bath for this recipe?
Oh, honey, please don’t! I really wish I could tell you that you can get away with skipping it, but the water bath is absolutely essential for making this a soft and fluffy japanese cotton cheesecake. Without that humid environment, the outside of the cake will cook much faster than the inside, causing it to dry out, crack violently, or sadly, sink because the internal steam structure collapses. The water bath is your golden ticket to that jiggly, light texture.
What is the best pan size for this jiggly cheesecake recipe?
I recipe tested this for a perfect 8 servings, and that calls for a 7-inch springform pan. That size ensures the cake bakes evenly within the specified time limits. If you go much bigger—say, a 9-inch—the batter will spread too thin and likely overbake or dry out before the center is done. If you want that perfect height and signature look for your jiggly cheesecake recipe, stick to the 7-inch size specified!
Can I make this without using a springform pan?
Technically, you could try to use a regular cake pan, but I wouldn’t advise it for your first attempt at a fluffy baked cheesecake. The whole point of the springform ring is to gently release the sides without having to flip the cake upside down or run a knife all the way around, which might cause tears in the delicate structure. For this specific delicate cake, the springform pan is definitely part of the winning formula!
My oven runs hot, can I use a lower temp?
That’s a smart thing to check because uneven heat is the enemy of a Japanese Dessert Recipe! If you know your oven runs hot, you might be tempted to lower the temperature from the start, but remember we need that initial high blast (325°F) to set the structure quickly. Instead of lowering the start temperature, I suggest baking the second phase (the lower temp) for 5 to 10 minutes longer, checking for doneness frequently. If you are worried about the top browning too fast, just loosely tent a piece of foil over the top halfway through the lower temperature bake. That should shield it perfectly while letting the interior finish cooking gently.
If you want to compare notes on other types of cheesecakes, like the crustless variety, feel free to dive into my guide on the amazing Basque Burnt Cheesecake!
Estimated Nutritional Data for Soft and Fluffy Japanese Cotton Cheesecake
Okay, I know sometimes we need to know the numbers, even when we are eating something this light and wonderful! Because this cake is mostly eggs, milk, and a little bit of flour, it comes out surprisingly reasonable compared to those heavy New York-style cheesecakes. But remember, this is just an estimate, based on how I make it using standard ingredients and aiming for eight perfect slices. If you use a bit more sugar or a different type of milk, those numbers will shift a tiny bit!
For one slice of my soft and fluffy japanese cotton cheesecake, you are looking at approximately 250 Calories. The fat content comes mainly from the butter and egg yolks, clocking in around 14 grams total. It has about 17 grams of carbohydrates and a solid 10 grams of protein, thanks to all those beautiful eggs! The sugar content is around 18 grams per slice.
This is a great addition to any balanced treat rotation, especially if you’re looking for a light and airy dessert that won’t leave you feeling bogged down after dinner. If you want to explore some genuinely healthier options where we build protein in intentionally, you should check out my recipe for a protein cheesecake!
Share Your Jiggly Cheesecake Success
And there you have it! You’ve officially conquered the delicate art of the Japanese Cotton Cheesecake. I hope your kitchen smells divine right now and that you managed to get some beautiful, jiggly results! I truly hope this detailed walkthrough helps you achieve the soft and fluffy japanese cotton cheesecake you’ve always wanted!
Baking is a journey, and I absolutely live to hear how my family’s favorite recipes turn out for you all. Did it jiggle just right? Did you manage to keep your meringue perfectly stiff? Did you add a little zest, or did you stick to the classic pure flavor?
Please, please, please come back here and leave a star rating for the recipe! It helps others see that this method works, and I love reading your feedback. If you ran into a snag, drop a detailed comment below—I check in often and I’m happy to help troubleshoot anything you bumped into in the process. You can always reach out to me directly through my contact page too if you have something private you need to discuss.
And if you took a picture of your masterpiece—that beautiful, cloud-light dessert—I would be honored if you shared it on social media and tagged me! Seeing your successes is honestly the best part of sharing these sometimes tricky recipes.
PrintSoft and Fluffy Japanese Cotton Cheesecake
A detailed recipe for making a light, airy, and jiggly Japanese cotton cheesecake using a water bath technique.
- Prep Time: 30 min
- Cook Time: 75 min
- Total Time: 105 min
- Yield: 8 servings
- Category: Dessert
- Method: Baking (Water Bath)
- Cuisine: Japanese
- Diet: Vegetarian
Ingredients
- 6 large egg yolks
- 60 ml whole milk
- 40 g unsalted butter
- 40 g cake flour
- 20 g cornstarch
- 6 large egg whites
- 1/4 tsp cream of tartar
- 100 g granulated sugar
- 1 tsp lemon juice
Instructions
- Preheat your oven to 325°F (160°C). Prepare a 7-inch round springform pan by lining the bottom and sides with parchment paper. Wrap the outside bottom and sides of the pan tightly with heavy-duty aluminum foil to prevent water entry.
- Create the yolk batter: In a saucepan over low heat, melt the butter with the milk. Remove from heat when just melted. Whisk in the egg yolks one at a time until combined.
- Sift the cake flour and cornstarch together over the yolk mixture. Whisk until smooth. Set aside.
- Make the meringue: In a clean, grease-free bowl, beat the egg whites with the cream of tartar and lemon juice until foamy. Gradually add the sugar, beating until stiff, glossy peaks form. The meringue should hold its shape when the whisk is lifted.
- Lighten the yolk batter: Take one-third of the meringue and gently fold it into the yolk batter until just combined. This lightens the base.
- Fold in the remaining meringue in two additions, using a cutting and folding motion to keep the air in the batter. Stop mixing as soon as no white streaks remain. Do not overmix.
- Pour the batter into the prepared pan. Tap the pan gently on the counter a few times to release large air bubbles.
- Place the cheesecake pan inside a larger roasting pan. Pour hot water into the roasting pan until it reaches about 1 inch up the side of the cheesecake pan (this is the water bath).
- Bake at 325°F (160°C) for 15 minutes. Then, reduce the oven temperature to 285°F (140°C) and bake for another 50 to 60 minutes, or until the top is golden brown and the cake is set but still slightly jiggly in the center.
- Turn off the oven, prop the door open slightly (about 1 inch), and let the cake cool inside the oven for 1 hour. This slow cooling prevents sudden temperature shock and cracking.
- Remove the cake from the oven and the water bath. Let it cool completely on a wire rack before removing the springform ring. Chill for at least 4 hours before serving.
Notes
- Use room temperature eggs for the best meringue volume.
- Ensure your mixing bowl for the egg whites is completely free of grease or water.
- The slow cooling process in the turned-off oven is crucial to prevent the cake from sinking rapidly or cracking.
- If your cake cracks, it usually means the oven temperature was too high or you over-whipped the meringue.
Nutrition
- Serving Size: 1 slice
- Calories: 250
- Sugar: 18
- Sodium: 120
- Fat: 14
- Saturated Fat: 8
- Unsaturated Fat: 6
- Trans Fat: 0
- Carbohydrates: 17
- Fiber: 0
- Protein: 10
- Cholesterol: 150
