

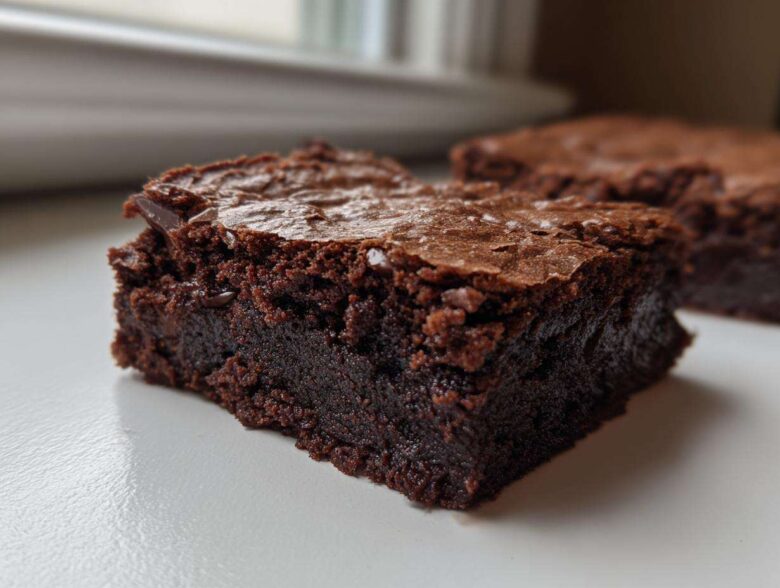
If you think you’ve had a good brownie, stop right there. Truly, you haven’t lived until you’ve tried these Brown Butter Brownies. I remember the first time I tried browning butter for cookies—it totally changed my world. Suddenly, chocolate tasted deeper, nuttier, and just intensely better!
When I finally brought that intense, warm flavor base into my go-to brownie recipe, I nearly cried. It gives you this incredible, sophisticated undertone that store-bought ones just can’t touch. Forget plain chocolate squares; this recipe is the ultimate upgrade for that perfect, fudgy texture we all crave. Trust me, once you skip the plain butter step, you’re never going back to boring old chocolate bars!
Why These Brown Butter Brownies Are the Best Brownies Recipe
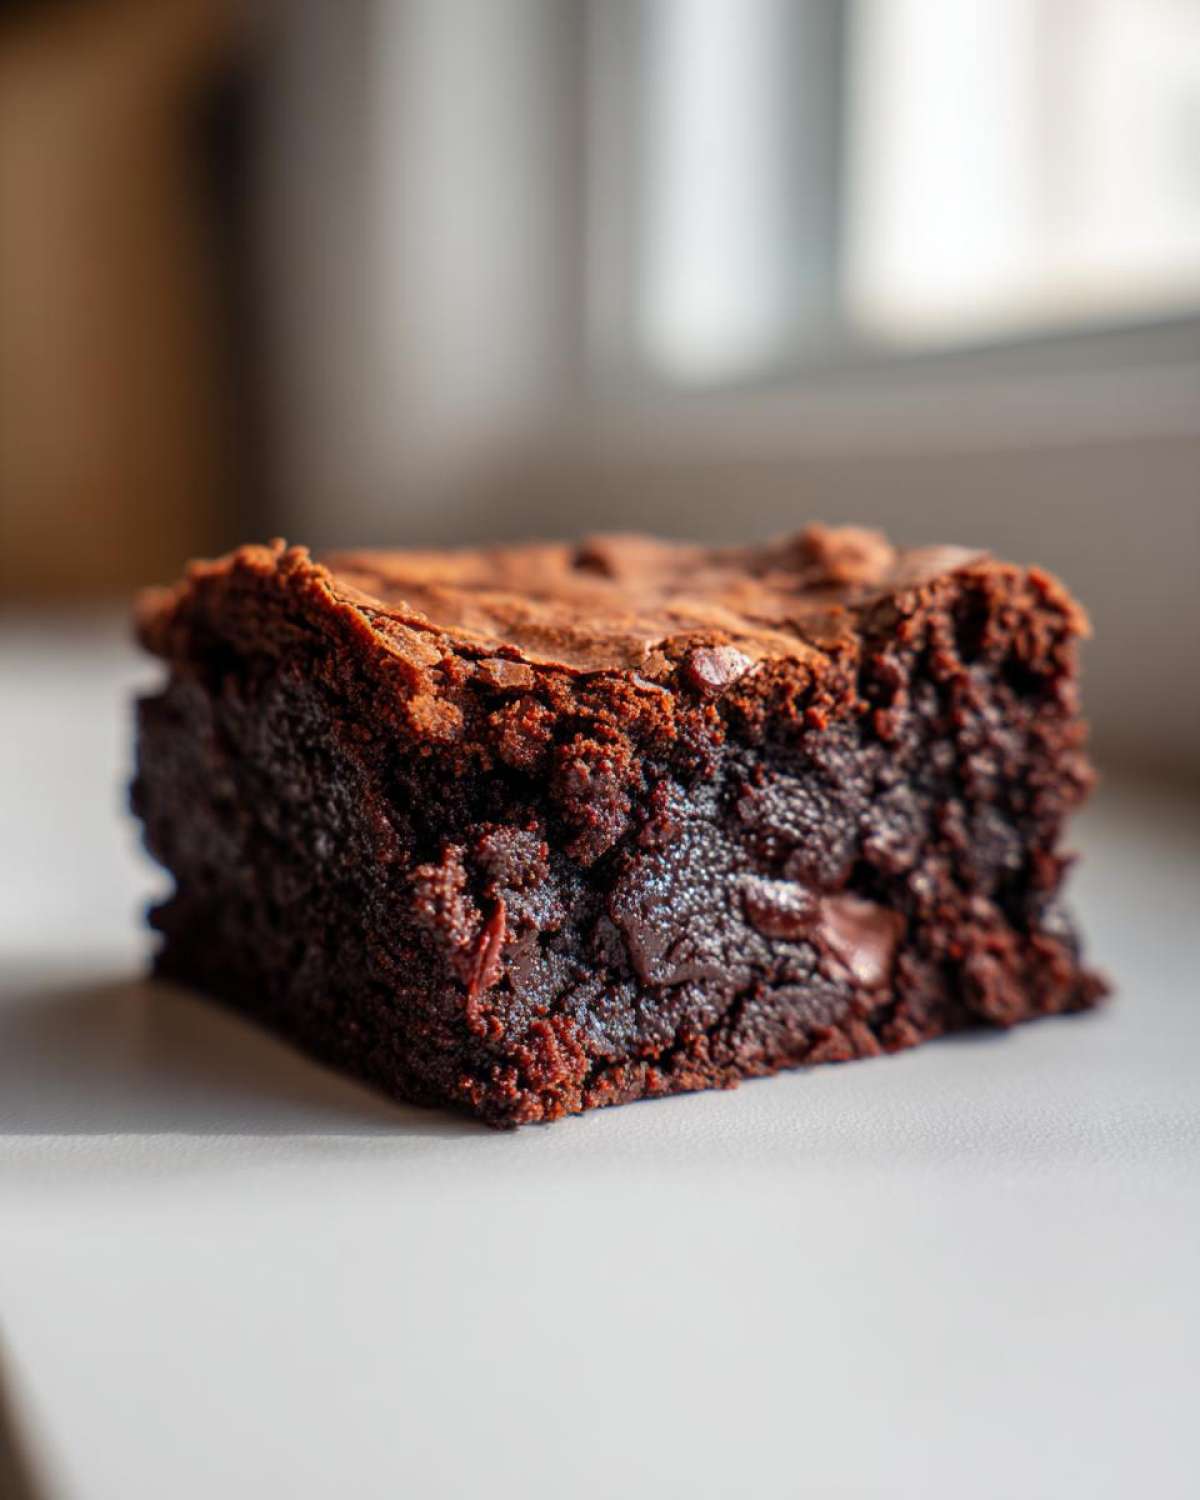
People ask me all the time what makes this recipe stand out from every other one they’ve tried. Honestly, it’s the one-two punch of flavor and texture. When you’re looking for the Best brown butter brownies recipe, you need that deep, toasted nut flavor, and you need them fudgy! We get so much of that richness from browning the butter first. It caramelizes the milk solids, which adds complexity that regular melted butter just can’t deliver.
And the texture? Oh my goodness. These aren’t those dry, cakey things you sometimes get stuck with. Nope! These are seriously Fudgy brown butter brownies, almost bordering on molten goodness when they’re still warm. If you want to see how I achieved that super shiny, crackly top that everyone gets obsessed with on my other brownie recipes, stick close, because the cooling time is just as important as the baking!
Achieving the Ultimate Fudgy Brown Butter Brownies Texture
The fudginess comes down to the fat-to-flour ratio, plain and simple. We use a lot of rich butter—browned butter, no less—and we keep the flour low. It’s intentional! This high-fat mix guarantees that dense, moist interior we’re aiming for. Don’t be tempted to add an extra spoonful of flour thinking it’ll help, or you’ll lose that perfect, gooey mouthfeel!
Ingredients for Perfect Brown Butter Brownies
Getting the right ingredients is the first step toward success, and it’s surprisingly straightforward. We aren’t messing around with complicated stuff here; it’s just quality components treated right. You’ll need 1 cup (2 sticks) of unsalted butter to start our favorite process! Then it’s both sugars: 1 1/4 cups of white granulated sugar and 3/4 cup of packed light brown sugar.
We keep the dry stuff simple with just 3/4 cup of all-purpose flour and 1/2 cup of unsweetened cocoa powder, plus 1/2 teaspoon of salt to make all that chocolate sing. Lastly, don’t forget the 4 large eggs and 1 tablespoon of vanilla extract. And for texture? 1 cup (6 ounces) of semi-sweet chocolate chips are folded in at the very end.
Ingredient Notes and Substitutions for Brown Butter Brownies
A quick word on the butter: it absolutely must be unsalted. This gives us total control over the salt level, which is crucial when you are trying to balance sweetness! Also, I specifically call for semi-sweet chips because they melt beautifully and give you that deep chocolate flavor. If you swap to only bittersweet, they might taste a little too intense.
But the brown sugar? That’s non-negotiable for moisture! Its molasses content keeps the texture chewy instead of dry. If you want to get wild, you could use a mix of semi-sweet and dark chocolate chips, but please, stick to the sugar amounts listed!
How to Make Brown Butter Brownies: Step-by-Step Instructions
Okay, here’s where the real magic happens. Learning exactly How to make Brown Butter Brownies is simpler than you think, but timing that browning step is key! First things first: get your oven warmed up to 350 degrees F. I always line my 8×8 inch metal pan with parchment paper; make sure you leave an overhang on two sides so you can lift the whole thing out later—it makes cleaning up so much easier!
Now, we melt that precious butter in a light-colored saucepan. I stress light-colored because you need to see those little brown specks forming! Pour it in and keep stirring over medium heat. You’ll see foam, then it calms down, and then—bam!—you see little dark bits forming on the bottom. That’s when you pull it off! Immediately dump it into a big bowl and let it cool for about ten minutes. You don’t want to scramble those eggs when you add them next! For more tips on managing butter heat, check out my guide on brown butter chocolate chip cookies; the technique is nearly identical.
Mastering the Brown Butter Baking Technique
This is the moment of truth for that brown butter flavor in baking. Once your butter has cooled for those ten minutes, scoop in both sugars and whisk them vigorously. Watch for that nutty aroma—that’s your cue! It usually takes around five to eight minutes total on the stove. You’re looking for those tiny, dark brown specks at the bottom of the pan. Don’t let them burn, but don’t pull them off too early either, or you’ll just have sweet melted butter instead of that glorious, toasty flavor. Pour it straight into your mixing bowl to stop the cooking!
Mixing and Baking Your Brown Butter Brownies
Once the sugar and butter are happily mixed, you’ll whisk in the eggs one by one, followed by the vanilla. Don’t rush this part! Then, grab your separated dry mixture—flour, cocoa, and salt—and gently fold it into the wet ingredients. The rule is: mix only until combined. Seriously, stop mixing the second you don’t see white flour spots anymore! Overmixing ruins the fudgy texture we worked so hard to build. Fold in your chocolate chips quickly after that.
Spread that gorgeous batter into your prepared pan and pop it in the oven for 30 to 35 minutes. You have to test doneness carefully here for the best results! You want a toothpick pulled from the edge to come out with moist crumbs clinging to it, but the center should still look a little soft when you jiggle the pan. If the toothpick comes out totally clean, you’ve gone too far!
Tips for Success with Your Brown Butter Brownies
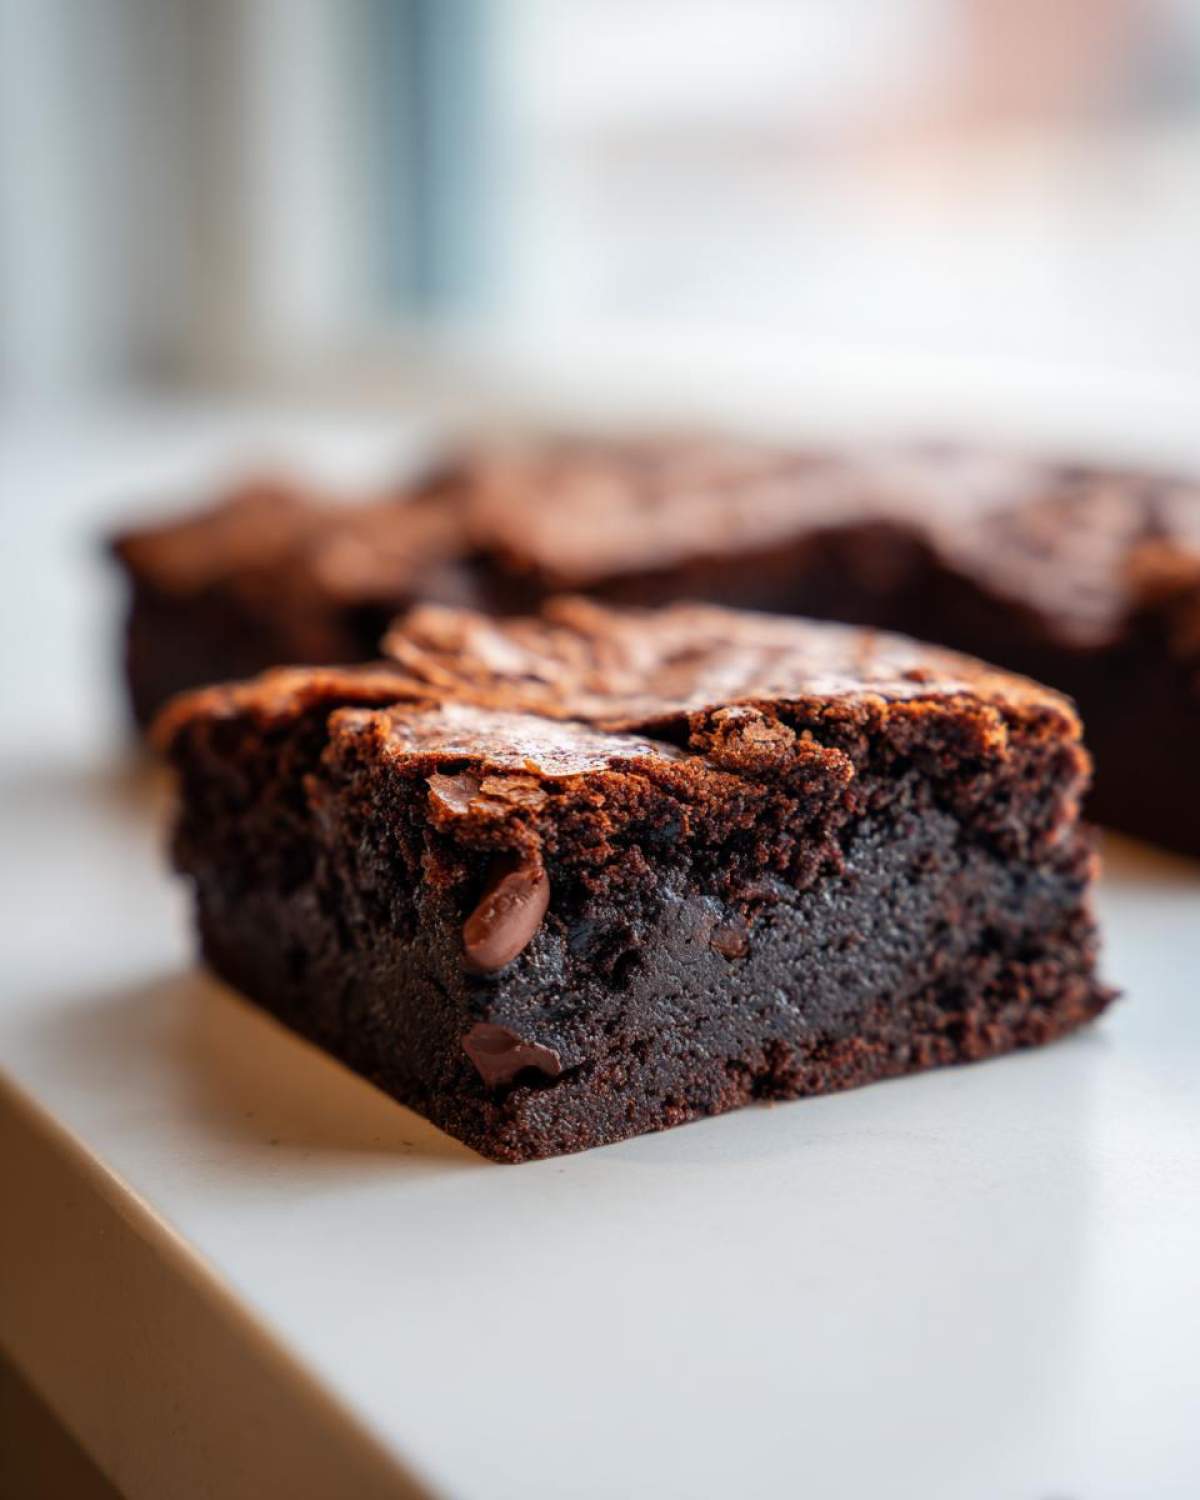
Honestly, even with the perfect recipe, a few little tricks separate the good brownies from the absolutely divine ones. Following some of my favorite brown butter baking techniques will push these over the edge! My number one tip, which I can’t stress enough, is the cooling time. You MUST let these cool completely in the pan before you even think about cutting them. I know, I know, it’s torture when that amazing chocolate smell floats around the kitchen!
If you try to slice them warm, they just won’t hold their shape because they are so incredibly fudgy. Resist the urge! Also, remember I mentioned using a light-colored pan? That’s so you can actually watch those little milk solids toast up nicely. If you use a dark pan, it’s easy to accidentally burn the butter before you realize it. Pop them in the fridge for an hour after they’ve cooled to room temperature if you need them cut fast. You can find more secrets for managing butter heat over in my brown butter cookie guide; it’s all about visibility!
Variations for Your Gourmet Brownie Recipe Brown Butter
While these are truly perfect as they are for that deep, nutty chocolate hit, sometimes you just need to dress them up a little bit! We are making a Gourmet brownie recipe brown butter here, so let’s treat them like a fancy dessert! My favorite twist is sprinkling a generous pinch of flaky sea salt right over the top the second they come out of the oven. That little pop of salt against the dark chocolate is just heavenly.
If you want crunch, fold in about a cup of toasted pecans or walnuts during the last mixing step. Or, if you’re feeling ambitious, you could sneak in a teaspoon of espresso powder with your cocoa powder for an extra layer of richness. If you’ve loved the way I layered peanut butter into those Buckeye Brownies, try swirling in a few spoonfuls of your favorite nut butter before baking!
Storage and Reheating Brown Butter Brownies
Because these are so wonderfully fudgy, they actually tend to stay really moist for days! The best way to store them is honestly just in an airtight container right on the counter. Don’t put them in the fridge immediately unless your kitchen is sweltering hot, because the butter can firm up too much. They are great at room temperature for almost four days.
If you absolutely must reheat, don’t use the microwave for too long! Just 10 seconds or so is enough to soften them back up and bring that brown butter aroma right back to life. A tiny blast is all you need to enjoy a truly fresh-tasting square.
Serving Suggestions for Rich Dark Chocolate Brownies
You’ve made the absolute best chocolate treat possible, so you have to serve them right! These Rich dark chocolate brownies are so flavorful on their own, but they really shine when paired with something cold and creamy. My top choice is always a scoop of really good vanilla bean ice cream—the contrast in temperatures is just divine.
If you want something a little classier, try drizzling them with a tart raspberry sauce; the berry cuts through the richness perfectly. Or, for an easy finish, just dust them gently with some high-quality cocoa powder right before serving. If you want to learn how to make a simple frosting instead, I have a great vanilla buttercream recipe that works magically on top of these!
Frequently Asked Questions About Brown Butter Brownies
I always get a flood of questions when I post these because people want to make sure they nail that flavor the first time. It’s all about nailing that butter, but don’t worry, I’m here to help you get the best results! People often ask about substitutions, and I get it—we all work with what we have in the pantry. It’s amazing how much that tiny step elevates the whole experience; if you want to read more about the science behind it, check out my post on brown butter flavor in baking!
Can I use salted butter for these brownies?
You absolutely *can* use salted butter, but you need to be careful! Since the recipe already calls for 1/2 teaspoon of salt, if you use salted butter, leave that added salt out entirely. You risk making them too salty, and we really want that deep, toasty flavor to shine through, not just saltiness! I always recommend unsalted so you control everything.
How do I know if my butter is browned enough?
This is the most important visual cue! You’ll see the butter foam up on the stove, and then it will quiet down. That’s when you need to watch closely! Tiny dark brown specks—like fine sand—will form on the bottom of the pan, and the aroma will smell intensely nutty, not burnt. If you’re unsure, scoop out a tiny bit onto a white plate to check the color. If it looks like honey-colored sand at the bottom, you’re perfect!
Can these rich dark chocolate brownies be made ahead of time?
Yes, and I often prefer them the day after they are made! These rich dark chocolate brownies actually get deeper in flavor overnight as the fudgy texture settles. Just make sure they are completely cooled, wrap the whole pan tightly in plastic wrap, and leave them on the counter. They are good for up to four days.
What’s the difference between these and chewy brown butter brownies?
The main difference is bake time, but the ratio helps here too! These are formulated to be super fudgy, meaning we bake them until the center is still soft. If you wanted slightly chewy brownies, you would bake them maybe 2 to 3 minutes longer, ensuring the toothpick comes out with just a few dry crumbs, but honestly, I think the fudgy version is superior when brown butter is involved!
Nutritional Estimates for These Brown Butter Brownies
I always feel a little guilty posting the nutrition facts because, let’s be real, these aren’t exactly diet food! But since we use such rich ingredients like all that wonderful brown butter and chocolate, it’s good to know what you’re getting into. Keep in mind these are just estimates based on the recipe card detailing exactly how much butter and sugar went into the mix.
This recipe yields 16 perfect squares, and for one serving, here’s the general breakdown. These numbers reflect the deep, decadent nature of these deep rich chocolate brownies, so enjoy them responsibly!
- Serving Size: 1 square
- Calories: 250
- Fat: 15g
- Saturated Fat: 9g
- Carbohydrates: 30g
- Sugar: 25g
- Protein: 3g
Don’t let that sugar count scare you too much; a lot of that comes from the necessary structure and moisture we build in with the brown sugar, which is way better for texture than simple syrup! Also, remember that this is a homemade recipe, so these nutritional values are estimates. The exact number can change slightly based on the brands of chocolate chips or cocoa powder you choose to use!
PrintFudgy Brown Butter Brownies
Make rich, fudgy brownies using browned butter for a deep, nutty chocolate flavor.
- Prep Time: 15 min
- Cook Time: 35 min
- Total Time: 50 min
- Yield: 16 squares
- Category: Dessert
- Method: Baking
- Cuisine: American
- Diet: Vegetarian
Ingredients
- 1 cup (2 sticks) unsalted butter
- 1 1/4 cups granulated sugar
- 3/4 cup packed light brown sugar
- 4 large eggs
- 1 tablespoon vanilla extract
- 3/4 cup all-purpose flour
- 1/2 cup unsweetened cocoa powder
- 1/2 teaspoon salt
- 1 cup (6 ounces) semi-sweet chocolate chips
Instructions
- Preheat your oven to 350 degrees F. Line an 8×8 inch metal baking pan with parchment paper, leaving an overhang on two sides for easy removal.
- Melt the butter in a light-colored saucepan over medium heat. Continue cooking, stirring often, until the butter foams, then subsides, and brown bits form at the bottom. The butter will smell nutty. This takes about 5 to 8 minutes. Immediately pour the brown butter into a large heatproof bowl and let it cool for 10 minutes.
- Whisk the granulated sugar and brown sugar into the slightly cooled brown butter until well combined.
- Whisk in the eggs one at a time, mixing well after each addition. Stir in the vanilla extract.
- In a separate bowl, whisk together the flour, cocoa powder, and salt.
- Gradually add the dry ingredients to the wet ingredients, mixing only until just combined. Do not overmix.
- Fold in the chocolate chips.
- Spread the batter evenly into the prepared baking pan.
- Bake for 30 to 35 minutes. A toothpick inserted near the edge should come out with moist crumbs attached, but not wet batter. The center should still look slightly soft.
- Let the brownies cool completely in the pan on a wire rack before lifting them out using the parchment overhang and cutting them into squares.
Notes
- To achieve the best brown butter flavor, use a light-colored pan so you can clearly see the milk solids browning on the bottom.
- For extra fudgy texture, slightly underbake them by 2 to 3 minutes.
- Cooling completely before cutting prevents the brownies from crumbling.
Nutrition
- Serving Size: 1 square
- Calories: 250
- Sugar: 25
- Sodium: 80
- Fat: 15
- Saturated Fat: 9
- Unsaturated Fat: 6
- Trans Fat: 0
- Carbohydrates: 30
- Fiber: 1
- Protein: 3
- Cholesterol: 55
