

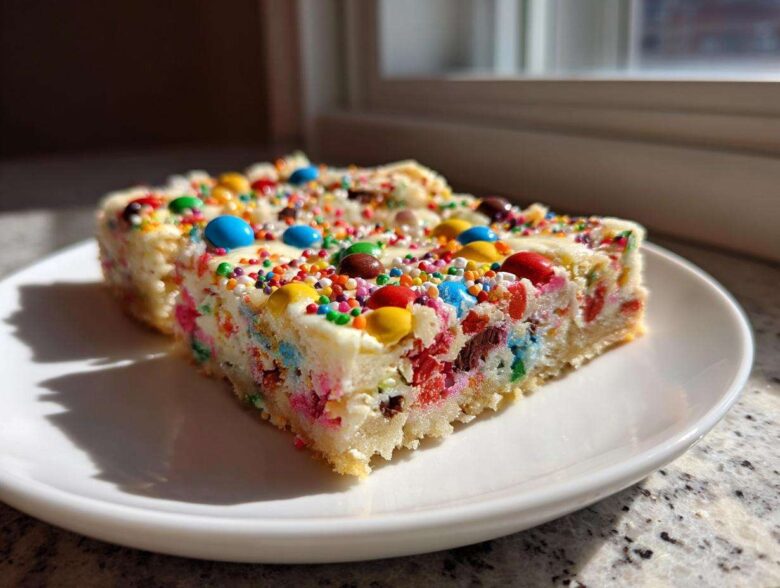
Oh, the holiday season! It’s my favorite time of year, but let’s be real, it comes with baking pressure, right? Everyone wants those gorgeous treats for parties, but who has time for endless scooping and chilling dough? That’s where I rescue you with the recipe I turn to every single December: the Ultimate Christmas Sprinkle and M&M Cookie Bars. Seriously, these christmas cookie bars are a lifesaver. They are the easiest, chewiest, one-pan wonders you will ever meet. My family expects these vibrant bars at every single holiday event now, mostly because they disappear before anything else!
I first started making these because I was tired of my kitchen looking like a flour bomb went off trying to make dozens of individual cookies. This method lets me mix everything in one bowl, press it into a pan, and boom—instant festive dessert! I shared some of my favorite baking stories on the main blog page over at this link, but trust me, this bar recipe is essential holiday viewing. I hope they become your go-to for quick holiday cheer, too!
Why These are the Best Christmas Cookie Bars Recipe for Your Holiday Table
Honestly, when the holiday schedule gets completely insane, you need reliable wins—and these bars are that win. They tick every single box without demanding your whole afternoon. We’re talking about beautiful, colorful, and incredibly decadent treats that look like you sweated over them for hours, but you really didn’t! These are true Easy Holiday Dessert Bars because they use pantry staples and come straight out of one pan. Forget fiddling with icebox cookie dough or complicated layers, these just spread and bake.
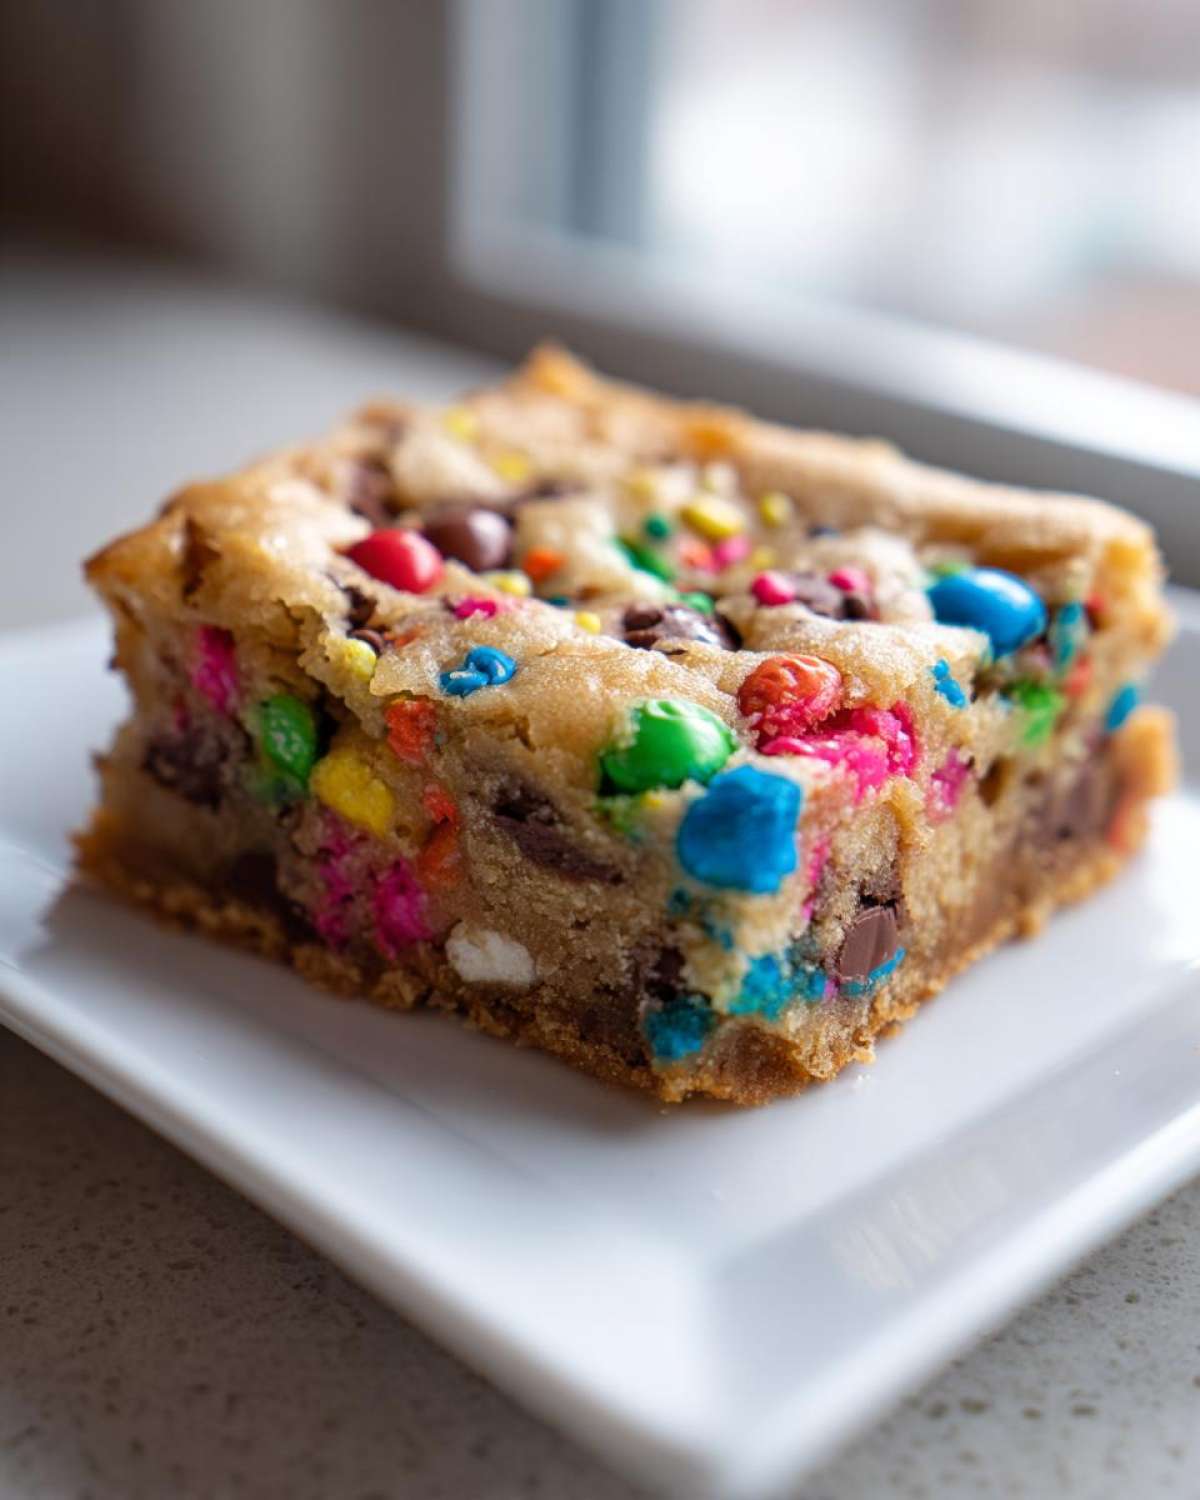
The biggest reason people always ask me for this specific Christmas Cookie Bars Recipe is the texture. They have that perfect combination of crisp, golden edges and the center is just impossibly soft and chewy. That’s the magic of using brown sugar and not overbaking them just slightly! They’re sturdy enough for wrapping and shipping, but tender enough that they melt in your mouth. If you need something that looks professional but feels totally effortless while you’re running around wrapping presents, look no further. Thinking about pairing this sweet treat with something savory? You should definitely check out the recipe for easy creamy beer cheese dip if you’re hosting a party!
One Pan Christmas Baking Simplicity
Let’s talk cleanup because that’s my favorite part! This is the ultimate in One Pan Christmas Baking. You mix it, you press it into the 9×13, and that’s it until it’s cooled down. The best part? There is absolutely zero chilling time required. You can decide at lunchtime you want cookie bars for your evening gathering, and you can totally pull it off. These are fantastic No Chill Cookie Bars, which means instant gratification for hungry holiday helpers!
Texture and Flavor Profile of Our Christmas Cookie Bars
When you bite into one of these, you get that wonderful buttery base, just like your favorite chocolate chip cookie, but amplified by the festive mix-ins. They manage to be substantial—you know, satisfyingly dense—but still wonderfully soft. That chewiness is what keeps people coming back for seconds on these Chewy Christmas Bars. They travel much better than traditional drop cookies and look much more impressive than standard Festive Cookie Squares, honestly. You get the full experience without the fuss. Trust me on this texture!
Gathering Ingredients for Your M and M Christmas Bars
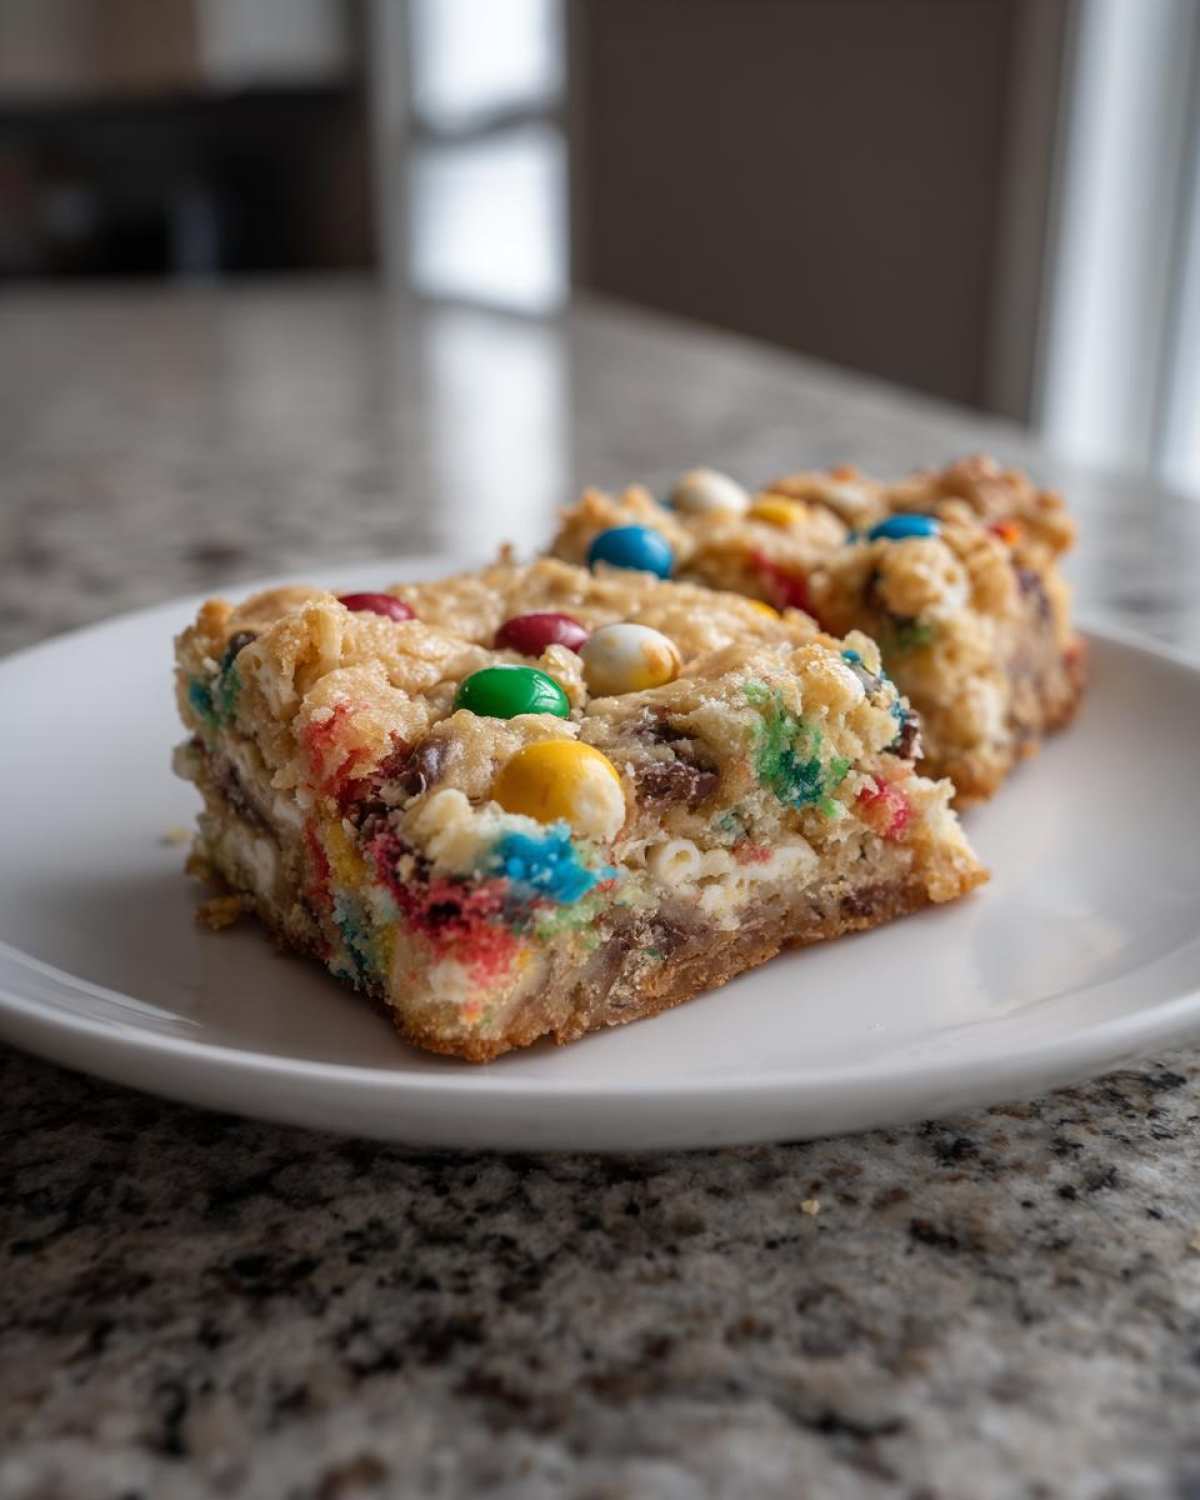
Okay, now that you’re convinced these are the easiest and tastiest things you’ll make all December, let’s talk about what you need! Gathering your ingredients is half the battle, and the beauty of these christmas cookie bars is that most of it is standard baking fare—plus some fun pops of color. We’re keeping this list streamlined so you can dash out to the store quickly. You’ll need just a few things to create that amazing buttery base and then load it up with candies. If you want to see another one-pan wonder that uses simple ingredients, you should check out my recipe for easy creamy white chicken enchiladas for savory needs!
Don’t worry if you’re missing one small thing; I’ve built in lots of flexibility, but stick close to the butter quantities for that perfect chew. Here is the full list of what you need to make a massive 9×13 pan full of these delicious Colorful Christmas Treats:
- 1 cup (2 sticks) unsalted butter, softened
- 1 cup packed light brown sugar
- 1/2 cup granulated sugar
- 2 large eggs
- 1 tablespoon vanilla extract
- 2 1/4 cups all-purpose flour
- 1 teaspoon baking soda
- 1/2 teaspoon salt
- 1 cup M&M’s (holiday colors preferred)
- 1/2 cup Christmas sprinkles (nonpareils or jimmies)
- 1/2 cup white chocolate chips (optional)
Ingredient Notes and Substitutions for Festive Cookie Squares
Listen closely, because success here hinges on the butter. It must be truly soft, meaning you can press your finger an inch into it easily. But please, please don’t melt it! Melted butter means flat, greasy bars, and we want that perfect height and satisfying chewiness in these Buttery Holiday Bars. For the M&M’s, grab the holiday mix—the reds, greens, and whites really make these Festive Cookie Squares pop when they come out of the oven.
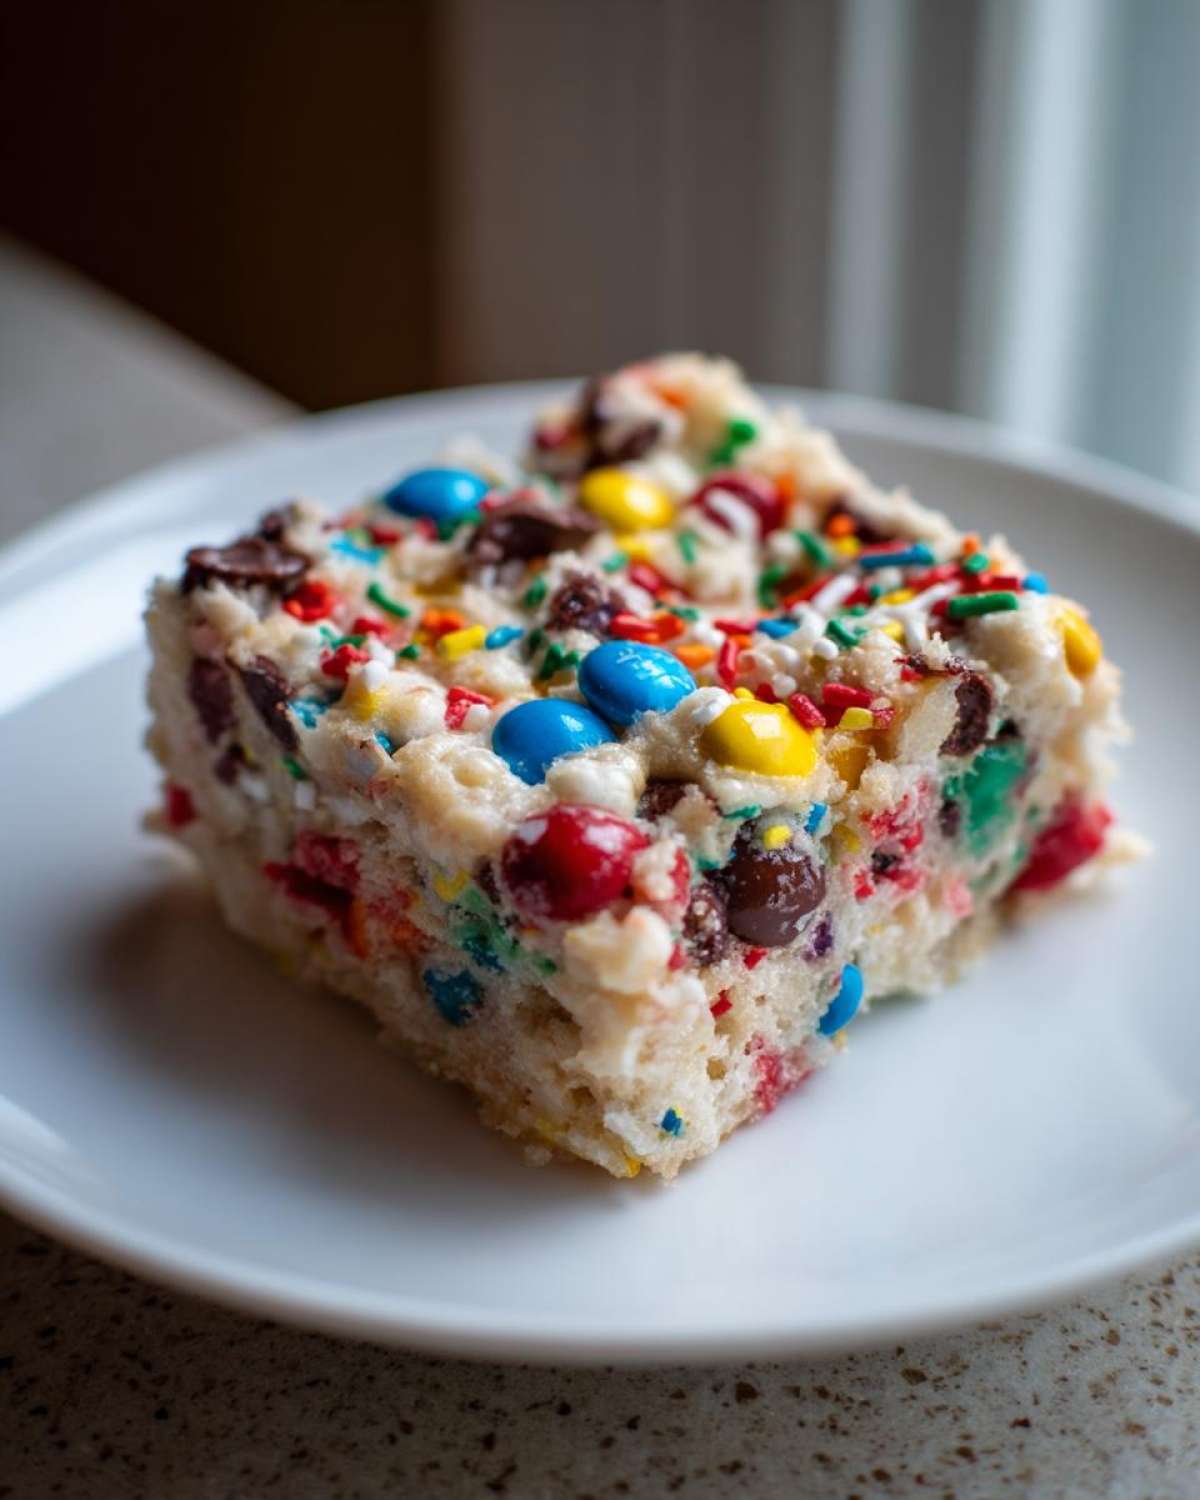
If you have any nut allergies at your event, you can skip the white chocolate chips entirely; they are absolutely optional and just add a bit of extra richness. Or, if you want to substitute them with another holiday candy like skim milk caramels or toffee bits, go for it! Just make sure whatever you add is chopped small enough so you don’t mess up the dough distribution. That soft, buttery dough is key to everything working right!
Step-by-Step Instructions for Perfect Christmas Cookie Bars
Alright, here’s where the magic happens! I’m going to walk you through exactly how I get these christmas cookie bars consistently perfect every single time—no surprises. The key to one-pan simplicity is setting yourself up for success from the jump. Make sure your oven is properly heated, and don’t skip the parchment paper setup. It just makes life so much easier later on when you have to lift this heavy, gorgeous pan of goodness out!
If you’re looking for something savory to serve alongside these sweet treats, my creamy nacho cheese recipe from here is always a massive hit at the potluck!
Preparing the Pan and Creaming the Base for Chewy Christmas Bars
First things first: Get that oven warming up to 350°F (175°C). Now, for the pan—this is my personal method for guaranteed release. I use a 9×13 inch pan, and I line it with parchment paper, but make sure the paper hangs over two opposite sides. Those overhangs become your handles, or your ‘sling,’ to lift these dense christmas cookie bars right out of the pan later. Game changer, trust me!
Next, get your mixer out. You need to cream that softened butter—remember, soft, not greasy!
- Soften the butter completely.
- Beat it together with your light brown sugar and the white granulated sugar until the mixture gets noticeably lighter in color and looks fluffy. This takes a minute or two, but it’s how we build air into the base for that great texture.
- Beat in your two eggs, one at a time, followed by that teaspoon of vanilla. Scrape down the sides so everything is incorporated nicely.
Mixing the Dough and Folding in Holiday Colors
Once you have that beautiful, creamy base, it’s time for the dry stuff. In a separate bowl—yes, I know, one extra bowl, but bear with me—whisk your flour, baking soda, and salt together really well. This ensures the leavening is distributed evenly.
Now, listen closely: Add the dry ingredients to the wet ingredients gradually. I mix on the *lowest* speed, just until the flour disappears. Seriously, as soon as you don’t see any white streaks, stop mixing! Overmixing develops gluten, and we want chewy soft bars, not tough ones. Once it’s just combined, take the bowl off the mixer. Time to fold in the fun stuff. Gently fold in your M&M’s, sprinkles, and the optional white chocolate chips using a spatula. You just want to distribute the colors; don’t stir aggressively or those beautiful red and green colors in the M&Ms might start bleeding into your dough!
Baking Time and Cooling for the Ultimate Christmas Cookie Bars
Spatula that dough evenly into your prepared pan. Press it down gently so you have a flat surface for baking. Pop it into that 350°F oven. You’re looking for about 22 to 25 minutes of baking time right now. How do you know when they’re done for those perfectly Chewy Christmas Bars? You watch the edges.
The edges should look golden brown and set, but the very center might still look just slightly gooey or soft when you gently shake the pan. That slight underbake is what keeps them wonderfully soft and keeps them qualifying as Simple Christmas Desserts rather than hard cookies! Once out, you must, must, *must* let them cool completely on a wire rack before you even think about touching them with a knife. If you try to cut them warm, they’ll lose all their structure. Once fully cool, use those parchment paper sling handles to lift the entire slab out, and then slice them up!
Tips for Success When Making Christmas Cookie Bars
I’ve made so many batches of these christmas cookie bars that I practically know them by heart, but a few little professional secrets really push them into legendary status. Since these are such rich, Buttery Holiday Bars, taking a tiny extra step makes a huge difference in the final outcome. Don’t skip these pointers if you want that perfect texture everyone fights over at the holiday party! If you want to try another one of my favorite recipes focusing on texture, check out my take on the brown butter bakery cookies—it’s a game changer!
First, let’s talk chewiness again. If you have the patience—and I know it’s hard when everything smells so good—pull them out about two minutes *before* you think they are done. I mean, maybe 2 minutes less than the recommended time. They will firm up as they cool down, giving you that amazing, almost underbaked, gooey center we love. Remember, slightly underbaked trumps dry!
Also, because these are packed with all those delightful M&M’s and chips, I sometimes like to give the mix-ins a quick toss in about a tablespoon of flour before folding them in. This tiny step stops the candies and the white chocolate chips from sinking straight to the bottom of the pan while baking. Nobody wants a plain top layer! Finally, if you’re making a giant platter for gifting, I always rely on the suggestion to chill them for a bit before cutting. It doesn’t affect the flavor, but those clean, square edges look amazing, making them perfect serving companions for party spreads!
Storage and Reheating for Your Festive Cookie Squares
One of the absolute best things about these christmas cookie bars is that they taste just as amazing—if not better—the next day! You don’t have to worry about making them hours ahead of time, which is such a relief during the holidays when the schedule is packed. Since they are rich and sturdy, they hold up really well. I usually make a huge batch on Thursday, and they are still soft and chewy by Sunday afternoon.
If you’re storing these at room temperature, just keep them in an air-tight container. Seriously, that’s it! They have enough sugar and butter to protect themselves from drying out quickly. Try to layer them with wax paper or parchment paper between the layers so the candy tops don’t stick to each other—especially if they have been frosted or drizzled with anything, though mine usually just have the baked-in M&M’s and sprinkles.
I’ve found that when kept in a cool, dry pantry, these Festive Cookie Squares are fantastic for a solid five to seven days. If you happen to have a warmer kitchen, or if you just want to slow the process down even further, sticking them in the fridge works too, but I usually only do that if I’m prepping them for my holiday travel bag. Speaking of making things easier, if you need a super quick treat for dipping, you have got to try my easy 3-ingredient fudge recipe—it’s almost impossible to mess up!
Now, remember that tip about chilling them before cutting? That’s more for clean presentation than actual storage. If you plan to devour these right away, cutting them warm (or even slightly warm) just results in messy, gooey squares, which is fine for the family but maybe not great for a pretty potluck platter. If you need clean slices, let them cool to room temperature, then pop the whole pan (still wrapped in parchment) into the fridge for about 30 minutes. When you pull them out, they cut like a dream! No reheating is necessary at all; room temperature is perfect for enjoying these Easy Holiday Dessert Bars.
Serving Suggestions for These Easy Holiday Dessert Bars
These christmas cookie bars are so rich and sweet all on their own, but part of the fun of holiday baking is figuring out what to chase them with, right? They disappear so fast at parties, but if you’re putting together a big spread, you need a few things to balance out all that butter and sugar. They are definitely one of my favorite go-to items when I’m asked to bring something for a big holiday gathering—super simple Christmas Potluck Desserts that everyone loves!
The best pairings are things that are either very simple or slightly acidic to cut through the sweetness. I find that a big glass of cold milk is classic for a reason; it just softens everything perfectly. If you’re serving these as an afternoon treat, though, maybe you want something slightly more grown-up. For that, I always serve them alongside some really strong, dark-roast coffee. The bitterness of the coffee really makes the vanilla and brown sugar notes in the bars sing! If you need a healthier boost to start your day or maybe as a pre-dessert appetizer, you should definitely try my ultimate energizing protein coffee smoothie recipe.
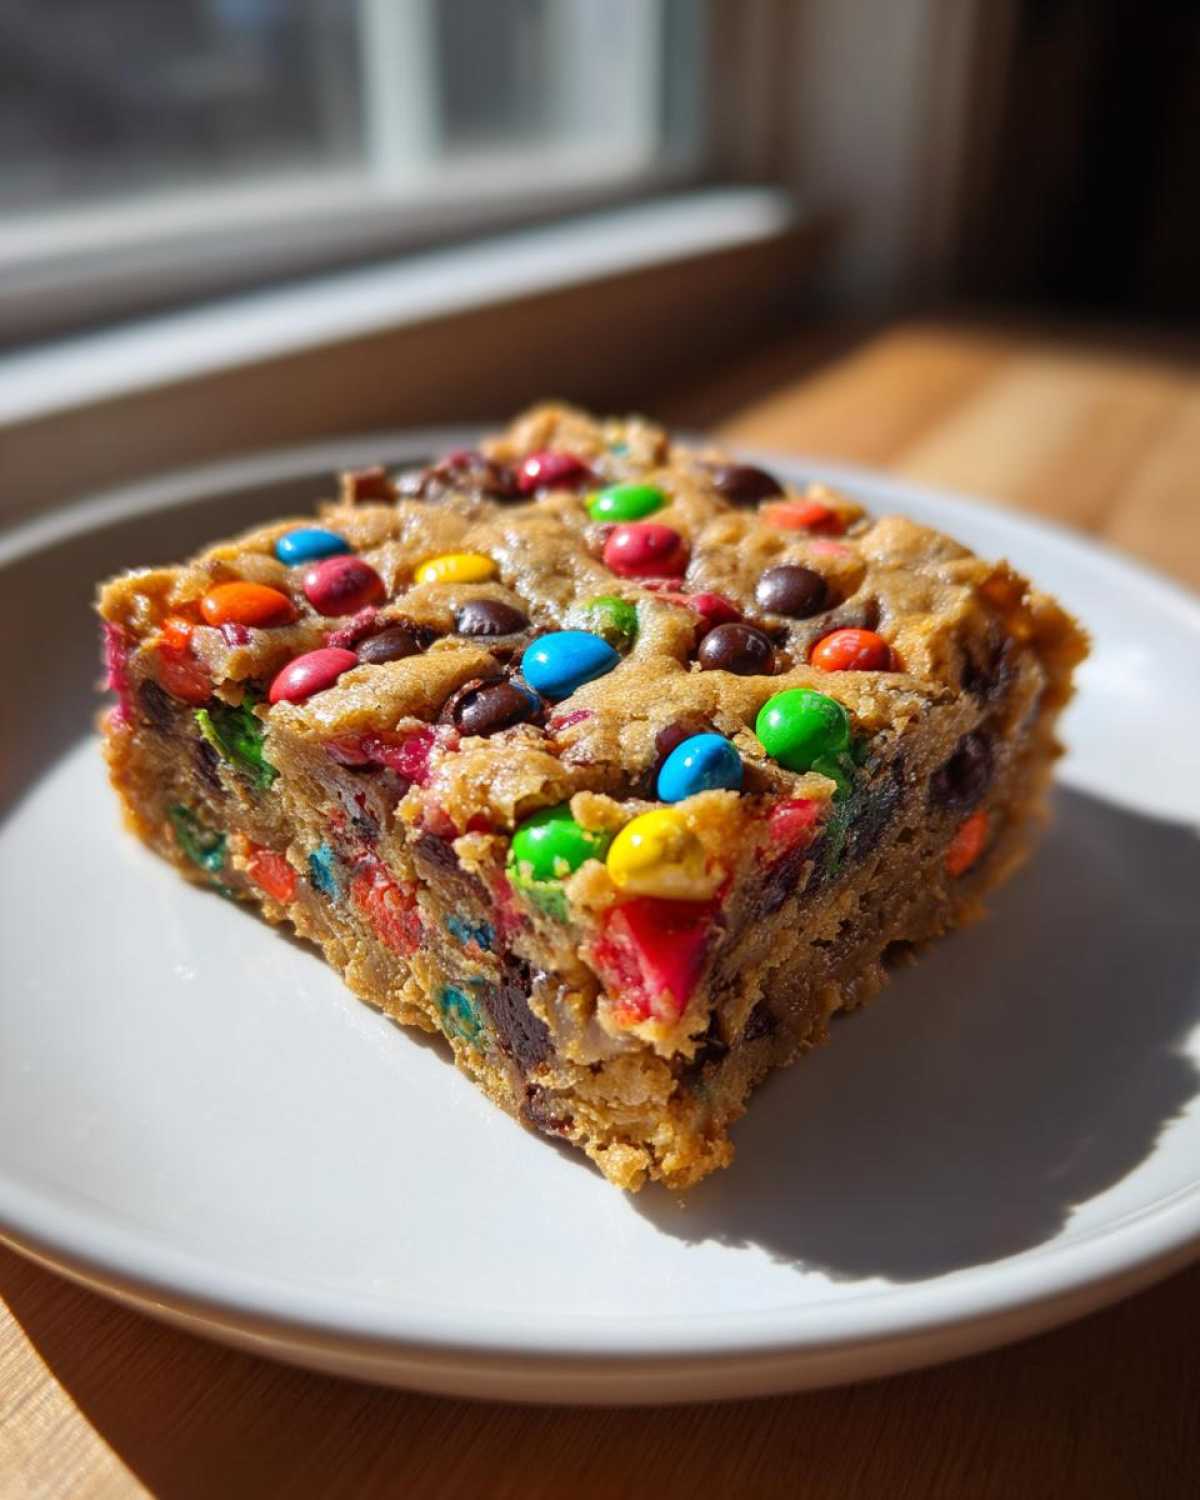
If you must serve another dessert, keep it light! A simple bowl of sliced citrus fruits—maybe some oranges or grapefruit—can be a lovely, bright counterpart to the dense richness of the bars. Don’t try to serve another heavy chocolate item next to these, or they’ll just fade into the background! These Easy Holiday Dessert Bars are the star; just give them simple supporting actors!
Frequently Asked Questions About Christmas Cookie Bars
I get so many wonderful questions every year once people start making these bars! It means you all are loving them, which makes my day. Since these are such a staple for me, I’ve worked out just about every possible hiccup along the way. Think of this as your bonus troubleshooting guide for making the absolute best christmas cookie bars possible!
If you’re looking for a savory comparison to see how I handle ingredient precision, my famous creamy classic egg salad recipe has some great tips on consistency, too! But let’s focus on these sweet squares!
Can I freeze these Christmas Cookie Bars?
Yes, you absolutely can! These are terrific for making ahead of time, which, let’s face it, is a lifesaver during the holidays. You need to make sure they are completely cool before freezing, obviously. Once cooled, slice the bars, but here’s my trick: Don’t separate them yet. Wrap the entire 9×13 block tightly in plastic wrap, then cover that whole thing tightly with aluminum foil—double protection is the best protection for baked goods.
Pop that wrapped block right into the freezer for up to three months. When you want some—and this is key—let the block thaw while still wrapped on the counter for a few hours. Once it’s still cold but soft enough to cut, slice them into your squares. That way, the edges don’t dry out while thawing! It keeps the texture of these Festive Cookie Squares spot on.
What kind of sprinkles work best for these Colorful Christmas Treats?
This is purely cosmetic, but I know how much you want those vibrant stripes! If you want the colors to stay sharp and vibrant on top, I always recommend using the little round ones—those are called nonpareils. They look like tiny, perfect colored beads, and they hold their color integrity really well even through baking. They give you that classic, bright holiday look for your Colorful Christmas Treats.
The longer ones, the jimmies, are also fine, but sometimes they bleed a tiny bit of color onto the pale blonde dough as they bake. You won’t notice it much in the final texture, but if you are going for that pure, clean holiday look, stick to nonpareils. Either way, they’ll taste fantastic!
How do I ensure my Christmas Cookie Bars stay chewy?
This is the most common question, and it all comes down to two things we talked about: sugar and time! First, make sure you are using that packed light brown sugar according to the recipe; the molasses content directly contributes to moisture and chewiness—it keeps them from drying into hard, crumbly crackers. If your brown sugar is hard as a rock when you measure it, you need to refresh it first!
Second, and this is the big one: Pull them out of the oven when the center still looks slightly shy. I mean it! If you wait until a toothpick comes out totally clean, you’ve already overbaked them, and they will firm up into something closer to biscotti than soft bars. For the best, incredibly satisfying, Chewy Christmas Bars, aim for those moist, soft crumbs clinging to the toothpick. That slight underbake equals maximum chewiness!
Estimated Nutritional Breakdown for Christmas Cookie Bars
So, I know we aren’t making these christmas cookie bars for their health benefits—they are loaded with sugar and butter because holidays demand it! But, since so many of you ask about the basics, I pulled the estimated numbers based on the full recipe serving 24 squares. Just remember what Grandma always said: a balanced diet is having a cookie in both hands!
These numbers will, of course, vary slightly depending on the exact brand of M&M’s or if you skip the optional white chocolate chips, but this gives you a general idea of what you are enjoying when you reach for one of these festive squares. If you’re interested in learning how to make homemade pantry staples completely from scratch, I have an amazing recipe for easy homemade mayonnaise you might enjoy!
Here is the breakdown based on serving size (1 bar):
- Serving Size: 1 bar
- Calories: 190
- Fat: 10g
- Saturated Fat: 6g
- Carbohydrates: 24g
- Sugar: 18g
- Protein: 2g
- Cholesterol: 35mg
- Sodium: 75mg
A little note on these figures: Since these are made with tons of brown sugar and butter for that perfect chewy texture, the sugar and fat content are naturally higher, which is what makes them so delicious and satisfying. Don’t count these out when planning your holiday spreads—a little bit of joy goes a long way!
Share Your Festive Cookie Squares Creations
Okay, that’s the whole secret sauce for the best christmas cookie bars! Now it’s your turn to get messy and bring some holiday excitement into your own kitchen. I truly get so much joy out of hearing from you all when you try one of my tried-and-true recipes like this one.
Once you’ve baked up these gorgeous Festive Cookie Squares, please don’t be shy! I absolutely love seeing your finished pans loaded up with those colorful M&M’s and sprinkles. It lets me know that my baking secrets are working for you, too!
Take a moment after you’ve sliced them up and taste-tested them (which should be immediately, naturally) and leave a quick star rating right below this section. If you have any specific comments—maybe you tried a substitution or tweaked the bake time—please drop those into the comment box as well! Your feedback really helps everyone else who is planning their One Pan Christmas Baking menu.
If you run into any serious trouble or have a burning question that I didn’t cover in the FAQ, you can always reach out directly to me through the contact page right here. Happy baking, and enjoy sharing these incredible, Easy Holiday Dessert Bars with everyone you love this season!
PrintUltimate Christmas Sprinkle and M&M Cookie Bars: Easy, Chewy, One-Pan Holiday Dessert
Make these simple, chewy Christmas cookie bars loaded with festive sprinkles and M&Ms. This one-pan recipe requires no chilling and is perfect for holiday parties.
- Prep Time: 15 min
- Cook Time: 25 min
- Total Time: 40 min
- Yield: 24 servings
- Category: Dessert
- Method: Baking
- Cuisine: American
- Diet: Vegetarian
Ingredients
- 1 cup (2 sticks) unsalted butter, softened
- 1 cup packed light brown sugar
- 1/2 cup granulated sugar
- 2 large eggs
- 1 tablespoon vanilla extract
- 2 1/4 cups all-purpose flour
- 1 teaspoon baking soda
- 1/2 teaspoon salt
- 1 cup M&M’s (holiday colors preferred)
- 1/2 cup Christmas sprinkles (nonpareils or jimmies)
- 1/2 cup white chocolate chips (optional)
Instructions
- Preheat your oven to 350°F (175°C). Line a 9×13 inch baking pan with parchment paper, leaving an overhang on the sides for easy removal.
- In a large bowl, cream together the softened butter, brown sugar, and granulated sugar until light and fluffy.
- Beat in the eggs one at a time, then mix in the vanilla extract.
- In a separate bowl, whisk together the flour, baking soda, and salt.
- Gradually add the dry ingredients to the wet ingredients, mixing on low speed until just combined. Do not overmix.
- Gently fold in the M&M’s, sprinkles, and white chocolate chips, if using.
- Press the dough evenly into the prepared baking pan.
- Bake for 22 to 25 minutes, or until the edges are golden brown and the center is mostly set.
- Let the bars cool completely in the pan on a wire rack before lifting them out using the parchment paper overhang.
- Cut into squares and serve.
Notes
- For extra chewiness, slightly underbake the bars by about 2 minutes.
- You can substitute any holiday candy mix for the M&Ms.
- If you want a cleaner cut, chill the cooled bars for 30 minutes before slicing.
Nutrition
- Serving Size: 1 bar
- Calories: 190
- Sugar: 18g
- Sodium: 75mg
- Fat: 10g
- Saturated Fat: 6g
- Unsaturated Fat: 4g
- Trans Fat: 0g
- Carbohydrates: 24g
- Fiber: 0g
- Protein: 2g
- Cholesterol: 35mg
