

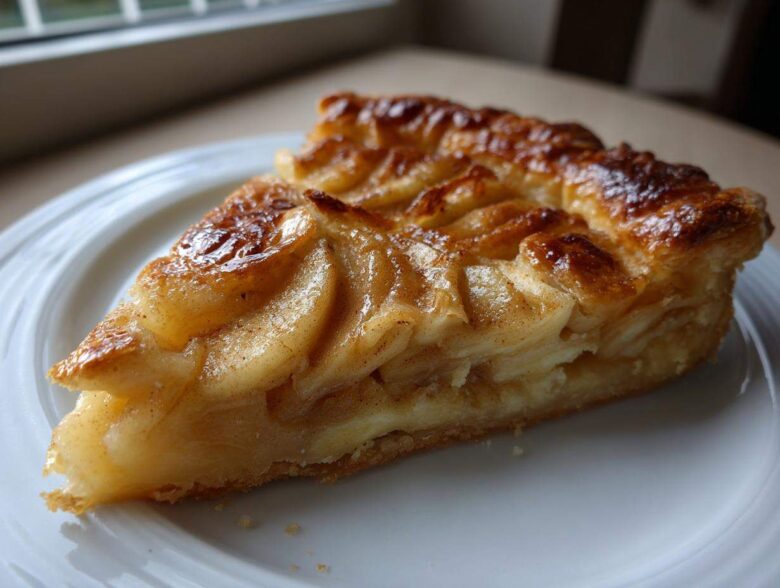
Oh, friends, is there anything better than walking into your kitchen and smelling warm apples mixed with buttery pastry baking? Seriously, that aroma is pure comfort! If you’ve been searching high and low for that perfect, utterly reliable recipe—the one that comes out flaky, golden, and sweet every single time—then stop looking, because you found it. I’ve tried every variation under the sun, from fancy French techniques to super quick hacks, but I keep coming back to what I call my **classic apple puff pastry** method. Trust me when I say that after years of test batches (and accidentally burning a few!), I’ve nailed the ratio that guarantees that crisp, buttery base underneath tender, caramelized apples. If you love things like my soft apple pie cookies, you’re going to adore this simple tart!
Why This Classic Apple Puff Pastry Recipe Works So Well
Honestly, the reason I keep coming back to this recipe isn’t just the taste—though that’s incredible! It’s because it delivers huge flavor with practically zero fuss. You get bakery-quality results without spending hours in the kitchen. Here’s what makes this the best apple puff pastry experience, hands down:
- It uses pre-made puff pastry, which means flaky, buttery pastry without all the folding stress.
- The apple slices are thin enough to cook through completely, so you never get that raw crunch in the middle.
- The simple flour/sugar coating prevents a soggy bottom by absorbing just a tiny bit of apple juice as it bakes.
- It bakes up fast! We’re talking about being in the oven for less than 30 minutes.
- The final result is perfectly balanced—not too sweet, letting the tartness of the apple truly shine through.
Gathering Ingredients for Your Classic Apple Puff Pastry
The beauty of a classic apple puff pastry recipe is how few things you actually need. I mean, this is the definition of using pantry staples to make something wonderful! I always keep a box of puff pastry in the freezer because you never know when a craving will hit. Don’t try to rush thawing it; that’s a recipe disaster!
For the fruit filling, you need apples that are firm enough to hold their shape. I love using Gala or Honeycrisp because they hold up nicely against the heat. If you try something too soft, you’ll end up with applesauce instead of beautiful tart slices. So, here’s what you need on your counter:
- One sheet of frozen puff pastry—make sure it’s fully thawed but still cool!
- About three medium apples, peeled and cored.
- A mix of sugar and flour for coating; the flour is our secret weapon against sogginess.
- Just a teaspoon of cinnamon for that classic, warm flavor that makes everyone ask what you’re baking.
- Little dots of unsalted butter sprinkled over the top right before it goes in the oven.
- And, of course, the egg wash, which is just one egg whisked with a splash of milk—it gives that gorgeous, shiny, golden crust!
If you want more warm, baked apple goodness, you absolutely must check out my easy apple crumble recipe next!
Essential Equipment for the Classic Apple Puff Pastry
Okay, so for equipment, don’t panic! This isn’t going to require a stand mixer or a fancy French rolling pin. Seriously, this is one of the simplest apple puff pastry dessert ideas out there because the tools are so basic. I always make sure I have these five things ready before I even start peeling the apples.
- You absolutely need your oven, obviously! Preheat it to 400°F—that high heat is what makes the pastry puff up spectacularly.
- Grab a standard baking sheet. Don’t use a dark or non-stick pan unless you’re sure about the puffing, because sometimes those dark pans brown the bottom too fast.
- Parchment paper is your best friend here. It keeps things from sticking, which is crucial when you have sticky, sugary apples on top!
- A good sharp knife for slicing those apples super thin. Precision matters here, trust me!
- Finally, just a medium bowl to toss all your apples with the sugar and cinnamon. No need to dirty up the big mixing bowl for this one!
Step-by-Step Instructions: Making the Classic Apple Puff Pastry
This is where the magic happens! Putting this beautiful classic apple puff pastry together is much faster than you think, but you have to be deliberate about the order of operations. I always have everything ready to go because once that pastry is unfolded, you don’t want it sitting out getting warm and mushy. Let’s get this tart assembled!
Preparation and Apple Seasoning
First things first: get that oven humming at 400°F (200°C). I like to line my baking sheet with parchment paper right away. While it heats up, focus on your apples. Peel, core, and slice them as thinly as you possibly can. Seriously, aim for paper-thin! If the slices are too thick, they won’t soften properly by the time the pastry is golden brown. Once they are sliced, toss them in a bowl with your sugar, flour, and cinnamon. Make sure every single piece is coated! That tiny bit of flour is soaking up any extra moisture so we don’t end up with a soupy mess later.
Assembling Your Flaky Apple Pastry Tart
Now, unfold your thawed puff pastry right onto the parchment paper. This is my favorite part! Take a sharp knife—use the tip, don’t press hard—and gently score a border about one inch in from the edge all the way around. You want to score it, not slice through it! This border acts like a little wall; when it bakes, that wall will puff up beautifully, creating the perfect frame for your fruit. Next, arrange those seasoned apple slices neatly inside that scored box. I like to lay mine slightly overlapping in neat rows because it looks so elegant, but a spiral works too! Then, just sprinkle those tiny bits of cold butter over the top of the apples. Those little spots melt down and create little pockets of heavenly flavor.
Baking and Finishing the Baked Apple Pastry
Time for the egg wash! In a tiny bowl, whisk that one egg with a tablespoon of milk. Now, here’s a crucial tip: only brush this mixture onto the exposed pastry border—don’t let it drip onto the apples or the inside edges where you scored. If it gets on the scored line, it can seal it shut, and you’ll lose that glorious puff! Brush it on evenly. Pop the whole sheet into your preheated 400°F oven for about 25 to 30 minutes. You are looking for two things: the pastry border should be dramatically puffed up and deeply golden brown, and the apples should look soft and slightly caramelized. Let it cool on the pan for just a few minutes before sliding it onto a cooling rack. If you’re going to add a glaze, this is the time, but honestly, it’s perfect just as it is!
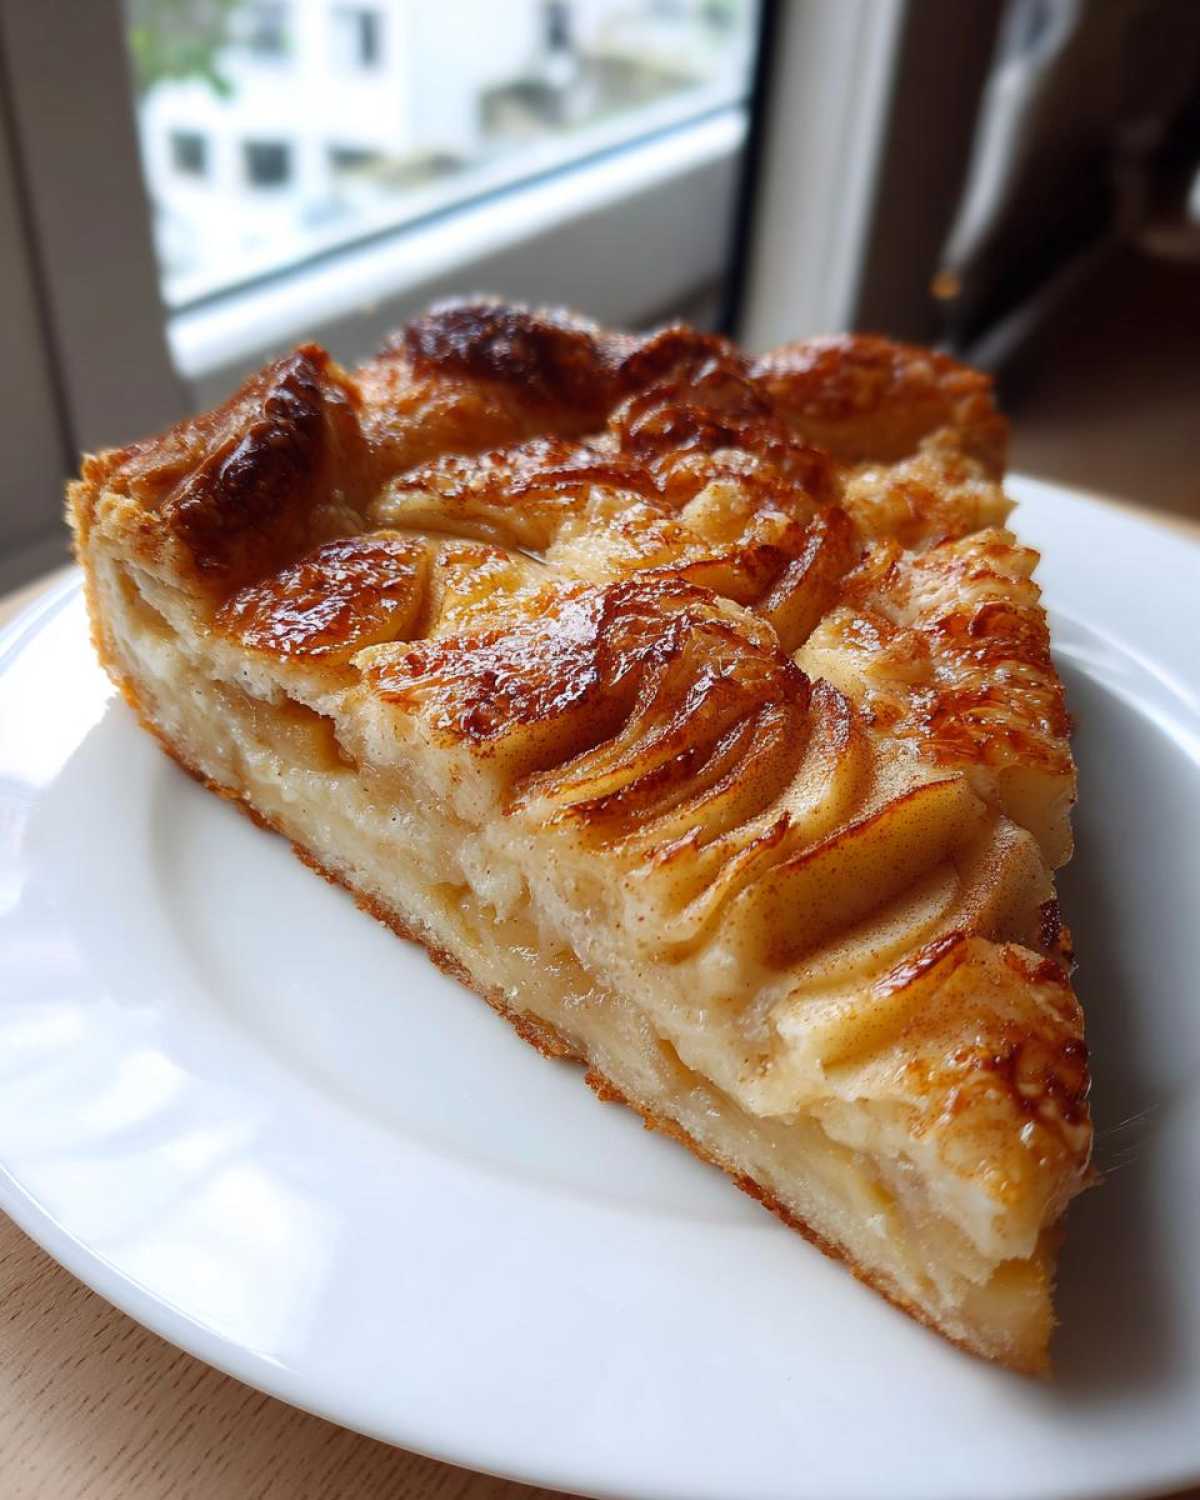
If you want to see a fun tutorial on how to manage pastry like a pro, check out my article on how to make apple pastry for more tips!
Tips for the Best Apple Puff Pastry Results
Even though this is a simple recipe, I’ve learned a few tricks over the years that separate a good apple puff pastry dessert from a truly show-stopping one. If you really want that professional-looking, flaky result, pay attention to the temperature of your ingredients. It sounds fussy, but it makes such a difference!
My number one piece of advice for achieving maximum puff is to keep that pastry COLD. If it gets warm while you’re scoring the edges or placing the apples, those fat layers melt together, and you end up with flat, baked dough instead of layers. If your kitchen is hot, pop the pastry back into the fridge for 10 minutes before you apply the egg wash. That chilling time is the secret to the crispest base.
Also, don’t go overboard on the spices! We want hints of that warm cinnamon apple pastry scent, not overpowering heat. A little goes a long way. If you want to sneak in a different flavor, try a tiny pinch of ground cardamom with the cinnamon—it’s amazing! And if you’re worried about the bottom, try sprinkling a very thin layer of plain flour inside that scored border before setting the apples down. It acts like a mini moisture barrier. You can find some other fun cinnamon twists in my cinnamon apple energy bites post, too!
Ingredient Notes and Substitutions for Your Apple Puff Pastry Dessert
I get so many questions about substitutions because pantry ingredients change all the time, right? Don’t stress if you don’t have exactly what I listed! This **easy apple tart recipe** is super forgiving, especially because we are using pre-made pastry, which already does the hard work for us.
Let’s talk butter first. Can you use frozen butter instead of cold, cut-up butter? Honestly, yes, if you absolutely must grate it straight from the freezer. But traditional cold butter works better for dotting. If you only have salted butter, just reduce the added sugar by about half a teaspoon. It won’t throw the whole thing off balance, I promise!
What if you don’t have Gala or Honeycrisp apples? Any firm baking apple will do the trick! Granny Smith apples are a great call if you like things a little tangier. Just make sure they are thin. You can even mix types—a few tart ones with a few sweet ones always adds complexity to the flavor of your fruit filled puff pastry.
Now, the egg wash. This is optional, but I really, really encourage you not to skip it if you want that gorgeous golden shine. If you are worried about using eggs for any reason, the best substitute is just a tiny splash of milk or cream brushed over the edges, or even a small amount of melted butter. It won’t be quite as shiny, but it will still brown nicely. No egg wash or substitute? Just sprinkle a little extra sugar on the border instead—you’ll get crunchy peaks!
If you ever need inspiration for something completely different—like a savory dish—you can check out my easy Salisbury steak recipe with gravy, but for now, stick to the apples; they’re worth it!
Serving Suggestions for Your French Apple Pastry
Okay, you pulled a gorgeous, golden, flaky tart out of the oven. Now what? While this French apple pastry is honestly perfect just hanging out on the cooling rack all by itself, serving it warm with the right topping just elevates the whole experience from a great snack to a show-stopping dessert, you know?
I always think about how I want to balance that warmth and slight tartness from the apples. My absolute favorite way to serve this is with something cold and creamy. A big scoop of high-quality vanilla bean ice cream melting right over the top? Yes, please! That hot-cold contrast is just heavenly.
If you’re serving it right after dinner, a simple dollop of lightly sweetened whipped cream works beautifully. You don’t need anything fancy; just whip up some heavy cream until soft peaks form. That airy texture contrasts nicely with the dense, baked apples and the crisp pastry underneath. It’s elegant without requiring much extra effort.
For that extra touch of shine—especially if you’re taking pictures or serving company—you need a glaze! Remember how I mentioned warmed apricot jam? That’s the real pro move for any fruit-filled pastry. Just take about a quarter cup of apricot jam and warm it gently on the stovetop with a tiny splash of water or maybe even some rum if you’re feeling indulgent. Stir it until it smooths out, and then, using a pastry brush, gently brush it right over the hot, cooked apples once the tart is slightly cooled. It sets up like glass and gives it that beautiful, professional sheen you see in bakeries. If you’re looking for other great flavor boosts, you have to see my recipe for vanilla buttercream frosting—it’s amazing warmed slightly and drizzled over the top instead of the jam!
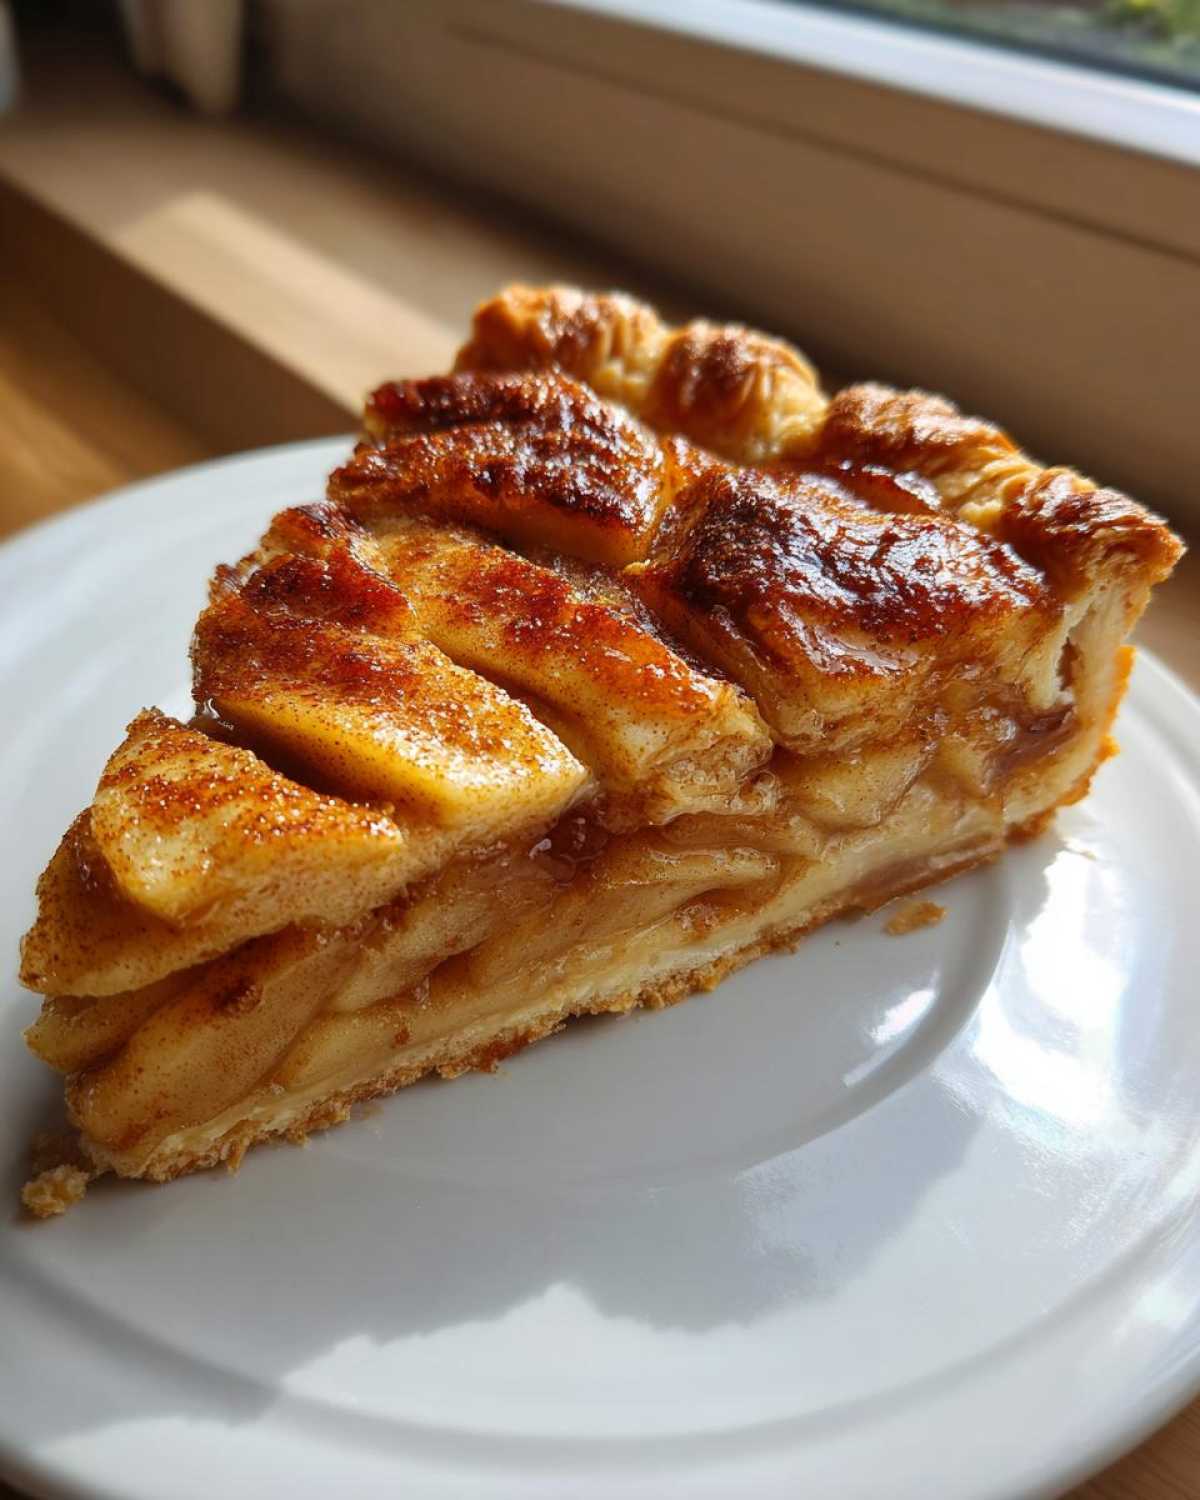
Storing and Reheating Your Homemade Apple Puff Pastry
You’ve made this incredible homemade apple puff pastry, and you’ve eaten enough right out of the oven to call it a success, but what about tomorrow? This tart is actually fantastic the next day, but we have to treat it right to keep that incredible flaky texture we worked so hard for. Unlike cookies, pastry can get a little sad if it sits out too long soaking up kitchen moisture.
If you have any leftover baked apple pastry, your best bet is to store it properly. I usually leave leftovers out on the counter for just a few hours after it has cooled completely. Since it has fruit and butter, you don’t want it sitting at room temperature overnight, especially in a warm kitchen. Once it’s fully cooled, wrap the slices tightly—yes, wrap each piece individually!—in plastic wrap, and then maybe slip that wrapped pastry package into an airtight container or a zip-top bag.
Stored airtight like this, your apple puff pastry dessert will stay perfectly delicious in the refrigerator for about 2 to 3 days. Any longer than that, and the pastry starts to get a little chewy, even when wrapped well. Don’t even think about leaving it out on the counter for longer than half a day!
Now, for reheating—this is the key to bringing back that initial magic! You absolutely cannot put this tart in the microwave unless you enjoy eating soggy, floppy pastry. The microwave heats the moisture and turns the flaky layers instantly into bread. We need dry heat to crisp things back up!
To restore that incredible crispness, pull the slice out of the fridge about 20 minutes before you want to eat it. Preheat your oven (or toaster oven, which is perfect for one slice!) to about 325°F (160°C). Place the slice directly onto a small baking sheet or even a piece of foil. Bake it for just about 5 to 8 minutes. You’ll know it’s ready when you can hear that satisfying little crunch when you tap the edges. It’s like fresh from the oven all over again! That quick blast of dry heat re-crisps the pastry beautifully, leaving the apples warm and tender inside. It’s the best way to enjoy any leftovers of this simple apple pastry recipe!
Frequently Asked Questions About This Classic Apple Puff Pastry Recipe
I know that when you’re trying a new recipe, especially one that promises to be the best, you might have a few little snags or questions pop up. That’s totally normal! I’ve gathered the questions I get most often about pulling off the perfect **classic apple puff pastry** tart. Hopefully, this clears everything up so you can bake with total confidence!
Can I use store-bought apple pie filling instead of fresh apples?
That’s the ultimate shortcut question! Look, I made this recipe specifically because I wanted to control exactly how sweet and spiced the apples were, which is why fresh slicing is usually my first choice for a truly classic apple puff pastry. If you *must* use canned pie filling, you need to drain it really, really well first—like, press out all the excess syrup using a fine-mesh sieve. Because the filling is already cooked down, you’ll want to use much less of it, and you should definitely skip adding that tablespoon of flour, onion the dry sugar, or the butter dots. It turns this into a quick dessert, but it loses some of that homemade charm, though it certainly qualifies as a quick apple dessert idea!
What’s the ideal temperature for the puff pastry before baking?
This is critical if you want that beautiful, airy rise. Your puff pastry should be cold when you take it out of the package, but it should have rested on the counter long enough that it’s pliable—you don’t want it cracking when you unfold it. If it feels sticky or floppy to the touch, stick it back in the fridge for 15 minutes. The sweet spot for successful puffing is slightly chilled! If the pastry is too warm, those layers of fat melt before they can steam and separate, leading to a dense, flaky apple pastry base instead of a light one. For more general tips on handling this dough, you can check out my guide on beginner puff pastry recipes!
My bottom crust is soggy! How do I prevent this next time?
Ah, the dreaded soggy bottom! Don’t worry, this happens to everyone, even professional bakers. For this baked apple pastry, there are three things that usually cause this: too much moisture from the apples, pastry that got too warm, or the oven not being hot enough at the start. Make sure you are tossing your apple slices with that small amount of flour—the flour helps absorb the liquid released by the apples as they heat up. Also, make sure your oven is truly preheated to 400°F before it goes in. A high starting temperature shocks the pastry and sets the bottom crust quickly. If you have a pizza stone, placing the baking sheet on top of it preheated in the oven helps draw moisture away from the bottom crust even faster!
Can I add nuts or dried fruit to this recipe?
Absolutely! This recipe is a fantastic blank canvas. If you want to add nuts, I find that pecans or walnuts work wonderfully. If you add them, just toss them in with the apples and cinnamon so they toast slightly while baking. If you want to add dried fruit, like chopped raisins or dried cranberries, I strongly suggest you soak them in a little warm water or apple juice for about 10 minutes first. This plumps them up so they don’t steal moisture from your pastry as they bake. They become perfect little pockets of chewiness in your sweet pastry dessert!
Do I have to use the egg wash on the border?
You don’t *have* to, but you really, really should if you want that gorgeous, professional, deep golden color and shine. The egg wash is what gives the exposed pastry its beautiful lacquered finish; without it, that border will bake up paler and look a bit more matte. If you skip the egg wash, you should at least brush the border with a little melted butter or milk to encourage some browning. If you’re aiming for the absolute best apple puff pastry look, the egg wash is the simple trick that sets it apart!
PrintClassic Apple Puff Pastry Tart
A simple recipe for a classic apple tart using flaky puff pastry and thinly sliced apples.
- Prep Time: 15 min
- Cook Time: 30 min
- Total Time: 45 min
- Yield: 6 servings
- Category: Dessert
- Method: Baking
- Cuisine: French
- Diet: Vegetarian
Ingredients
- 1 sheet frozen puff pastry, thawed
- 3 medium apples (such as Gala or Honeycrisp)
- 1/4 cup granulated sugar
- 1 tablespoon all-purpose flour
- 1 teaspoon ground cinnamon
- 2 tablespoons unsalted butter, cut into small pieces
- 1 egg, beaten (for egg wash)
- 1 tablespoon milk (for egg wash)
Instructions
- Preheat your oven to 400°F (200°C). Line a baking sheet with parchment paper.
- Peel, core, and thinly slice the apples.
- In a medium bowl, toss the apple slices with the sugar, flour, and cinnamon until evenly coated.
- Unfold the thawed puff pastry sheet onto the prepared baking sheet. Score a 1-inch border around the edges of the pastry using a knife, being careful not to cut all the way through.
- Arrange the seasoned apple slices neatly inside the scored border, overlapping them slightly in rows or a spiral pattern.
- Dot the top of the apples with the small pieces of butter.
- In a small bowl, whisk together the egg and milk to create an egg wash. Brush the egg wash lightly over the exposed puff pastry border.
- Bake for 25 to 30 minutes, or until the pastry is golden brown and puffed, and the apples are tender.
- Let the tart cool slightly on the baking sheet before slicing and serving.
Notes
- For a richer flavor, you can brush the baked tart with warmed apricot jam for a glaze.
- Use firm apples that hold their shape well during baking.
- If you prefer a sweeter crust, sprinkle a little extra sugar over the border before baking.
Nutrition
- Serving Size: 1 slice
- Calories: 310
- Sugar: 22
- Sodium: 180
- Fat: 18
- Saturated Fat: 8
- Unsaturated Fat: 10
- Trans Fat: 0
- Carbohydrates: 35
- Fiber: 3
- Protein: 4
- Cholesterol: 45
