

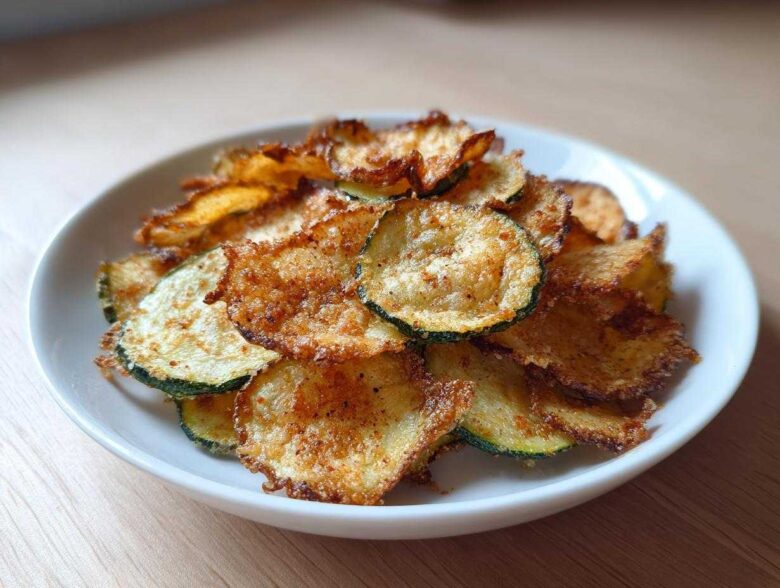
Oh man, you know that feeling? You’re sitting down to watch a movie or maybe just need that little afternoon energy boost, and all you can think about is CRUNCH. But then that little voice kicks in: “Do I really need a whole bag of potato chips?” Trust me, I’ve been there staring into the pantry darkness, wishing for a satisfying, savory snap that didn’t derail my whole day. Well, friends, I finally cracked the code! This recipe finally delivered the goods: **Crunchy Zucchini Chips A Guilt-Free Snack!** Seriously, these turn humble zucchini into thin, crackly little discs that satisfy every craving. Whether you use your trusty oven or zip through it in the air fryer, I promise you the crunch factor here is absolutely legendary.
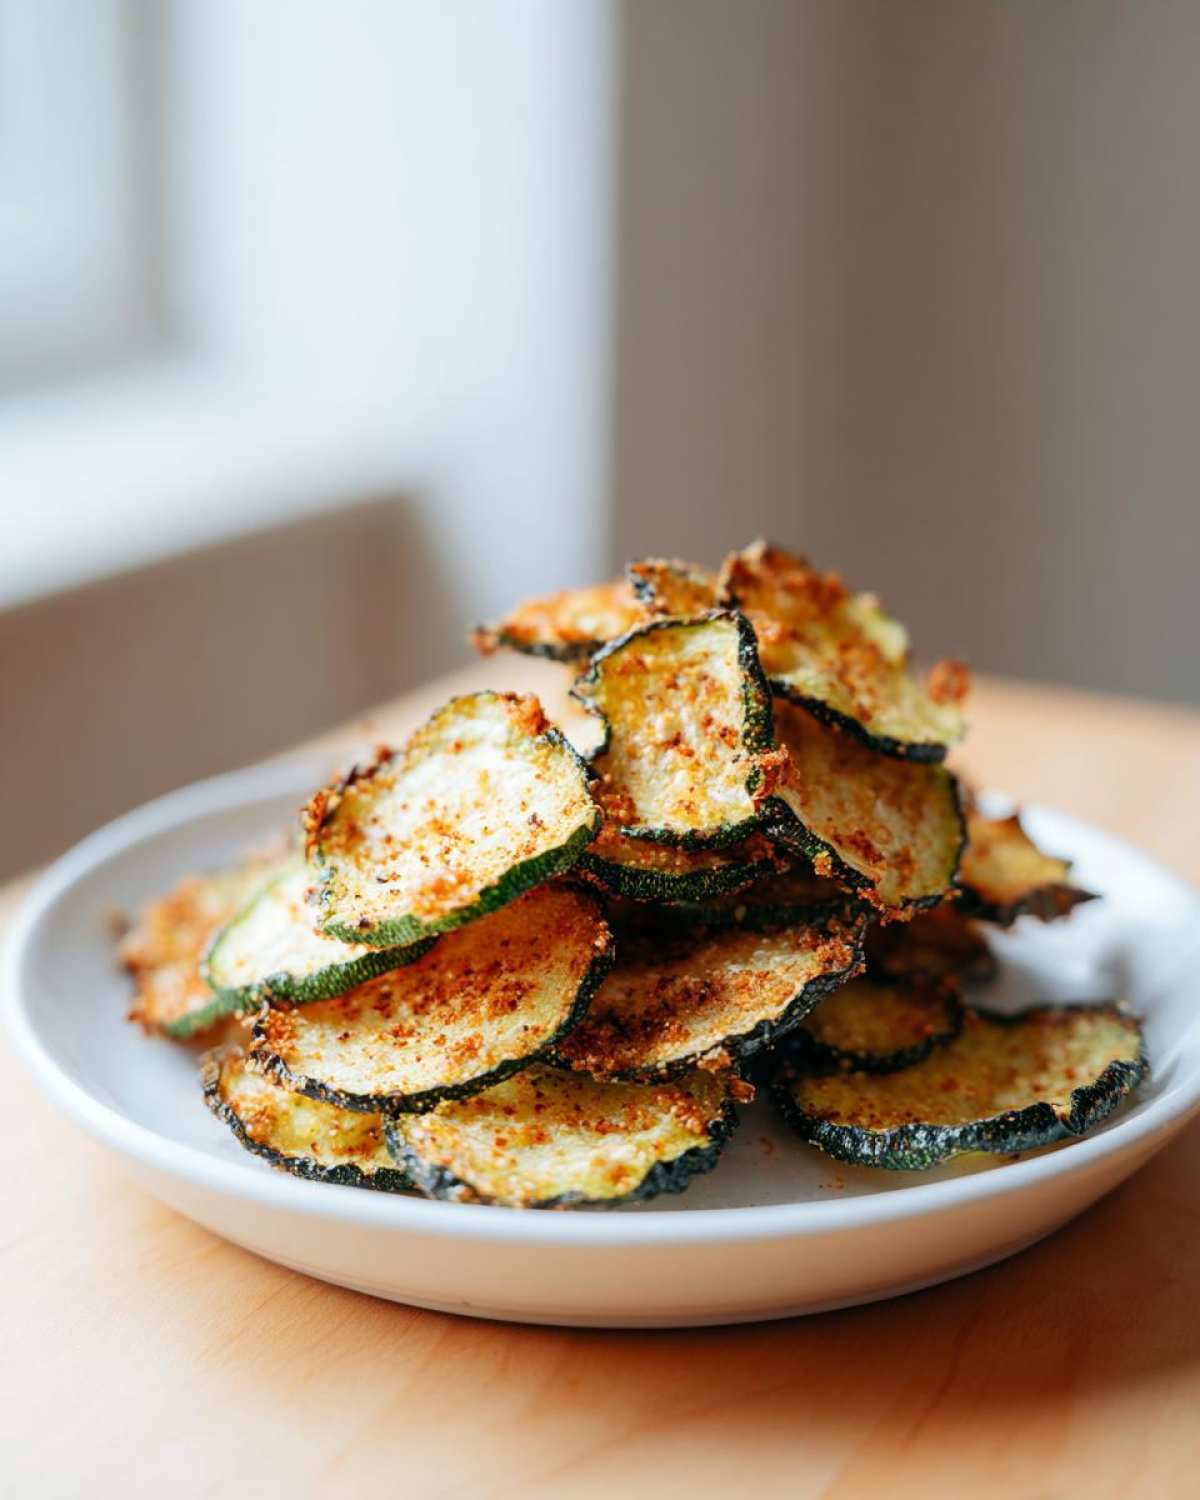
Why You Will Love These Crunchy Zucchini Chips A Guilt-Free Snack!
Honestly, I whipped up a batch last week and they vanished before dinner. It’s amazing what veggies can do when treated right! You absolutely have to try this method because:
- They are unbelievably **crunchy,** that’s the main promise! We conquer the dreaded sogginess with a simple drying trick.
- Talk about **guilt-free snacking ideas**—these are low in fat and carbohydrates, making them perfect when you’re mindful of what you eat. They are practically guilt-free!
- The prep is super fast. Once you get the slicing done, the rest is just waiting for the oven or air fryer to do the hard work.
- They work great anytime! Need a savory vegetable chips for a party? Done. Need a quick healthy snack alternative after a workout? Absolutely.
If you want another great snack idea that’s packed with goodness, you should check out my recipe for veggie-packed egg muffin cups—they are an easy grab-and-go breakfast too!
Essential Ingredients for Crunchy Zucchini Chips A Guilt-Free Snack!
The beauty of this recipe, especially when you’re aiming for something genuinely healthy, is that the ingredient list is ridiculously short. We aren’t masking the zucchini flavor with heavy batters or tons of weird fillers. We are just highlighting what’s already delicious! Having the right ratios here is huge for guaranteeing you get **Crunchy Zucchini Chips A Guilt-Free Snack!** and not sad, slightly warm vegetable slices.
Here is what you need to gather before we even think about slicing:
- 2 medium zucchini: Make sure they are firm! No soft spots, please. You want them just right so you get maximum yield when you slice them thinly.
- 1 tablespoon olive oil: Please measure this level! We need just enough to help the seasonings stick and encourage crisping, but too much will weigh them down and lead to sogginess later.
- 1/2 teaspoon salt: This is crucial for pulling the water out, which your next step will prove!
- 1/4 teaspoon black pepper: Freshly ground is always best; it gives a better bite.
- 1/4 teaspoon garlic powder: Perfect savory base note.
- 1/4 teaspoon paprika: This adds color and a tiny bit of warmth. It makes them look so much better when they come out of the oven!
If you’re looking for other simple meals to make with minimal fuss, you should really take a look at my chicken and cauliflower rice casserole recipe, too. It’s another winner!
The Secret to How to Make Zucchini Chips Crunchy: Preparation Steps
Alright, listen up, because this is where 90% of people mess up their zucchini snacks. If you skip these steps, you are baking moist vegetable rounds, not crispy treats! Getting those ultimate **Crunchy Zucchini Chips A Guilt-Free Snack!** to happen relies entirely on dedication here. We need to get water out of those green beauties before they ever see heat. Seriously, if you take one thing away from this whole post, let it be the importance of drying! You’ll want to be gentle when you mix in the oil later, but right now, we are fighting moisture!
Achieving Uniform Thin Sliced Zucchini Chips Recipe Thickness
Consistency is everything when you are aiming for maximum crunch. If some slices are thick and some are paper thin, the thin ones will burn before the thick ones even slightly dry out—and we don’t want that mess! I beg you, use a mandoline slicer if you have one. Set it to about 1/8 of an inch. If you don’t have one, use your sharpest knife and take your time. Just keep them as uniform as you possibly can. That’s the first secret to a perfectly baked outcome. It’s just like getting those perfect circles when making sheet pan pancakes; precision matters!
The Critical Step: Avoiding Soggy Baked Vegetables By Drying
Once they are sliced, it’s time for the heavy lifting. Lay all those slices out on a couple of clean kitchen towels. Now, here’s my bonus tip that elevated the crispness: sprinkle a little extra salt (not the oil measurement!) over them now, let them sit for about five minutes, and then you’ll see little beads of water forming. You absolutely must press! Lay another towel on top and press down with your palms like you mean it—lean into it! You need to force out every bit of liquid you can. This initial moisture removal is non-negotiable for achieving **Crunchy Zucchini Chips A Guilt-Free Snack!**; it stops the dreaded soggy outcome every time.
Instructions for Healthy Oven Baked Zucchini Chips
Okay, now that we’ve wrestled all the water out of those poor zucchini slices, they are ready for their transformation into **Crunchy Zucchini Chips A Guilt-Free Snack!**. Because we pulled out so much moisture, the baking time is a little longer than you might expect, but trust the process! That long, slow bake is what gets you that dehydrated, perfect crisp.
First thing’s first: get your oven preheated while you’re seasoning the slices. You want a nice, low-and-slow temperature for this. Set your oven to 225 degrees Fahrenheit (107 degrees Celsius). This low heat prevents them from browning too fast before they dry out.
Toss those dried slices we talked about with the measured olive oil and all the lovely seasonings in a bowl. Make sure every single piece gets a light, even coat. Now, get your baking sheets ready with parchment paper. Parchment is your friend here; it keeps things from sticking, which makes cleanup easy!
- Arrange the seasoned zucchini slices onto the parchment-lined baking sheet. This is a big one: they absolutely cannot overlap! If they touch, they steam each other, and we are back to square one with sogginess. Give them space to breathe!
- Slide them into that preheated oven. Now, you need patience. We are looking for 1 to 1.5 hours total.
- Set a timer for one hour. Around that time, you need to flip every single chip. Yes, every one! Flipping ensures they dry evenly on both sides.
- After flipping, keep checking every 15 minutes. They are done when they look dry, feel stiff, and snap when you gently try to bend them. If they are still floppy, give them another 15 minutes. Don’t be afraid to leave them in longer if needed—it’s better to slightly overbake them than underbake them!
Once they are done, pull them out and let them cool completely on a wire rack. I know, I know, you want to eat them right away, but they will crisp up even more as they sit! If you ever want to try making a different kind of satisfying crunch, check out my recipe for chicken sausage and broccoli orzo; it’s a great weeknight dinner!
Making Air Fryer Vegetable Crisps: An Alternative Method for Crunchy Zucchini Chips A Guilt-Free Snack!
If you have an air fryer, you are in luck because it dramatically cuts down on the time needed to achieve that perfect, snappy texture. Honestly, I love the oven method, but sometimes I need those **Crunchy Zucchini Chips A Guilt-Free Snack!** *right now*. The air fryer is amazing because it circulates that hot air so efficiently!
The prep remains exactly the same: you MUST slice thin and you MUST press out that moisture. Salt them, dry them, toss them lightly in the oil and seasonings. Seriously, don’t try to shortcut the drying part just because you’re using the air fryer; that’s the quickest way to make **Air Fryer Vegetable Crisps** that are sad instead of snappy.
The main difference is temperature and time. We need a slightly higher heat level in the air fryer to get that crispness quickly, but we don’t want to scorch them. Set your air fryer temperature to 300 degrees Fahrenheit (150 degrees Celsius). This is lower than many air fryer recipes suggest, but it helps dry them out without blackening the edges before the centers crisp.
Since air fryer baskets are smaller, you need to work in batches. Arrange the slices in a single layer in the basket. Do not pack them in! If they are piled up, they will steam, and boom—soggy chips. Cook them for about 15 to 20 minutes total. You absolutely need to open the drawer and give the basket a good shake halfway through to move the pieces around for even crisping.
Keep an eye on them the last five minutes. They go from done to burnt really fast! When they look dry and feel firm, pull them out. Like the oven method, they will get crunchier once they cool down outside the fryer. It’s a fantastic way to get delicious, low-carb baked zucchini snack results in a fraction of the time. If you are recovering from a cold or just need comfort, make sure you try my Penicillin Soup recipe after you’ve had your savory snack!
Tips for Success and Best Seasoning for Zucchini Chips
I’ve learned a few tricks over the years of trying to avoid the soggy vegetable trap. Making these chips great isn’t just about the temperature you set; it’s about respecting the chemistry of the zucchini! If you follow the main steps, you’ll get there, but these little details are what make them the best seasoning for zucchini chips you’ve ever made.
When it comes to seasoning, don’t feel stuck with just the salt and paprika! While that mix I gave you is perfect for a straightforward, savory vegetable chips for a party vibe, you have room to play. If you want cheesy goodness without the dairy, you HAVE to try sprinkling on some nutritional yeast during that tossing step—it adds a wonderful savory depth. Or maybe you love a little heat? Try swapping the paprika for a pinch of cayenne pepper! The point is, once they are dry, the flavor just pops beautifully.
Cooling Process: The Final Step to Perfect Crunch
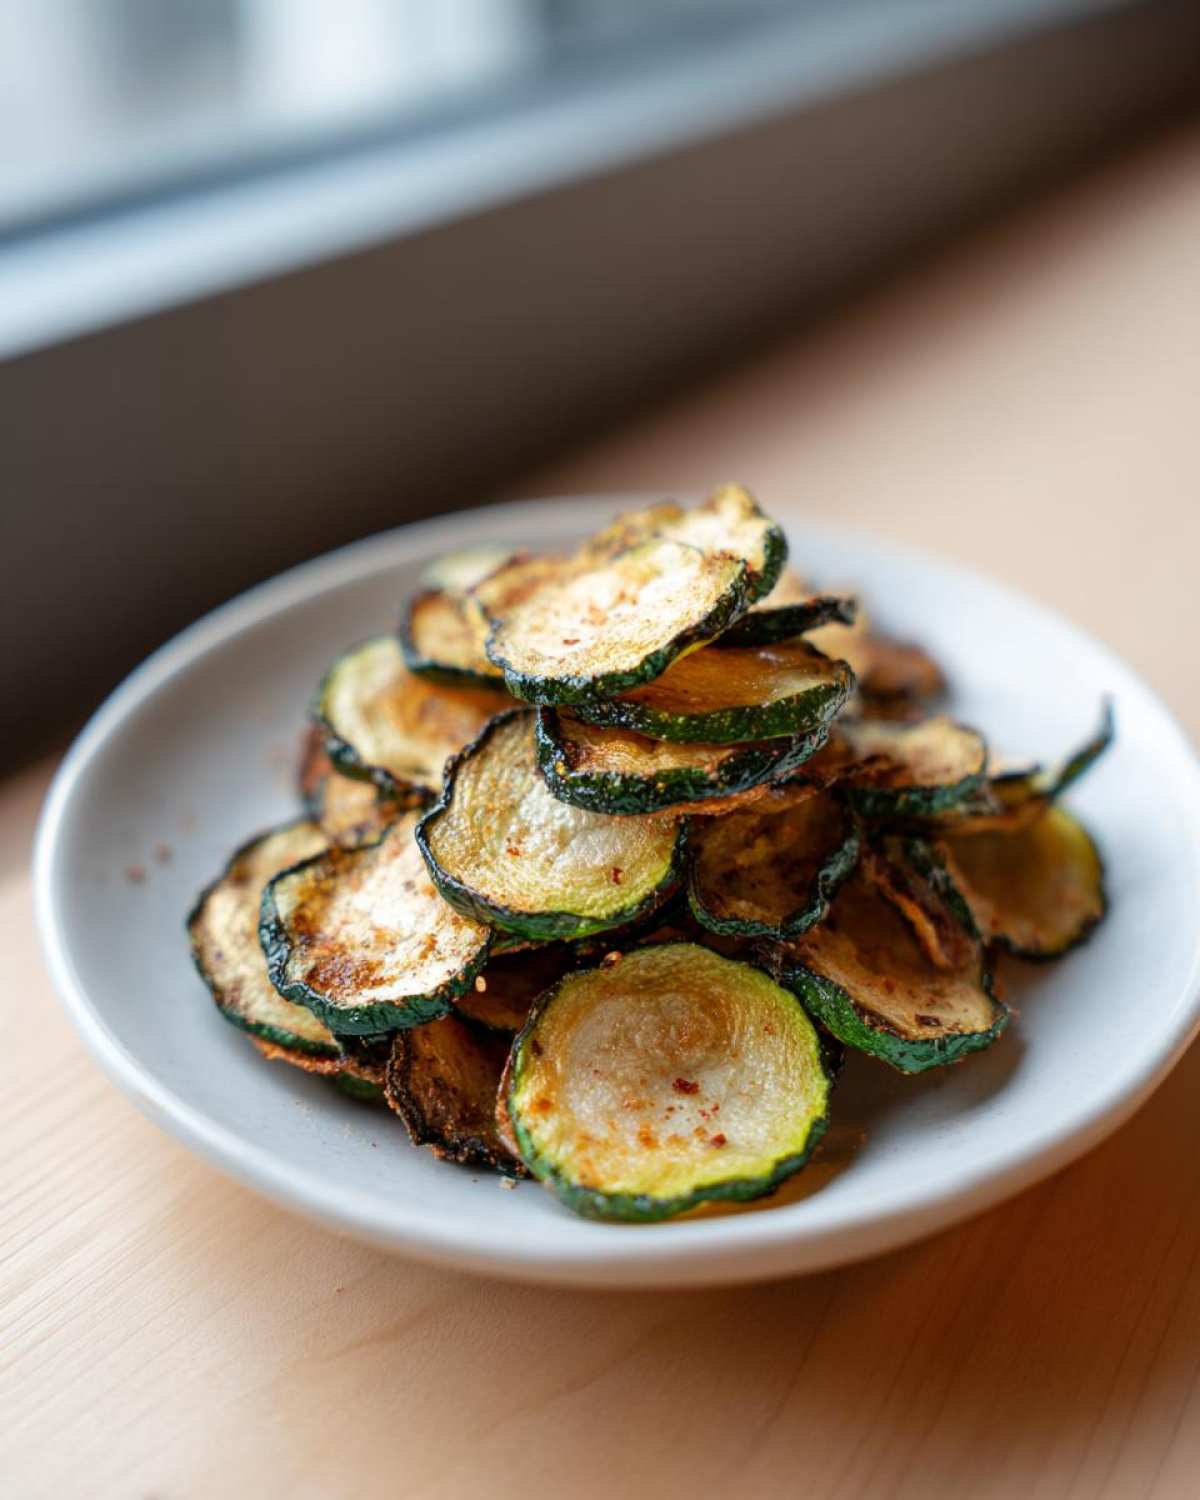
This is the moment where you think you failed, I promise it happens to me every time! When you pull those chips out of the oven or away from the air fryer basket, they might still feel slightly soft in the very center. Don’t panic and throw them back in!
Zucchini chips firm up dramatically as they release residual heat. You must transfer them immediately onto a wire cooling rack. If you leave them sitting on the baking sheet or piled high in the air fryer basket, the trapped steam will immediately soften the bottom layer. Let them cool completely—at least 20 minutes. When they reach room temperature, they should be perfectly snappy and ready to go. If you want to browse other great cooking tips, feel free to wander over to my general blog page for inspiration on all sorts of kitchen adventures!
Storage and Reheating Instructions for Crunchy Zucchini Chips A Guilt-Free Snack!
Okay, so you managed to make a batch of these amazing **Crunchy Zucchini Chips A Guilt-Free Snack!** that you simply couldn’t devour in one sitting. Hooray! Now we need to talk about keeping that glorious crunch alive. The enemy here is humidity, always humidity. If you try to store them in a plastic bag or a container that isn’t perfectly sealed, you might as well have left them on the counter next to a sweating glass of iced tea.
You need an airtight container. Stick them in that container and keep them at room temperature—no need for the fridge! If you did the moisture-removal step absolutely perfectly, these should stay beautifully crisp for about three days. Three days of perfectly crunchy, low-carb baked zucchini snack bliss!
But let’s be real, sometimes they sit in the pantry for four days, and they get just a *little* bit softer. Don’t throw them out! Reheating is super easy, but you cannot use the microwave—that will just steam them again, and you’ll weep. Instead, spread them out on a clean baking sheet and pop them back into a low oven (like 250°F) for about 5 to 8 minutes. Pull them out when they feel stiff again. It breathes new life into older chips! If you’re looking for a much heartier meal after you finish up your snack stash, you simply must try my recipe for easy Salisbury steak; it’s pure comfort food!
Frequently Asked Questions About Making Zucchini Chips
I know questions pop up as you’re getting ready to bake, especially when you’re trying a new vegetable technique. It’s natural to have worries about sogginess or thickness! I’ve tried to cover everything above, but here are a few questions I get asked all the time when people are trying this **crispy zucchini chips recipe** for the very first time.
Can I use parchment paper when air frying my zucchini chips?
This is a great technical question! Generally, food manufacturers advise against using standard parchment paper in the air fryer because the paper is so light, it can lift up on the rush of hot air and potentially touch the heating element—which is obviously a fire hazard. You don’t want that! For air frying, it’s much safer and more effective to use the single-layer arrangement we talked about. The air needs to circulate completely around the slice. If you are worried about sticking, you can buy reusable silicone mats specifically designed for air fryers, though honestly, if you oil the basket lightly, sticking isn’t usually an issue for these.
Are these low carb baked zucchini snack chips suitable for keto?
They absolutely are! If you look at the nutrition summary, you’ll see the carb count is incredibly low per serving. Since we aren’t adding any flour, cornstarch, or sugary coatings, these **low carb baked zucchini snack** chips are a fantastic solution for anyone following a general low-carb lifestyle or even keto. You get the satisfaction of a chip crunch without the heavy starch load you get from potatoes. They really fit the bill for **guilt free snacking ideas**!
If you need something sweet after your savory snack fix, you have to check out the secrets I learned making chocolate meringue pie—it’s surprisingly straightforward!
Serving Suggestions for Your Guilt Free Snacking Ideas
So, you have your beautiful platter of **Crunchy Zucchini Chips A Guilt-Free Snack!**, and they are absolutely perfect. Now what? These savory vegetable chips for a party are almost begging to be dipped or served alongside something else amazing. You don’t want to dull that amazing crunch, so we keep things light!
My favorite way to enjoy these is simply on their own, maybe with a tiny sprinkle of smoked paprika right at the end. But if you’re building a larger spread, they pair wonderfully with Greek yogurt-based dips. Think homemade tzatziki or a creamy onion dip using plain yogurt instead of sour cream.
If you’re treating these as more of a light side dish for lunch, they add great texture on top of broth-based soups. Seriously, crumble a few over a hot bowl of chicken noodle soup instead of crackers—instant upgrade! They’re also amazing crushed up as a coating for chicken if you’re looking for a simple alternative to breadcrumbs. If you need a full meal idea where zucchini plays a healthy supporting role, my chicken lettuce wraps are ridiculously delicious and just as light!
PrintCrunchy Zucchini Chips: A Guilt-Free Snack
Make crispy, crunchy zucchini chips in the oven or air fryer for a healthy, low-carb snack alternative.
- Prep Time: 15 min
- Cook Time: 90 min
- Total Time: 105 min
- Yield: 4 servings
- Category: Snack
- Method: Baking or Air Frying
- Cuisine: American
- Diet: Low Fat
Ingredients
- 2 medium zucchini
- 1 tablespoon olive oil
- 1/2 teaspoon salt
- 1/4 teaspoon black pepper
- 1/4 teaspoon garlic powder
- 1/4 teaspoon paprika
Instructions
- Preheat your oven to 225 degrees Fahrenheit (107 degrees Celsius) or set your air fryer to 300 degrees Fahrenheit (150 degrees Celsius).
- Wash and thinly slice the zucchini into rounds, about 1/8 inch thick. A mandoline slicer works best for uniform thickness.
- Place the zucchini slices on a clean kitchen towel or paper towels. Cover them with another towel and press firmly to remove as much excess moisture as possible. This step is key for crunch.
- In a bowl, toss the dried zucchini slices with olive oil, salt, pepper, garlic powder, and paprika until lightly coated.
- Arrange the slices in a single layer on a baking sheet lined with parchment paper, ensuring they do not overlap. For air frying, place them in a single layer in the basket.
- Bake for 1 to 1.5 hours, flipping the chips halfway through. If using an air fryer, cook for 15 to 20 minutes, shaking the basket halfway through.
- Check the chips frequently after the first hour of baking. They are done when they are dry and crisp. If they are still soft, continue baking in 15-minute intervals.
- Remove from the oven or air fryer and let them cool completely on a wire rack. They will crisp up more as they cool.
Notes
- Removing moisture is the most important step to prevent sogginess. Press hard after slicing.
- For extra flavor, try using onion powder or nutritional yeast instead of paprika.
- Store cooled, completely dry chips in an airtight container at room temperature for up to 3 days.
Nutrition
- Serving Size: 1/4 of recipe
- Calories: 65
- Sugar: 2
- Sodium: 250
- Fat: 4
- Saturated Fat: 0.5
- Unsaturated Fat: 3.5
- Trans Fat: 0
- Carbohydrates: 6
- Fiber: 2
- Protein: 1
- Cholesterol: 0
