

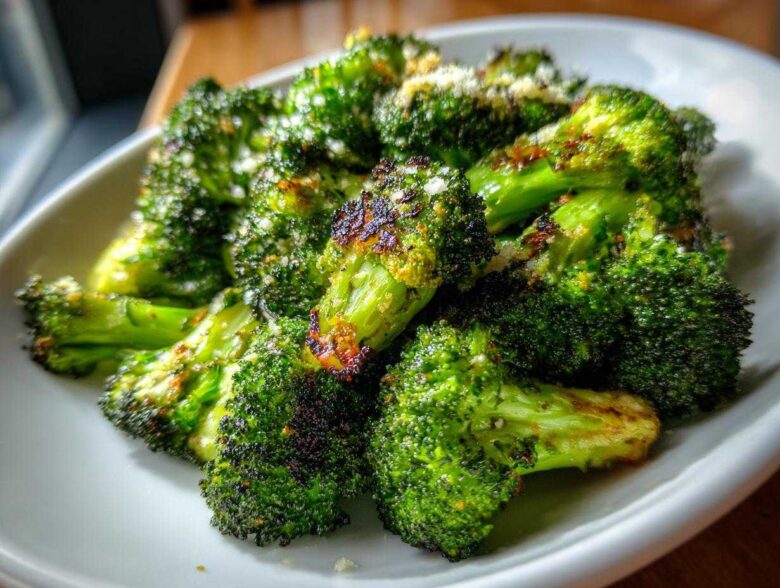
Listen, I know what you’re thinking. Another recipe for a vegetable side dish? Snooze fest, right? Wrong! I used to dread making broccoli. It was always either slightly raw and crunchy, or worse—limp, steamed, kind of gray mush. That was before I cracked the code on **roasted broccoli**. Honestly, I was throwing away perfectly good heads of broccoli because I couldn’t get that magical texture: perfectly tender on the inside, but with those dark, caramelized, almost chip-like edges.
It took me way too many soggy sheet pans to figure it out, but trust me, the secret is treating those florets like they deserve VIP treatment in the oven. Once you nail the high heat and the right coating, that beautiful **roasted broccoli** changes everything. This Garlic Parmesan version is the one that finally won over my vegetable-averse nephew. It’s speedy enough for a Tuesday night, but impressive enough for company. You are going to absolutely love making this easy **roasted broccoli recipe**!
If you want to see some of my other simple side dishes, check out the full list over at the recipe index. But you simply have to try this technique first!
Why This Garlic Parmesan Roasted Broccoli Recipe is the Best Roasted Broccoli
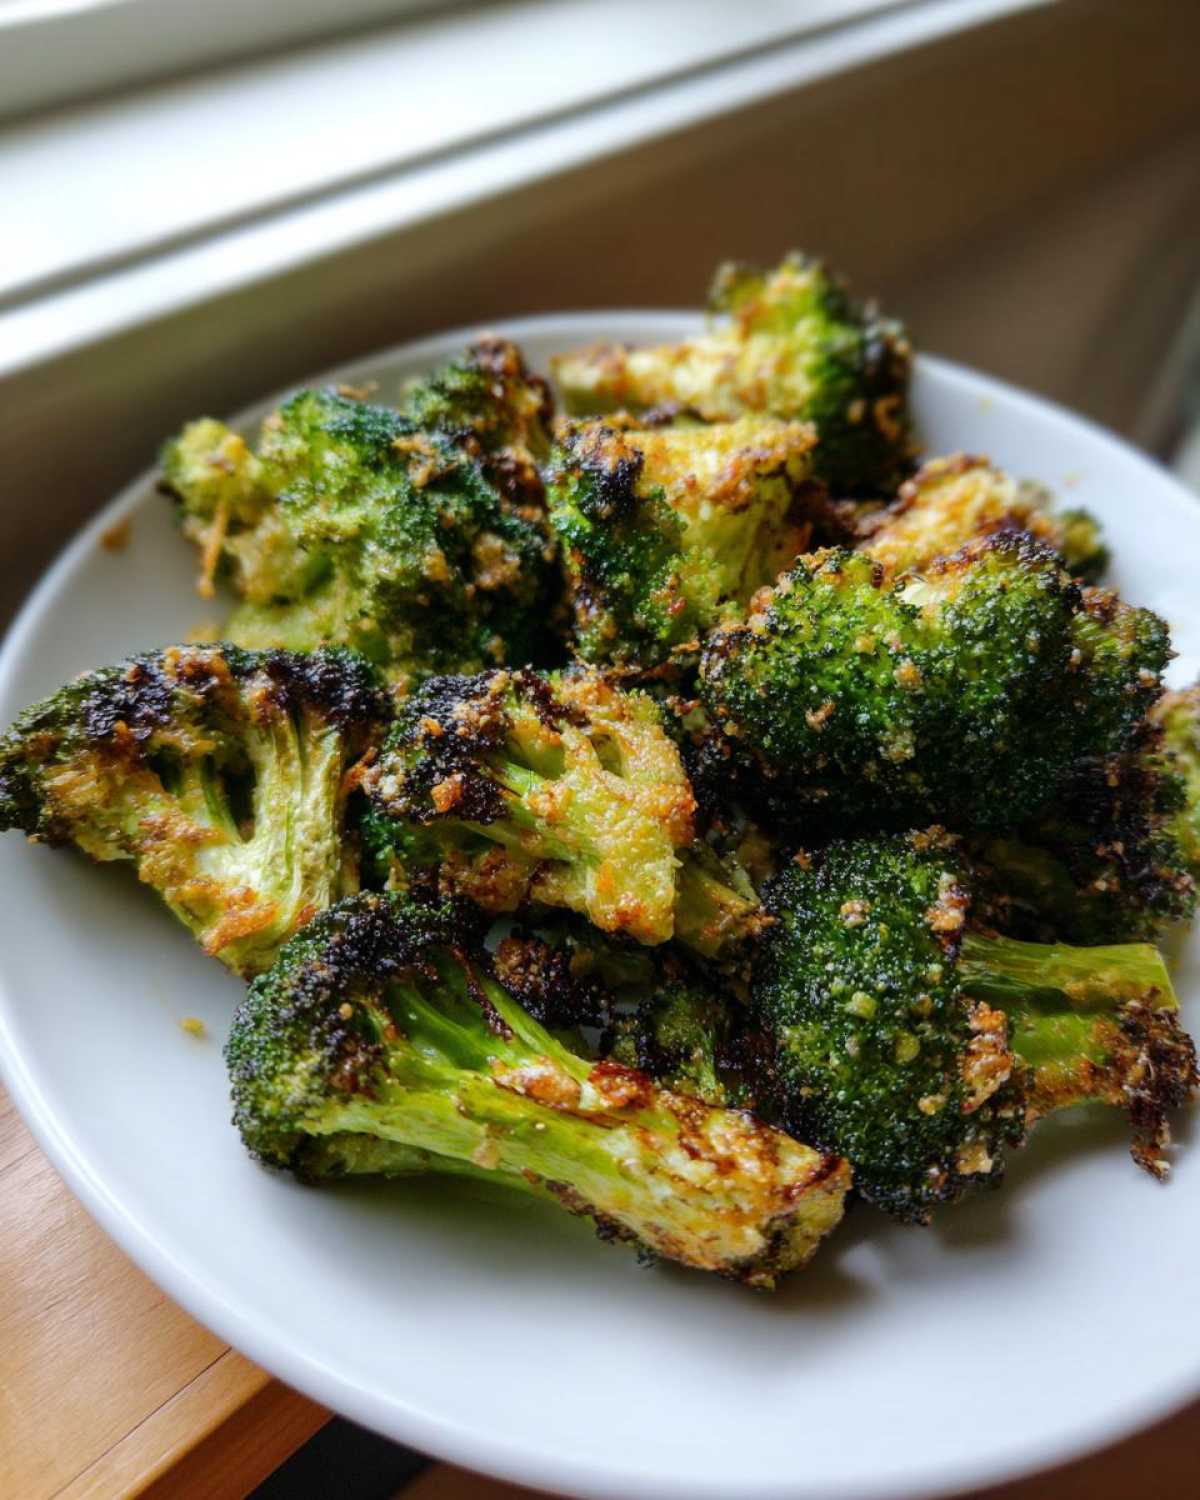
I really believe this Garlic Parmesan flavor bomb creates the absolute **best roasted broccoli** you will ever eat. Why? Because it hits every single texture goal out there. We’re aiming for that **tender inside crispy outside broccoli** sandwich, right? The high heat of the oven cooks the stems quickly while perfectly charring those tips. To get that crispy magic, you just can’t mess around—you need that oven screaming hot, 400 degrees minimum! That intense heat is what drives off the moisture and achieves those beautiful, **caramelized roasted broccoli** edges.
And the flavor? It’s simple perfection. The savory Parmesan melts beautifully and crisps up against the oil, while the garlic toasts just enough to become sweet, not bitter. If you click over to my dedicated guide on getting super crispy roasted broccoli, you’ll see I stress the importance of the high heat; it’s non-negotiable for a crunchy result!
Quick Prep for Your Weeknight Broccoli Side Dish
The best part, honestly, is how fast this comes together. You’re spending maybe 10 minutes actually chopping and tossing, and the rest is pure oven magic. Seriously, the total time is just over half an hour, which means this is my go-to **weeknight broccoli side dish** when I need something healthy but flavorful fast. You’ll have this incredible **roasted broccoli side dish** on the table before the main course is even finished resting!
Essential Ingredients for Perfect Roasted Broccoli
Okay, for this recipe—which makes four great servings, by the way—the quality of what you toss onto that sheet pan really does matter. We’re keeping the ingredient list short because we want the natural flavor of the broccoli to shine, just amplified by the garlic and cheese. Don’t go hunting for fancy specialty items; we’re sticking to basics that work every single time.
Here’s what you need to gather up before you preheat that oven:
You’ll need one big, beautiful head of broccoli, cut into bite-sized florets. Then, grab two tablespoons of good quality olive oil—don’t skimp here, this helps everything crisp up! Two cloves of garlic must be minced very finely; tiny bits toast faster without burning. For seasoning, we just use a little quarter teaspoon of salt and just a whisper of black pepper, maybe an eighth of a teaspoon.
The real stars, besides the broccoli itself, are our finishing touches. You’ll want a quarter cup of grated Parmesan cheese. I usually buy a block and grate it myself right before I start—it makes a noticeable difference, trust me!
Ingredient Notes and Substitutions for Roasted Broccoli
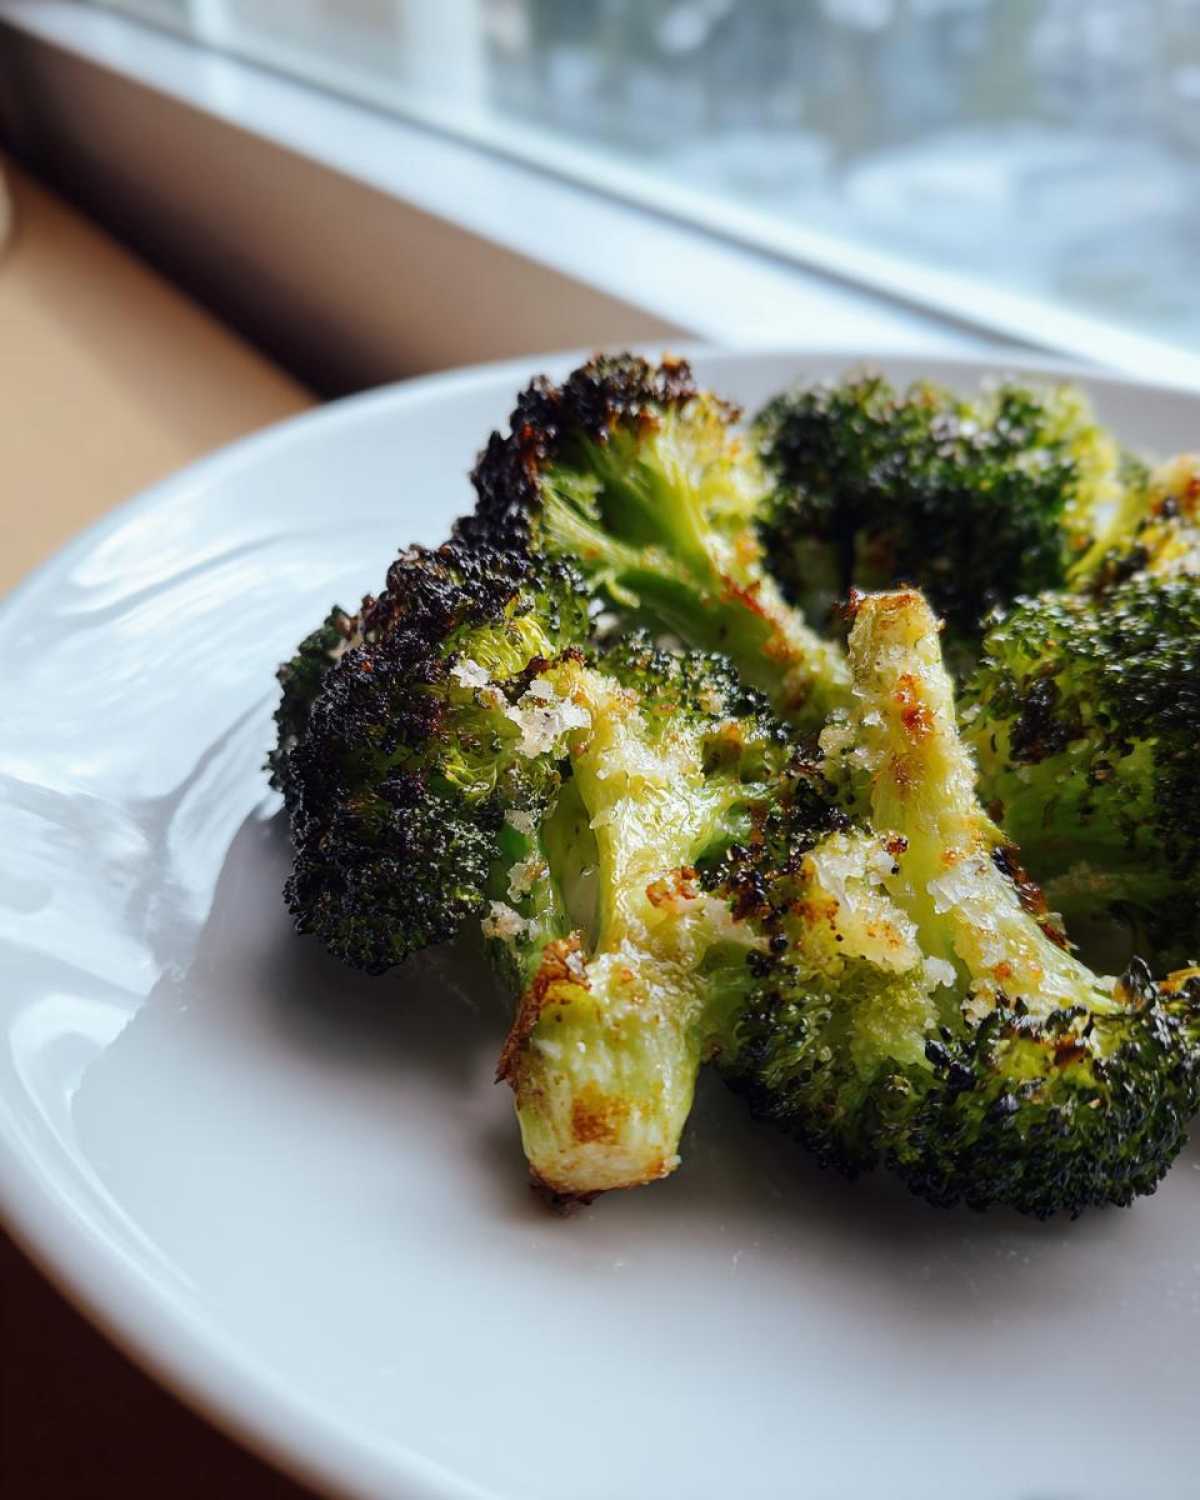
Let’s talk specifics, because these small details elevate this from just ‘okay’ **roasted broccoli’ to something you’ll make weekly. Regarding the garlic: please grate or mince it super fine. If you use the big jar of pre-minced stuff that sits in oil? It tends to steam the broccoli a bit, and nobody wants that! Fresh is king here.
Now, the Parmesan cheese requires some attention. If you use the pre-shredded bag variety, sometimes it has starches added that prevent it from melting smoothly and achieving that beautiful crisp edge we crave. Freshly grated melts better initially and then crisps up wonderfully as the cooking finishes. It’s worth the extra minute of work!
If you taste your broccoli right out of the oven and it feels a touch too heavy or savory, I always keep fresh lemon on hand. You can drizzle one teaspoon of fresh lemon juice over the top right before serving. It cuts through the richness of the cheese and brightens up the whole vegetable. It’s my secret little tweak for when I want a brighter finish!
The Ultimate Broccoli Roasting Method for Crispy Roasted Broccoli
If you’re serious about getting this vegetable right, you need to focus on the **broccoli roasting method**. Getting that perfect texture—you know, the dream of **tender inside crispy outside broccoli**—isn’t about the ingredients alone; it’s about the technique. This is my tried-and-true advice on **how to roast broccoli perfectly** every single time so it tastes like it came from a fancy steakhouse.
The main enemy of crispiness is steam. Steam happens when you crowd the pan or when the oven isn’t hot enough! I’ve learned that to truly achieve that amazing **caramelized roasted broccoli** effect without turning everything mushy, you have to give your floret pieces space to breathe in that hot oven air. We are roasting these guys open-air, not steaming them in their own juices!
If you’re doubling the recipe, please listen to me: do not just pile it all onto one sheet pan. That’s inviting sogginess. If you’re making a big batch, grab two baking sheets. Spreading the broccoli out in a single layer across those two pans ensures maximum surface area exposure to the 400-degree heat. It makes cleanup a tiny bit more annoying, but I promise, the perfectly charred, crispy results are worth the extra sheet pan duty. You can find some other great roasting tips over in my guide on roasting other cruciferous veggies!
Preheating and Pan Preparation for Roasted Broccoli
This part is crucial, so don’t walk away from the oven dial! You must preheat your oven to 400 degrees Fahrenheit (that’s 200 Celsius). This high heat is non-negotiable for great **roasted broccoli**. If the oven isn’t fully heated when the broccoli goes in, the oil warms up slowly, and you end up stewing the vegetables before they ever get a chance to brown.
I just use a plain metal baking sheet—no parchment paper here for the initial roast, because parchment actually traps some of the steam near the surface, which defeats the purpose! For this initial blast of heat, you want the metal itself helping cook those bottom edges until they start to brown. We keep it simple, hot, and fast!
Step-by-Step Instructions for Garlic Roasted Broccoli
Alright, now that you’ve got your oven blazing hot and your broccoli perfectly oiled and seasoned, let’s get this into the heat! I’ve broken down the official instructions into steps you can follow right off your phone while you’re standing in the kitchen. Remember, we roast this in two phases—that’s how we get the perfect texture!
First thing: You will get your preheated 400°F oven ready. Take your baking sheet, which hopefully has your single layer of seasoned florets spread out nicely, and pop it onto the center rack. Now, you roast this for the first 15 minutes. This is where the broccoli softens up and the edges start getting that first hint of browning. Don’t peek too much, but 15 minutes sets the stage!
Once the timer goes off, you need to work quickly because we don’t want the oven cooling down too much. Carefully pull that hot sheet pan out! See all those lovely browned bits starting to form? Now, this is the fun part: you are going to sprinkle that quarter cup of grated Parmesan cheese evenly all over the broccoli pieces. Try to get some cheese nestled around the base of the florets.
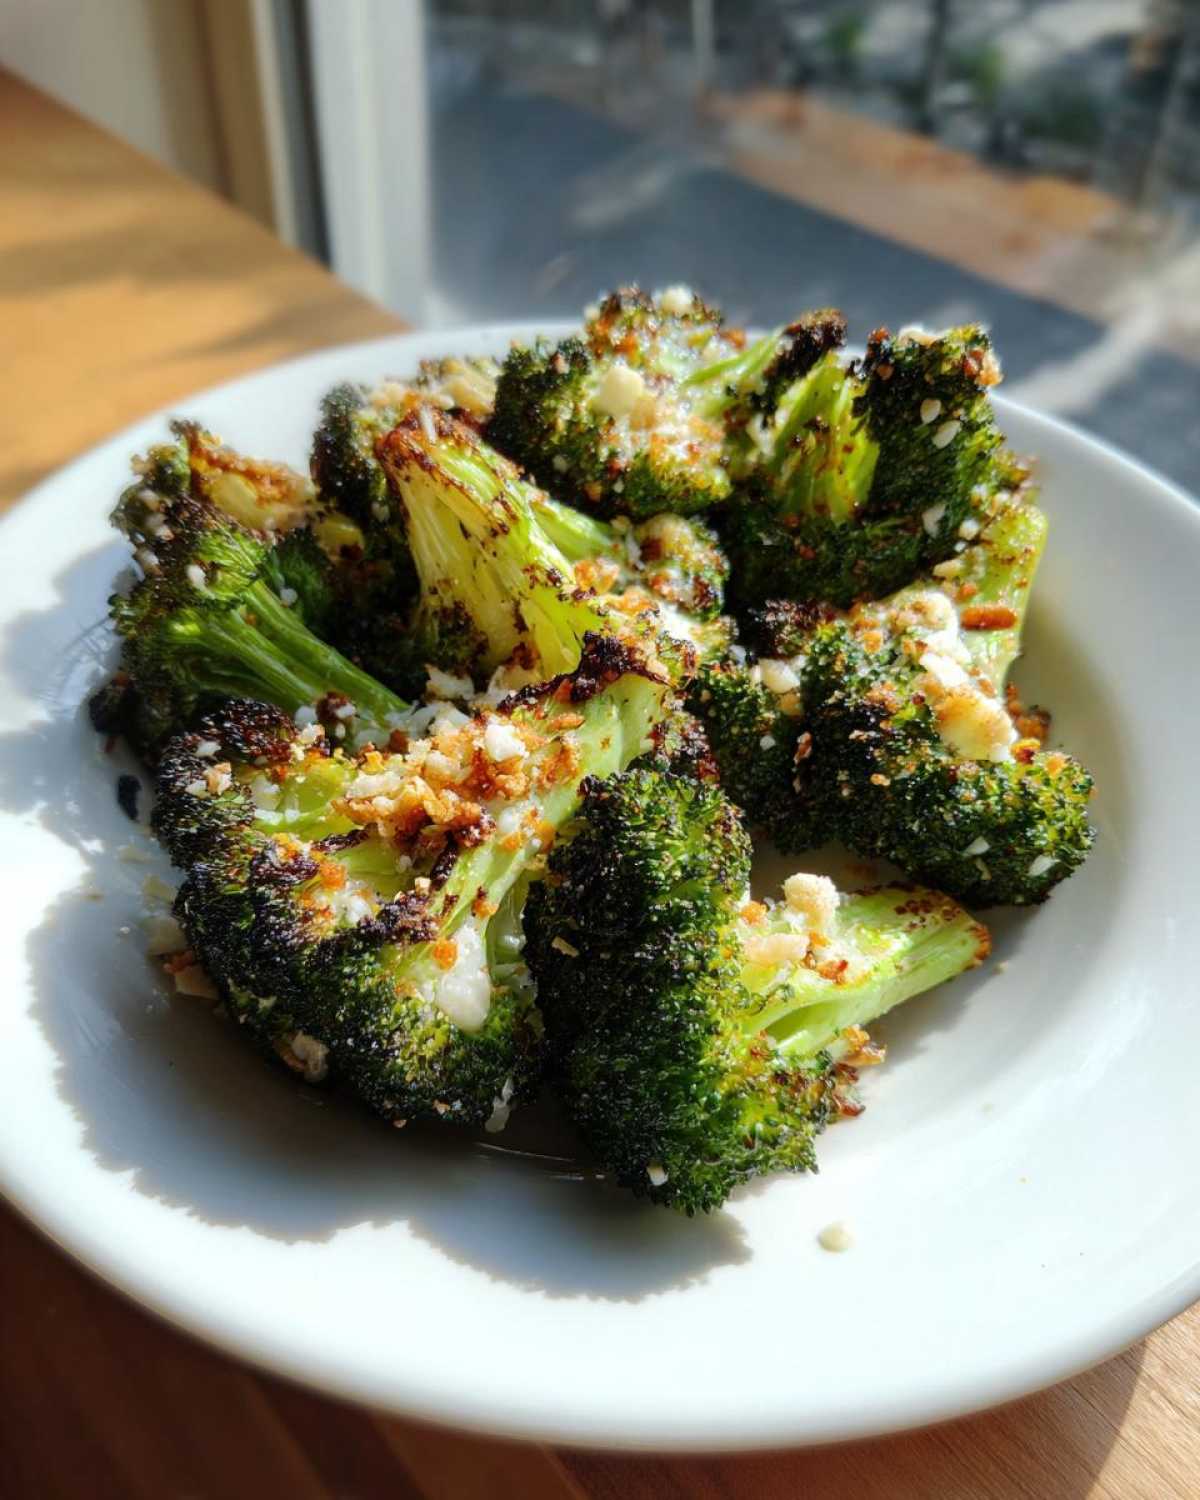
Back into the oven it goes! This second roast is shorter, only another 5 to 7 minutes. You are looking for two things here: that cheese should be melted, bubbly, and starting to turn golden brown, and the very tips of the broccoli should look nicely darkened and crispy. Pull it out the second you see those edges turning deep brown—that’s the money shot!
You’ll want to grab this easy **roasted broccoli recipe** and serve it immediately while it’s piping hot. If you want that final pop of flavor I mentioned earlier, now is the time to hit it with a tiny splash of lemon juice. Enjoy every crispy bite!
If you need more quick vegetable inspiration, I have a whole category dedicated to simple vegetable sides that are just as fuss-free as this one!
Tips for Success When Making Roasted Broccoli Side Dish
We’ve covered the basics of the seasoning and the timing, but I want to give you a couple of insider tricks that take this **roasted broccoli side dish** from great to absolutely legendary. These are the tweaks I learned over years of aiming for that perfect char! Remember, texture control is everything when it comes to roasting vegetables.
For example, I mentioned it before, but it bears repeating because it’s so important: if you are making a massive batch of this **roasted broccoli**, whatever you do, do not try squeezing it all onto one pan! Steam is your enemy. If you try to bake too much at once, all the moisture gets trapped between the vegetables, and you end up with rubbery stems instead of beautiful charring. Use two baking sheets! Trust me, I learned this the hard way. Spreading everything out thinly lets that hot air circulate, guaranteeing those crispy edges everywhere.
Also, don’t pull the broccoli out of the oven and then decide to go answer the phone or start chopping your main course. This vegetable waits for no one! It’s best served piping hot right after that cheese has melted and crisped. If you want to maximize the fantastic flavor profile we built here, check out my recipe for the ultimate crispy roast guide—it has a whole section on oil temperature!
Achieving Caramelized Roasted Broccoli Edges
This is the ultimate goal, right? We aren’t just looking for cooked broccoli; we want that sweet, nutty flavor that only high heat and direct contact with the pan can provide. The absolute key to those gorgeous **caramelized roasted broccoli** edges is space! I cannot stress this enough.
When you spread the broccoli florets onto that preheated hot sheet pan, they should only be touching the pan surface in one spot. There must be air space between every single floret. It sounds fussy, but if they are overlapping, they’ll steam each other instead of roasting. Think singles bar, not a crowded elevator!
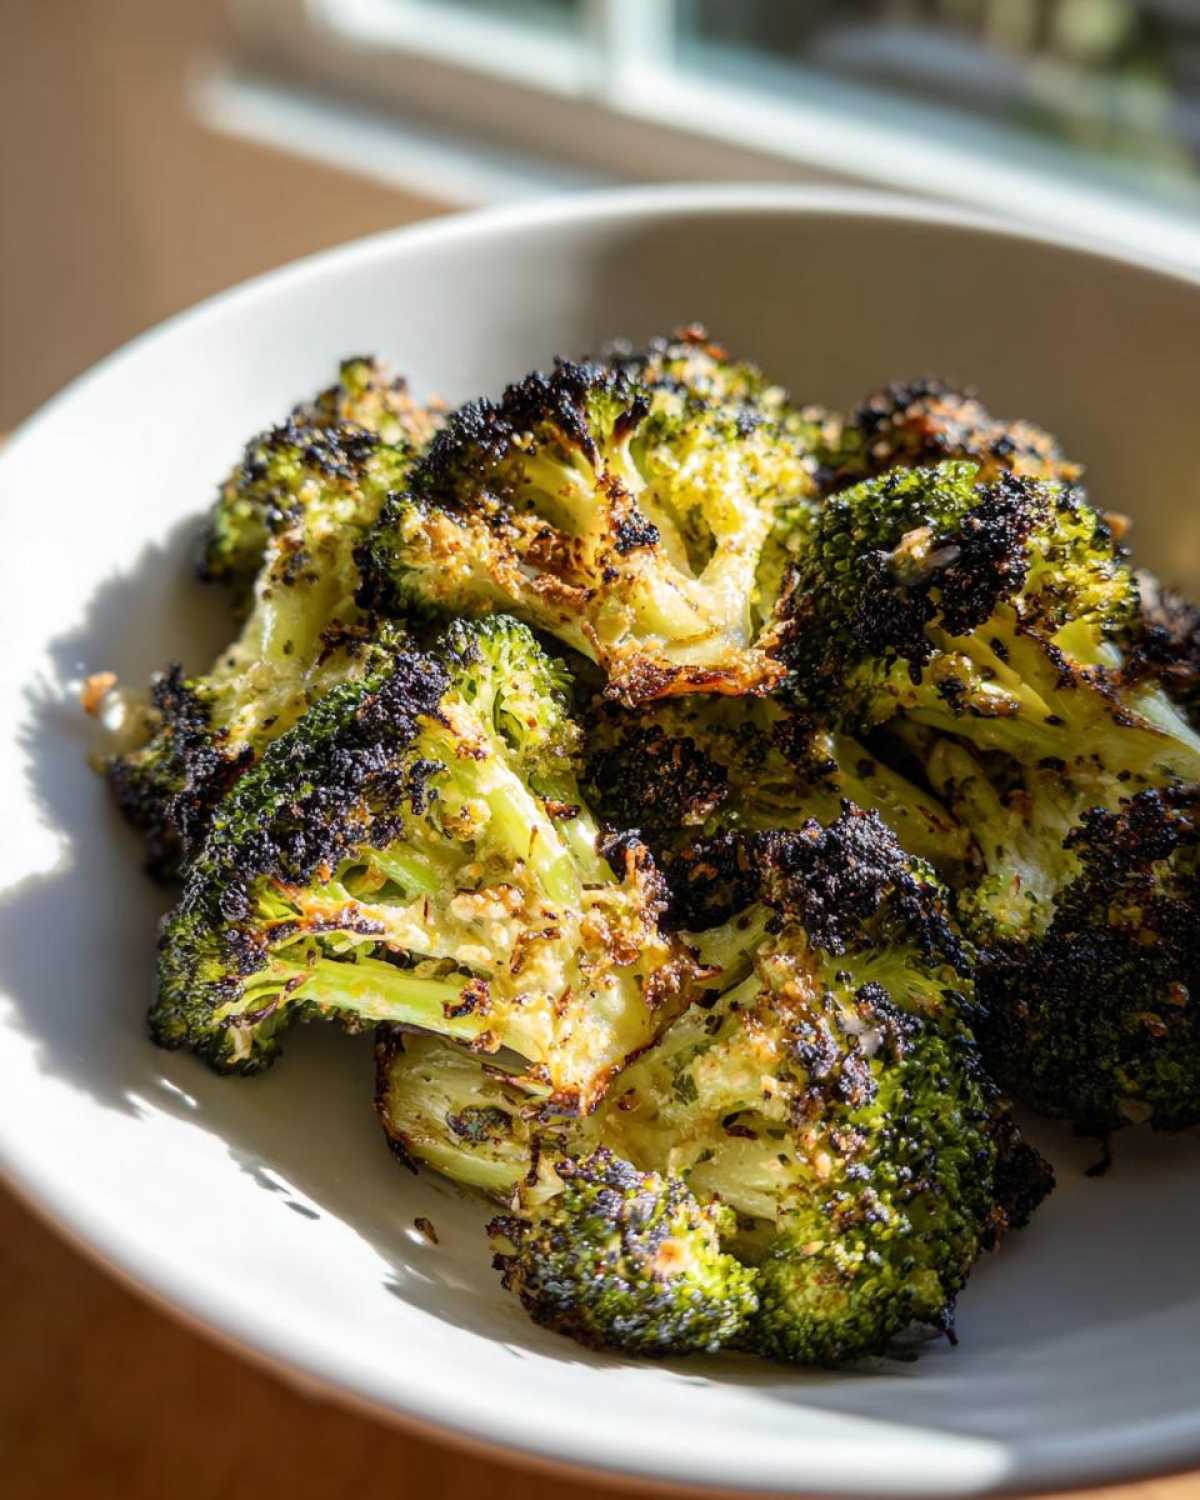
Ensure you give those florets a good toss halfway through that first 15-minute roast. A good toss guarantees that different sides of the broccoli get exposed to that intense heat, leading to more surface area available for charring. When you pull them out for the Parmesan sprinkle, you should already see nice dark brown spots developing on the exposed bits. That’s what you’re looking for to ensure total flavor payoff!
Serving Suggestions for Your Roasted Broccoli
Now that you have technically mastered the **best roasted broccoli** recipe on the planet, the next fun part is figuring out what to put on the plate next to it! This Garlic Parmesan flavor profile is so versatile, it basically begs to be paired with something simple so the broccoli can truly shine as the star side dish.
Since we used garlic and Parmesan, it leans wonderfully into Italian-American flavors, but honestly, it goes with almost anything. For a killer weeknight meal that feels completely put-together but takes zero effort on your part, try pairing it with some simple roasted chicken breasts. I have this fantastic Garlic Parmesan Baked Chicken recipe that uses similar flavors, so you only need to have one type of seasoning mix on hand.
If you’re leaning towards pasta—and who isn’t, right?—this **roasted broccoli side dish** cuts through the richness of a simple creamy lemon sauce beautifully. You can toss the florets directly into a bowl of spaghetti or fettuccine right at the end. It also holds up surprisingly well next to richer dishes, cutting the fat with its bright flavors.
Honestly, I always make a double batch of this recipe because leftovers are fantastic—and that’s saying a lot for a vegetable side! It makes a wonderful addition to almost any meal you are planning, taking your entire dinner from average to awesome.
Storage and Reheating Instructions for Leftover Roasted Broccoli
A sign of a truly great side dish is that it tastes good the next day, and honestly, this Garlic Parmesan **roasted broccoli** holds up really well! But we have to respect the crispiness we worked so hard to achieve. If you find yourself with extra florets—which, good for you, that means you made enough!
When storing leftovers, the enemy is moisture trapped against the vegetable. You must let the broccoli cool down completely to room temperature first. Don’t you dare put hot food straight into the fridge; that creates condensation, and condensation breeds sogginess! Once cool, transfer it into an airtight container. If you have a container that’s much bigger than the broccoli, that’s fine, but seal it tightly. Stored correctly, this will stay fresh and flavorful in the refrigerator for about three to four days. Any longer than that, and the texture starts to fade.
Now, the reheating is where you can either save the crisp or doom it. Please, I beg you, put the microwave away for this one. The microwave heats the water molecules inside the broccoli, making it instantly soft and steamy again. We worked too hard for that!
For the best results, you want to use dry heat to pull the moisture out again and crisp up those edges. The air fryer is my number one choice if you have one—just pop the leftovers in at 350°F for about 4 to 6 minutes, shaking once halfway through. It revives that texture beautifully.
If you don’t have an air fryer, the regular oven works like a charm too. Spread the cooled broccoli back out on that same baking sheet (no need for extra oil!), and pop it back into an oven set to 375°F for about 8 to 10 minutes. Keep an eye on it, because once the cheese gets a second blast of heat, it can go from golden to burnt pretty quickly. A quick revitalization, and it’s just as delicious as it was fresh!
Frequently Asked Questions About Roasted Broccoli
I’ve gotten so many questions over the years about this **roasted broccoli** method, especially from people who swear they’ve never liked the vegetable before! You guys are the best for trying this, and I want to make sure you have all the answers you need to nail that crispiness. Here are a few things I hear most often from folks trying this **easy roasted broccoli recipe** for the first time.
Can I use frozen broccoli for this easy roasted broccoli recipe?
Oh, honey, I really wish you could, but no! Please, please don’t try to use frozen broccoli here. That’s the quickest route to massive disappointment, and I don’t want you wasting your good Parmesan on something that’s destined to be soggy. Frozen vegetables, by definition, have been pre-blanched and hold a ton of extra water inside their cells.
When you put that frozen broccoli into a 400-degree oven, all that water melts out instantly, surrounding the florets in liquid. Instead of roasting and getting those beautiful brown edges, you end up basically steaming the vegetable right on the sheet pan. You just won’t get that lovely **crispy roasted broccoli** texture we are aiming for. For the absolute **best roasted broccoli** experience, use fresh, trim it up well, and pat it dry if you notice it’s a little damp!
What other seasonings work well with roasted broccoli?
While I absolutely adore the savory punch of garlic and Parmesan, there are so many other ways to dress up your vegetable! It really depends on what you’re serving it with, but I love experimenting with spice and brightness. If you want a little kick without using cheese, grabbing some red pepper flakes and tossing them in with the olive oil is fantastic.
If you’re looking for a smoky depth, smoked paprika works wonders and gives a beautiful color to the florets as they roast. We talked about the lemon zest addition earlier, but seriously, if you want to embrace that brighter flavor profile, try my lemon roasted broccoli variation where you squeeze fresh lemon juice over everything right at the very end. You can use a combination of those spices or just swap them out entirely based on your mood. It’s so flexible!
If you’re looking for something completely different and incredibly decadent, you should check out how I make my creamy beer cheese dip—it’s fantastic for dunking veggies, too, if you ever feel like dipping instead of roasting!
Nutritional Snapshot of This Healthy Roasted Vegetable Recipe
I know so many of you look for a quick summary of the nutrition when you’re planning out your meals for the week. Since this Garlic Parmesan **roasted broccoli** is such a simple, clean dish, it fits perfectly into almost any kind of eating plan. It’s high in fiber, low in sugar, and gives you a nice little boost of protein thanks to that Parmesan cheese!
Now, before you go planning your entire menu around these numbers, you have to remember that this is just an estimate. I calculated this based on the specific quantities listed in the ingredients—especially the amount of olive oil and the average size of the broccoli head. Different brands of Parmesan can change the sodium levels a bit, so take these figures as a fantastic guideline, not a perfect lab reading!
Here’s the estimated breakdown for one serving (this recipe makes about four servings total):
- Serving Size: 1 serving
- Calories: 105
- Fat: 7g
- Saturated Fat: 2g
- Carbohydrates: 8g
- Sugar: 2g
- Fiber: 3g
- Protein: 6g
- Sodium: 250mg
- Cholesterol: 7mg
Isn’t that great? It’s a genuinely filling, **healthy roasted vegetable recipe** that doesn’t leave you feeling weighed down. Because the oil is measured carefully in the recipe, the fat content is mostly the healthy unsaturated kind, which is just a bonus! Enjoy knowing that every bite of this wonderfully **crispy roasted broccoli** is working for you!
PrintGarlic Parmesan Roasted Broccoli
A simple recipe for making crispy, flavorful roasted broccoli with garlic and Parmesan cheese.
- Prep Time: 10 min
- Cook Time: 22 min
- Total Time: 32 min
- Yield: 4 servings
- Category: Side Dish
- Method: Roasting
- Cuisine: American
- Diet: Vegetarian
Ingredients
- 1 large head broccoli, cut into florets
- 2 tablespoons olive oil
- 2 cloves garlic, minced
- 1/4 teaspoon salt
- 1/8 teaspoon black pepper
- 1/4 cup grated Parmesan cheese
Instructions
- Preheat your oven to 400 degrees Fahrenheit (200 degrees Celsius).
- Place the broccoli florets on a large baking sheet.
- Drizzle the olive oil over the broccoli and toss to coat evenly.
- Add the minced garlic, salt, and pepper. Toss again until the broccoli is well coated.
- Spread the florets into a single layer on the baking sheet. Do not overcrowd the pan.
- Roast for 15 minutes.
- Remove the pan from the oven and sprinkle the Parmesan cheese over the broccoli.
- Return the pan to the oven and roast for another 5 to 7 minutes, or until the edges are crispy and the cheese is melted and lightly browned.
- Serve immediately.
Notes
- For extra crispy edges, use two baking sheets instead of one to prevent steaming.
- If you prefer a brighter flavor, add 1 teaspoon of fresh lemon juice after roasting.
Nutrition
- Serving Size: 1 serving
- Calories: 105
- Sugar: 2
- Sodium: 250
- Fat: 7
- Saturated Fat: 2
- Unsaturated Fat: 5
- Trans Fat: 0
- Carbohydrates: 8
- Fiber: 3
- Protein: 6
- Cholesterol: 7
