

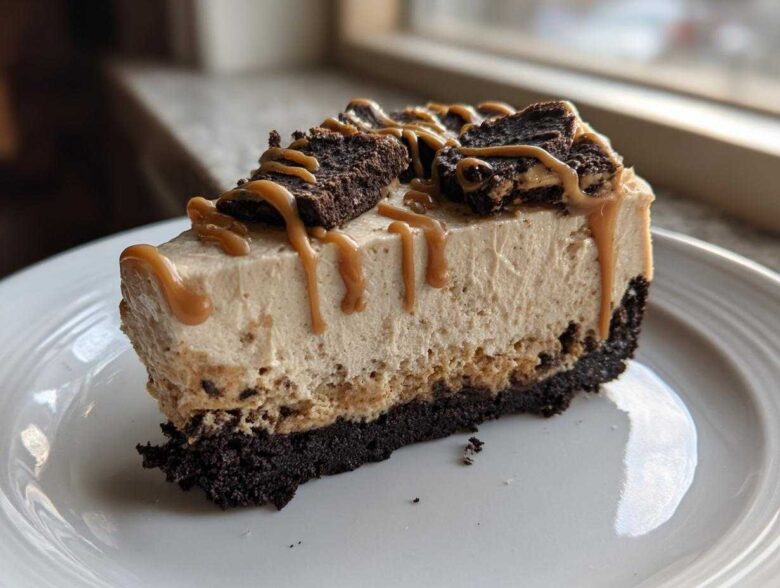
Oh my goodness, let’s talk about Biscoff. That spiced, caramelized cookie butter is what dreams are made of, right? When you swirl that magic into a cloud of creamy cheesecake? It’s genuinely next level. But here’s the thing—you don’t need to stress over melting points or water baths!
I want to share what I truly believe is the best easy biscoff cheesecake recipe around. Forget the complexity; this one is specifically designed to be simple and gloriously no-bake. After testing several versions, I perfected this easy biscoff cheesecake recipe to guarantee creamy results without turning on the oven. Seriously, you just mix, press, and chill. It’s the perfect weekend treat when you want maximum flavor payoff for minimum fuss!
If you’re looking for something similar but a bit more rustic, check out my Basque Burnt Cheesecake, but today, we focus on smooth, cool perfection.
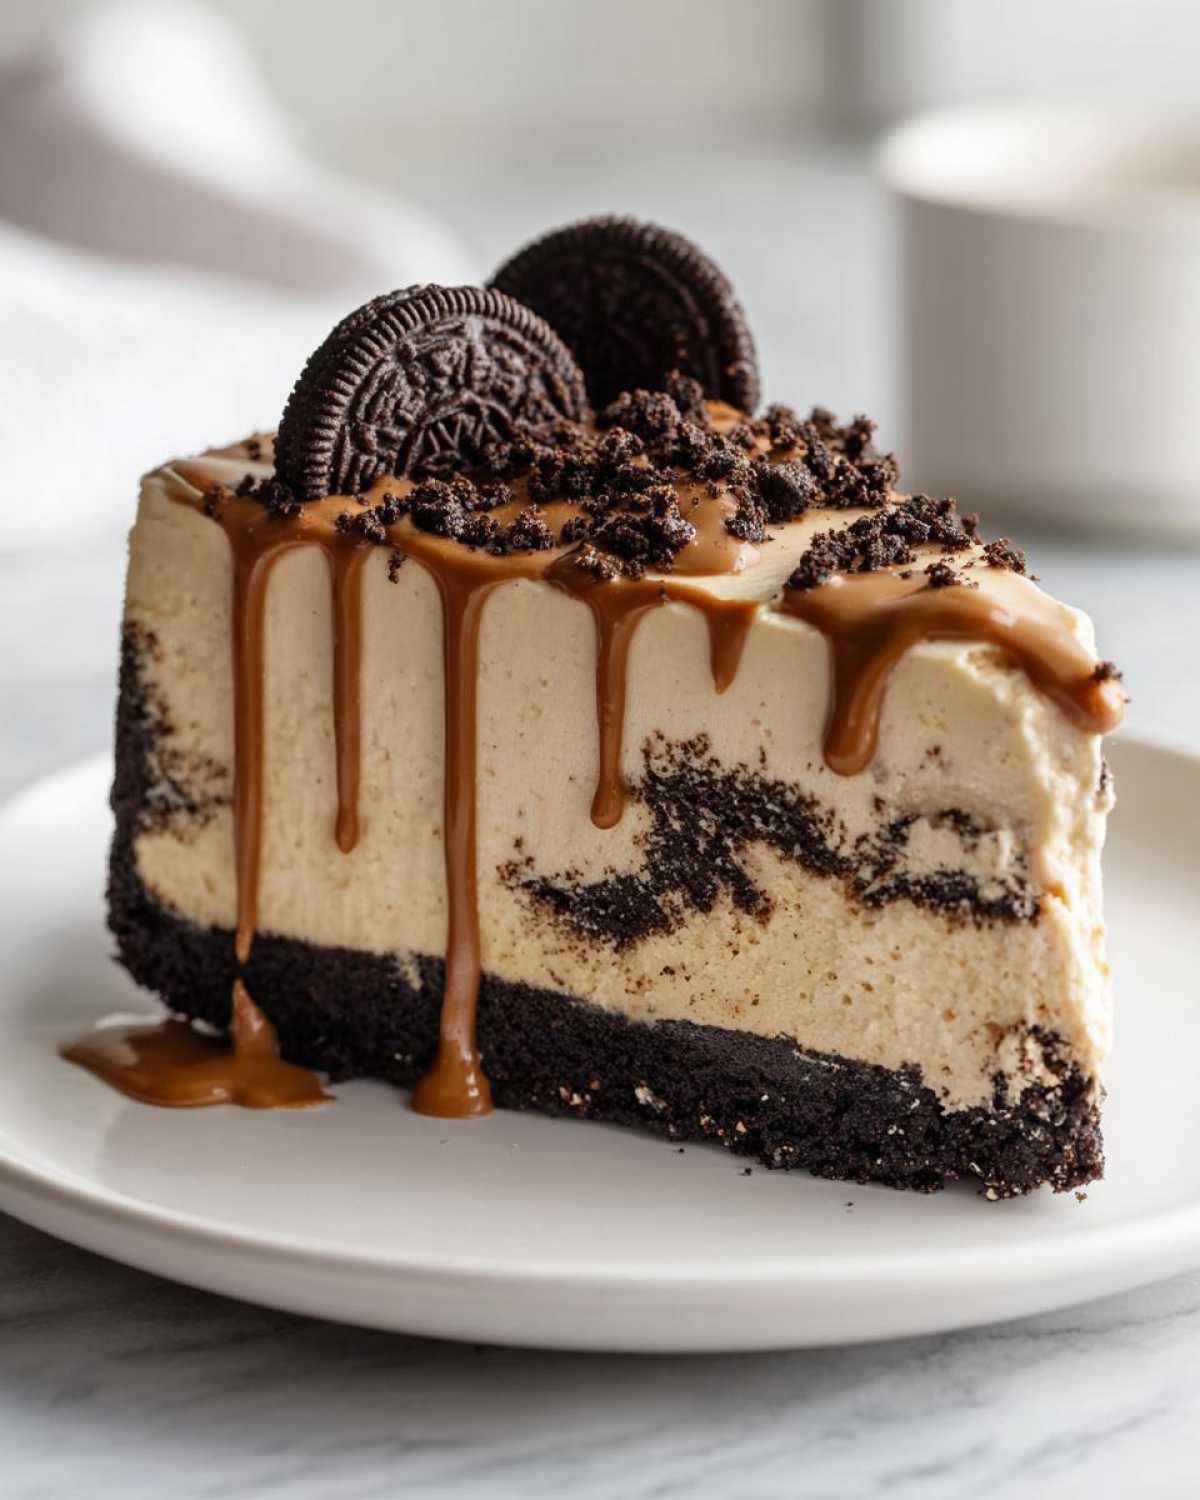
Why This is the Best Easy Biscoff Cheesecake Recipe (No Bake)
Why should you trust my simple instructions over a recipe that demands an oven? Well, because your time is precious, and sometimes you just want that beautiful caramelized flavor without any fuss! This recipe delivers that rich, spiced taste without ever needing to set an oven timer.
-
Perfect for Beginners: A Beginner Cheesecake Recipe
Seriously, if you’ve never made a cheesecake before, start here. The hands-on time is unbelievably short—we’re talking just 20 minutes from start to finish before it goes in the fridge. There are no eggs to worry about tempering or cracking. It’s genuinely a stress-free no-bake mini cheesecake project!
-
Incredibly Creamy Biscoff Cheesecake Instructions
The texture is what sells this for me every time. Because we whip the heavy cream separately and gently fold it in, the filling becomes airy, light, and smooth. The Biscoff spread melts right into the cream cheese base, giving you that deep, complex flavor without any graininess.
-
Quick Biscoff Dessert Ready for Chilling
While it does need 6 hours to set up properly (and honestly, overnight is always better!), the actual work is done fast. You’ll spend more time washing the sticky mixer bowls than actually mixing! This makes it the ideal quick Biscoff dessert when company shows up unexpectedly.
Gathering Ingredients for Your Easy Biscoff Cheesecake Recipe
Okay, let’s get our tools ready! For any easy cheesecake recipe, the ingredients are simple, but the preparation of those ingredients is key. Don’t skip the notes about temperature, because that’s where things go wrong when you’re trying to keep things simple!
We are making one cohesive dessert here, but I like to think of it in two parts: the base that holds everything together and the glorious filling that melts in your mouth. I’ve linked my favorite recipe for no-bake Oreo truffles if you want a chocolate treat next time, but today it’s all about those irresistible spiced cookies!
Crust Components for the Easy Cheesecake Recipe
The crust needs to be sturdy enough to hold that heavy filling, but still pleasantly crunchy. You’ll need 1 1/2 cups of crushed Biscoff cookies. If you can’t find the actual Biscoff cookies, don’t panic—graham crackers work just fine, as we discuss later on! Make sure you melt 6 tablespoons of unsalted butter, nice and smooth, to bring those crumbs together perfectly.
Filling Ingredients for a Simple Cheesecake with Cookie Butter
This is where the magic happens! You need 16 ounces of good quality cream cheese, and I mean truly softened, people. Don’t microwave it until it’s soupy, just leave it out for an hour or so. We use 1 cup of powdered sugar for sweetness and 1 teaspoon of vanilla extract for depth. For that incredible lift, we need 1 cold cup of heavy whipping cream. Finally, for the star flavor, grab 1/2 cup of Biscoff cookie butter for mixing in, plus just a couple extra tablespoons for that final drizzle on top.
Step-by-Step Creamy Biscoff Cheesecake Instructions
Alright, put on your apron—now we actually get to put this whole easy biscoff cheesecake recipe into action! Don’t rush any of these steps; they are little building blocks for that amazing, creamy finale. I still double-check my steps every time, even though this is my go-to easy eclair cake cousin dessert.
Preparing the No Bake Biscoff Cheesecake Crust
First things first, deal with the crumbs. In a bowl, mix those crushed Biscoff cookies (or graham crackers, if that’s what you went with!) with your 6 tablespoons of melted butter. You want it to look like wet sand—it should hold together when you pinch a little bit between your fingers. Take your 9-inch springform pan. Press that buttery mixture firmly into the bottom. I use the bottom of a flat measuring cup to really compact it down. We need great structural integrity here! Pop that pan into the freezer for about 10 minutes while we tackle the filling. That quick chill firms up the butter, which helps keep the crust from crumbling when you slice it later.
Mixing the Cheesecake Filling for Your Easy Biscoff Cheesecake Recipe
This is the most critical part for achieving that great texture. Grab your mixer and beat the softened cream cheese first until it is completely smooth—I mean silky smooth, no lumps allowed! Then, slowly add in the powdered sugar and vanilla. Mix until that’s incorporated. Now, here’s a separate job: whip your 1 cup of cold heavy whipping cream in a separate, clean, cold bowl until you get stiff peaks. You know you’ve hit it right when you can lift the whisk and the cream stands up tall on its own. Next, gently fold in your 1/2 cup of Biscoff cookie butter. That means using a spatula and lifting the lighter whipped cream mixture over the heavier cream cheese base. We fold, we don’t stir! Stirring will knock all the air right out of it.
Assembling and Chilling the Quick Biscoff Dessert
Once you have a uniform, beautiful beige-colored filling, take that crust out of the freezer. Carefully spoon the filling over the chilled crust. Use an offset spatula or the back of a spoon to spread it evenly right to the edges. Cover the pan loosely with plastic wrap—don’t let the wrap touch the filling; you don’t want that sticky plastic sticking to your beautiful dessert! Now comes the hard part: waiting. You *must* refrigerate this for at least 6 hours until it’s completely firm. Honestly, if you can hold off until the next day, that sleeping time makes the creamy Biscoff cheesecake even better.
Tips for Success with Your Easy Biscoff Cheesecake Recipe
Even though this is touted as an easy recipe, there are a couple of little secrets I’ve learned over the years that stop this dessert from ever being anything less than spectacular. Since this is a no-bake recipe, science is doing the work, but we have to help it along!
If you’re worried about lumps or density, pay close attention to these two spots in the process. I always think about my chocolate meringue pie secrets when I’m making anything creamy—temperature and air are everything in baking!
Ingredient Temperature Matters for this Easy Cheesecake Recipe
I cannot stress this enough for any recipe involving cream cheese: it needs to be truly soft. If you try to whip cold cream cheese, you are going to end up with tiny, frustrating little lumps in your filling, no matter how long you mix it. Take it out of the fridge at least an hour before you plan to start assembling. You want it soft enough that a gentle press leaves an indentation, but it shouldn’t look shiny or melty. Trust me, good softening equals smooth cheesecake!
The Importance of Folding in Whipped Cream
When you whip your heavy cream, you are creating thousands of tiny air bubbles that give the whole dessert its fluffy lift. This is what prevents the cheesecake from becoming a dense brick! Once the stabilized Biscoff cream cheese mixture is ready, you must gently fold in that whipped cream. Use a big rubber spatula and use a cutting motion, turning the bowl as you go. If you stir or beat it in, you’ll deflate all that beautiful air, and you’ll end up with a heavy, soupy dessert instead of the light, creamy Biscoff cheesecake we promised you.
Ingredient Notes and Substitutions for this Simple Cheesecake
Okay, one thing I love about this easy Biscoff dessert is that it’s forgiving, but you have to stick to a few core rules for it to set up right in the fridge. Readers often ask me about swapping ingredients, especially if they can’t find the exact kind of Biscoff cookie on hand. It’s good to know your options before you start!
When it comes to making a simple cheesecake with cookie butter, knowing what you *can* change versus what you *shouldn’t* is key for that perfect texture. I have a great post on an easy graham cracker crust alternative that might give you some ideas, too.
Crust Swaps: Digestive Biscuits vs. Graham Crackers
If you look at the ingredient list, I mentioned Biscoff cookies, but no sweat if you only have graham crackers! They are completely interchangeable for the base in this recipe. The texture will be slightly different—graham crackers are a bit drier—but the flavor pairing with the Biscoff spread in the filling works beautifully. Just use the same measurement and the same amount of melted butter.
Achieving a Firmer No Bake Biscoff Cheesecake
Now, if you are serving this at a party outdoors, or if you simply prefer a really sturdy slice that holds its shape perfectly, you can add a little structural support. The source notes mention using unflavored gelatin. You’ll need about 1 teaspoon of gelatin dissolved in 2 tablespoons of hot water first. Once it’s clear and dissolved, whisk that into your cream cheese mixture right before you fold in the whipped cream. It makes for a much firmer no bake Biscoff cheesecake.
Serving Suggestions for Your Easy Biscoff Cheesecake Recipe
Once this beauty has chilled properly, it’s time for the grand reveal! Since this is such a straightforward, delicious dessert, we want our presentation to really pop. The best part is that minimal effort yields maximum reward here.
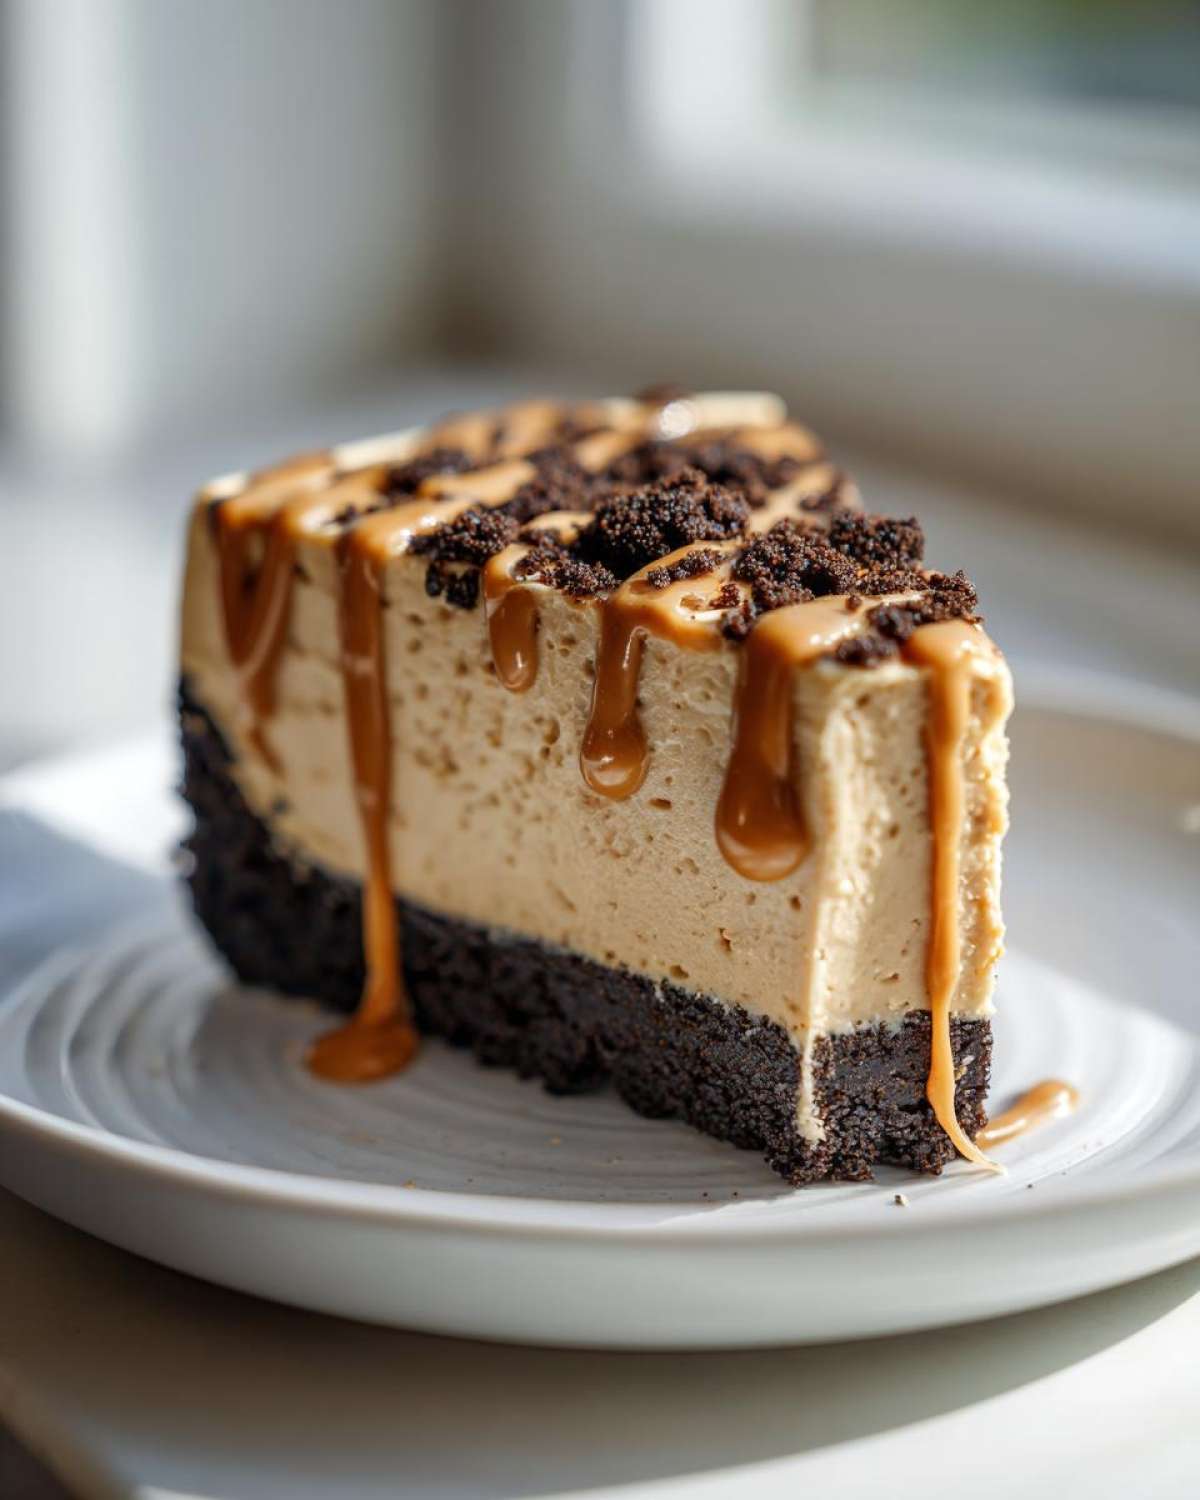
Remember that extra little bit of Biscoff spread we saved? Now is the time to shine. Take those reserved 2 tablespoons, warm them slightly in the microwave until they are runny again, and drizzle them artfully across the top. You can use a fork to make zigzags, or just let it drip naturally down the sides.
If you want to make it look extra fancy, a light dusting of crushed Biscoff cookies or even a few whole cookies placed around the edge of the pan before you slice it elevates this instantly. It pairs wonderfully with coffee or maybe even a slice of my moist homemade caramel cake if you’re serving a dessert buffet!
Storage and Reheating Instructions for this Quick Biscoff Dessert
Since this is our marvelous no bake Biscoff cheesecake, we never, ever reheat it! The filling relies on cold temperatures to keep that whipped cream structure firm and airy. You want it served cold, straight from the fridge.
Store any leftovers covered tightly in your refrigerator. It keeps really well, actually—usually good for up to three or four days. If you’ve made it ahead of time for a party, just keep it chilled, maybe removing it 15 minutes before serving so it’s not rock hard. Check out my tips for make-ahead meals for planning ahead!
Frequently Asked Questions About the Easy Cheesecake Recipe
When you make something this simple, questions always pop up, especially if you’re attempting your very first beginner cheesecake recipe! I gathered the most common ones I get asked about this sweet treat so you can feel totally confident while assembling it. We want maximum creamy success, right?
Can I bake this easy Biscoff cheesecake recipe instead?
You know, you absolutely could try to adapt it, but I wouldn’t recommend it for this specific formula. This recipe relies on the stability of chilled cream cheese and whipped cream to set up. If you bake it, you’ll lose all that beautiful airiness we folded in, and the texture will likely be dense instead of that wonderful, light cloud we are aiming for. If you want a baked version, you’d definitely need a recipe that calls for eggs!
How long does the No Bake Biscoff Cheesecake need to set?
Patience is the main flavor in any no-bake dessert! While the instructions say a minimum of 6 hours, I really want you to aim for overnight if you can manage it. The longer it chills, the firmer that filling gets, and the cleaner your slices will be. That overnight chill time is the secret boost for a perfect texture in your no bake Biscoff cheesecake.
What is the best way to cut a creamy Biscoff cheesecake?
This is a trick that saves so many beautiful desserts! For the cleanest slices in your creamy Biscoff cheesecake, you need a hot knife. Fill a tall glass with very hot (almost boiling) water. Dip a long, sharp knife into the hot water for about ten seconds, wipe it completely dry with a paper towel, and then make your cut. Repeat that dip-and-wipe process before every single slice. It melts the filling just enough to glide right through without dragging the crust or smushing the sides.
If you enjoyed learning these little tricks, you might love checking out my tips for the best easy apple crumble recipe too, which always needs a good scooping-out technique!
Estimated Nutritional Data for this Easy Biscoff Cheesecake Recipe
I always look at these numbers with a little grain of salt, honey! Since we’re using glorious cookie butter and cream cheese, this isn’t exactly a low-cal treat, but WOW is it worth it. This data is just an estimate based on the ingredients listed above for one serving slice. Please remember that substitutions can change these figures instantly!
For a single slice of this easy Biscoff cheesecake recipe, here’s what we’re generally looking at:
- Serving Size: 1 slice
- Calories: 450
- Sugar: 35g
- Sodium: 280mg
- Fat: 30g
- Saturated Fat: 18g
- Carbohydrates: 40g
- Protein: 6g
If you want the full breakdown or need to check my sourcing on how these estimates are calculated, you can always check out my general recipe and nutrition disclaimer page right here. Enjoy every single bite!
Share Your Easy Biscoff Cheesecake Creation
Now that you’ve successfully navigated the waters of making the easy biscoff cheesecake recipe—and I’m betting it turned out gorgeous, by the way—I really want to know what you think!
There is nothing better than seeing your beautiful, creamy, no-bake desserts pop up online. If you made this, please take a photo or two! If you’re the type who likes to leave feedback on recipes (and I love when you do!), drop your star rating right below the recipe card.
More than just a rating, tell me about your experience! Did you add extra zest? Did you try the gelatin trick? Did the kids devour it instantly? Pop your stories, tips, or any questions you still have into the comments section down below. I read every single one, and seeing your successes with this simple cheesecake with cookie butter really makes my day!
If you need to get in touch with me for something a little more specific, you can always reach out via my contact page. Happy baking—or, well, happy chilling!
PrintEasy No Bake Biscoff Cheesecake Recipe
Make a simple, creamy cheesecake using Biscoff cookie butter. This no-bake recipe is perfect for beginners and requires minimal effort.
- Prep Time: 20 min
- Cook Time: 0 min
- Total Time: 6 hr 20 min
- Yield: 8 servings
- Category: Dessert
- Method: No Bake
- Cuisine: American
- Diet: Vegetarian
Ingredients
- 1 1/2 cups crushed Biscoff cookies (or digestive biscuits)
- 6 tablespoons unsalted butter, melted
- 16 ounces cream cheese, softened
- 1 cup powdered sugar
- 1 teaspoon vanilla extract
- 1 cup heavy whipping cream, cold
- 1/2 cup Biscoff cookie butter, plus 2 tablespoons for topping
Instructions
- Mix the crushed Biscoff cookies and melted butter in a bowl until combined. Press this mixture firmly into the bottom of a 9-inch springform pan. Place the crust in the freezer for 10 minutes.
- In a large bowl, beat the softened cream cheese with an electric mixer until smooth. Add the powdered sugar and vanilla extract, mixing until fully incorporated.
- In a separate bowl, whip the cold heavy whipping cream until stiff peaks form. Gently fold the whipped cream into the cream cheese mixture.
- Fold in the 1/2 cup of Biscoff cookie butter until just combined. Do not overmix.
- Spread the cheesecake filling evenly over the chilled crust.
- Cover the pan loosely with plastic wrap and refrigerate for at least 6 hours, or preferably overnight, until firm.
- Before serving, drizzle the remaining 2 tablespoons of melted Biscoff cookie butter over the top. Release the springform sides carefully.
Notes
- If you do not have Biscoff cookies, you can substitute with graham crackers for the crust.
- For a slightly firmer texture, you can add 1 teaspoon of unflavored gelatin dissolved in 2 tablespoons of hot water to the cream cheese mixture before folding in the whipped cream.
- Keep the cheesecake refrigerated until ready to serve.
Nutrition
- Serving Size: 1 slice
- Calories: 450
- Sugar: 35
- Sodium: 280
- Fat: 30
- Saturated Fat: 18
- Unsaturated Fat: 12
- Trans Fat: 0
- Carbohydrates: 40
- Fiber: 1
- Protein: 6
- Cholesterol: 95
