

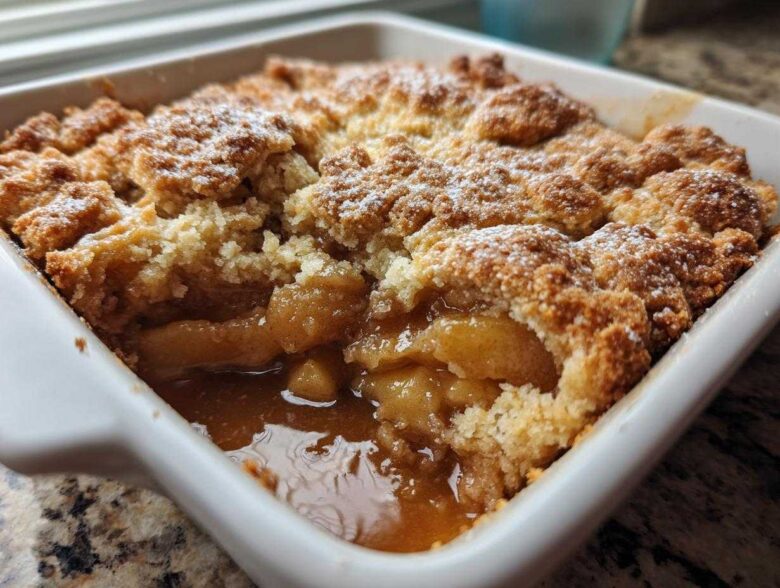
Forget everything you thought you knew about baked fruit desserts, because we are about to level up your baking game! If you love that deep, comforting fall baking recipes feeling but need something truly show-stopping, then hang tight. I’m sharing the secret to my ridiculously delicious apple cobbler. This isn’t your grandma’s standard, slightly soggy version; nope! We are using two game-changing tricks—browning the butter for incredible depth and finishing it with a fluffy, tangy buttermilk biscuit topping. Trust me, the flavor this combo creates is just absolutely unbeatable.
Why This Ridiculously Delicious Apple Cobbler Recipe Works
You might be wondering what makes this recipe truly special compared to every other secret to delicious apple cobbler out there. Honestly, it’s all about the building blocks. We ditch the standard presentation for something much more flavorful and textural. It’s comfort food, yes, but it’s refined comfort food! These elements work together to create a dessert that sings: rich depth, perfect spice balance, and that incredible bite on top.
- The depth from the nutty, caramelized brown butter in the filling. It’s a flavor bomb!
- Using tart Granny Smith apples ensures we get that sweet and tangy apple dessert flavor that doesn’t turn to mush.
- The cold buttermilk in the topping gives us amazing lift and tenderness, stopping it from being dry.
- The rustic patching of the topping creates those beautiful, crispy edges when baked.
The Secret to Ridiculously Delicious Apple Cobbler: Brown Butter
Okay, this is non-negotiable for achieving that *ridiculously delicious* payoff. Regular melted butter is fine, but brown butter? Wow! You melt the butter until the milk solids toast on the bottom of the pan. It smells like hazelnuts and caramelizing sugar—pure magic! It instantly gives the whole apple filling a nutty, deeper flavor profile that you just can’t get any other way. Trust me, take those few extra minutes for the browning step.
Achieving the Perfect Crispy Topping Apple Cobbler Texture
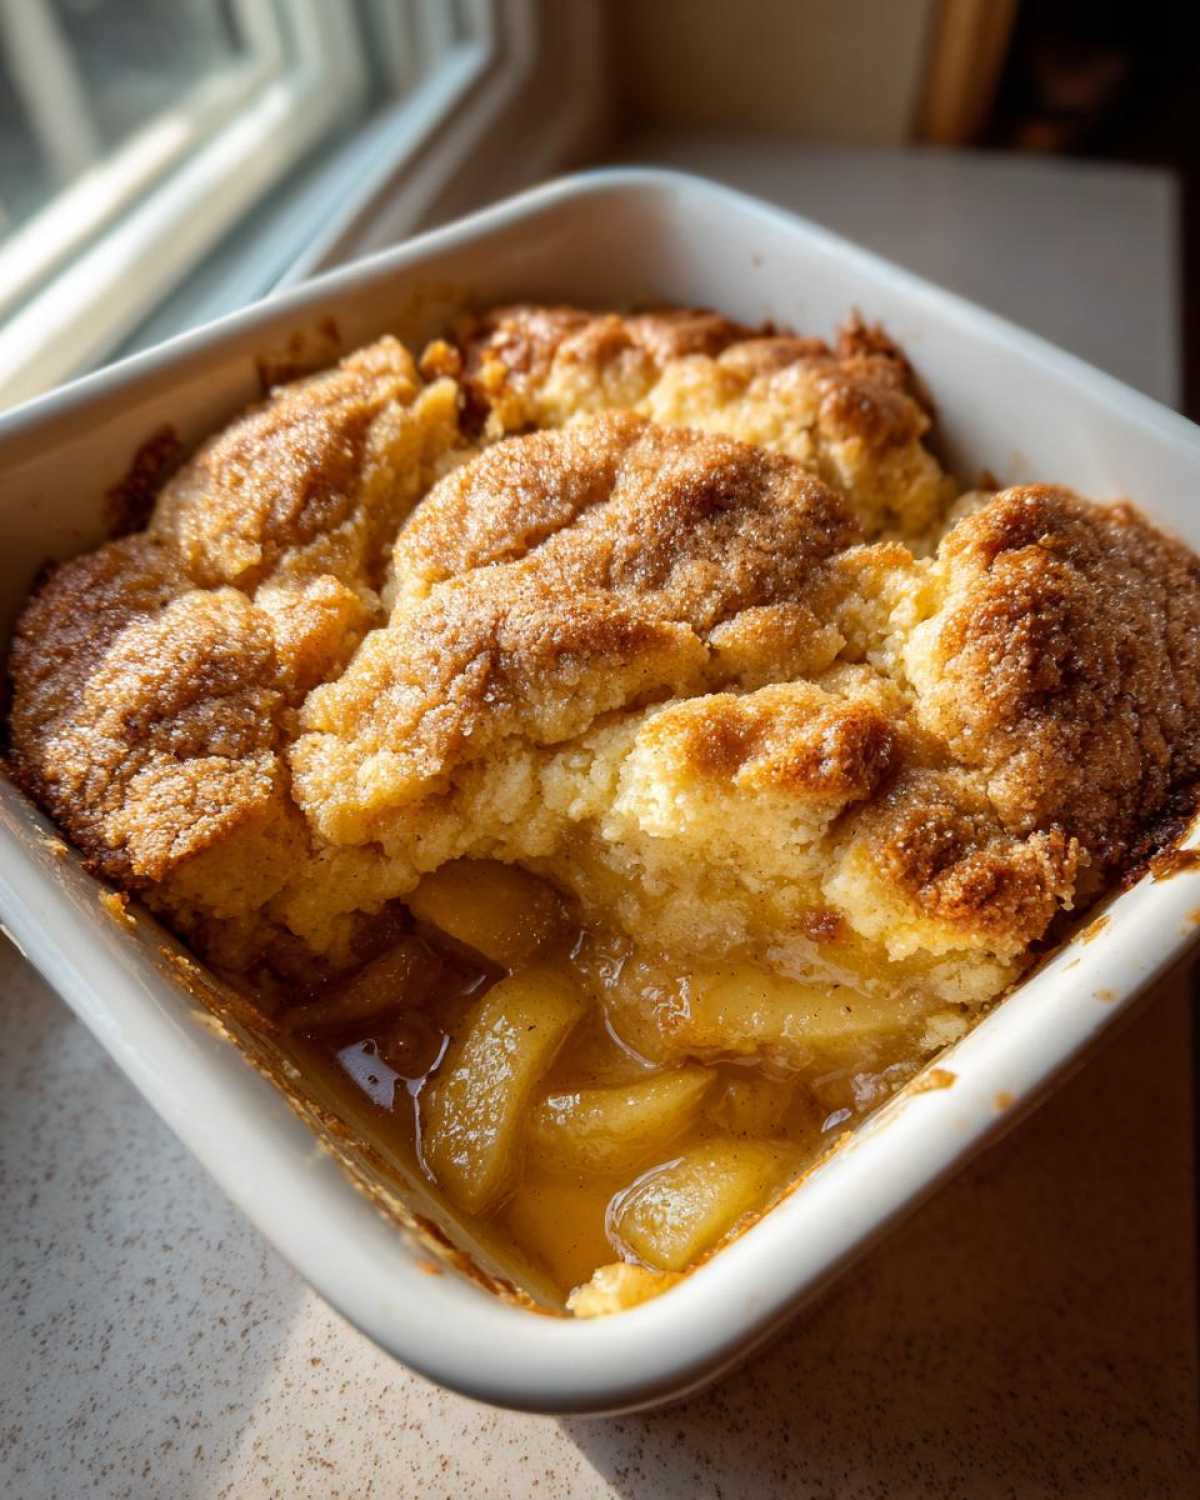
We aren’t doing a streusel here; we are leveling up to a classic Southern style apple cobbler topping—a buttermilk biscuit drop! Buttermilk is slightly acidic, which reacts beautifully with the baking powder to make the topping incredibly light and tender inside. The key to that amazing crispy topping apple cobbler texture is keeping the dough shaggy and dropping big spoonfuls over the fruit. Those peaks brown up so nicely while the insides stay soft while baking!
Gathering Ingredients for Your Ridiculously Delicious Apple Cobbler
Alright, now that we know *why* this recipe is unbelievably good, we need to get our supplies ready! As you’ll see in the ingredient list below, we keep things pretty traditional for the fruit filling, but that 1/4 cup of brown butter is our secret weapon right there in the fruit layer. Don’t skimp on the spices, either; they are what make this taste like a cozy holiday hug. I want you to grab Granny Smiths though—they hold up the best! We’ve broken down the lists so you know exactly what goes into the apples and what goes into that gorgeous biscuit topping. It’s all laid out below, so let’s gather everything we need to make this amazing dessert! If you’re looking for other easy fruit bakes, check out my tips for a classic easy apple crumble recipe.
Apple Filling Ingredients
- 6 large Granny Smith apples, peeled, cored, and sliced 1/4 inch thick
- 1/2 cup granulated sugar
- 1/4 cup packed light brown sugar
- 2 tablespoons all-purpose flour
- 1 teaspoon ground cinnamon
- 1/2 teaspoon ground nutmeg
- 1/4 teaspoon ground allspice
- 1 tablespoon lemon juice
- 1/4 cup (4 tablespoons) unsalted butter, for browning
Buttermilk Biscuit Topping Ingredients
- 1 1/2 cups all-purpose flour (for topping)
- 1 tablespoon granulated sugar (for topping)
- 1 teaspoon baking powder
- 1/2 teaspoon salt
- 6 tablespoons cold unsalted butter, cut into small pieces
- 3/4 cup cold buttermilk
- 2 tablespoons unsalted butter, melted (for brushing)
- 1 tablespoon turbinado sugar (for sprinkling)
How to Make Ridiculously Delicious Apple Cobbler: Step-by-Step
This is where all our preparation turns into the best warm apple dessert you’ve ever tasted! Making this how to make apple cobbler from scratch recipe feels really natural because we break it down piece by piece. Don’t rush these steps, especially the butter part—that’s the key to the flavor, remember? We’re going to get that filling mixed, top it lovingly, and then sit back and wait for the kitchen to smell like heaven. The recipe is straightforward, I promise. We are aiming for those bubbly, thick juices and a golden, crispy topping!
Preparing the Apple Base and Browning the Butter
First thing’s first: get that oven preheated to 375 degrees Fahrenheit and lightly grease your 8×8 inch baking dish. Now, grab a big bowl and toss those lovely sliced apples with both sugars, the flour, all your spices (cinnamon, nutmeg, allspice), and the lemon juice. Make sure every single slice is coated! Pour all that beautiful fruit into your prepared dish. Next, the star moment! Melt that 1/4 cup of butter in a small skillet on medium heat. Watch it foam, and listen closely! When it starts smelling nutty and you see little brown specks forming on the bottom, that’s it—pour that hot, brown, amazing butter right over the apples immediately.
Mixing and Dropping the Buttermilk Biscuit Topping
Time for the biscuit topping next. In a separate bowl, quickly whisk together your topping flour, tablespoon of sugar, baking powder, and salt. Now, toss in your 6 tablespoons of cold, cubed butter. I like using my fingers here to cut it in until it looks like coarse crumbs—you don’t want it melted at all. Pour in the cold buttermilk and stir just until you can barely bring it together into a shaggy dough. Seriously, stop mixing when it looks a little messy; we don’t want tough biscuits! Drop generous spoonfuls of that dough randomly over the apples. Leave gaps! We want those apples peeking through so the topping gets crispy, not steamed.
Baking and Cooling Your Ridiculously Delicious Apple Cobbler
We are in the home stretch now, friends! Lightly brush the tops of those dough mounds with the 2 tablespoons of melted butter—this helps them brown up—and sprinkle them really generously with that coarse turbinado sugar. That’s for crunch! Slide the dish into the 375°F oven and bake it for 40 to 45 minutes. You know it’s done when the filling is thick and bubbling furiously around the edges and the biscuit tops are deeply golden brown and set. Pull it out, but—and this is critical for the best texture—you have to let your ridiculously delicious apple cobbler cool on a rack for at least 20 minutes before you serve it. Those juices need time to settle!
Tips for the Best Apple Cobbler Recipe Success
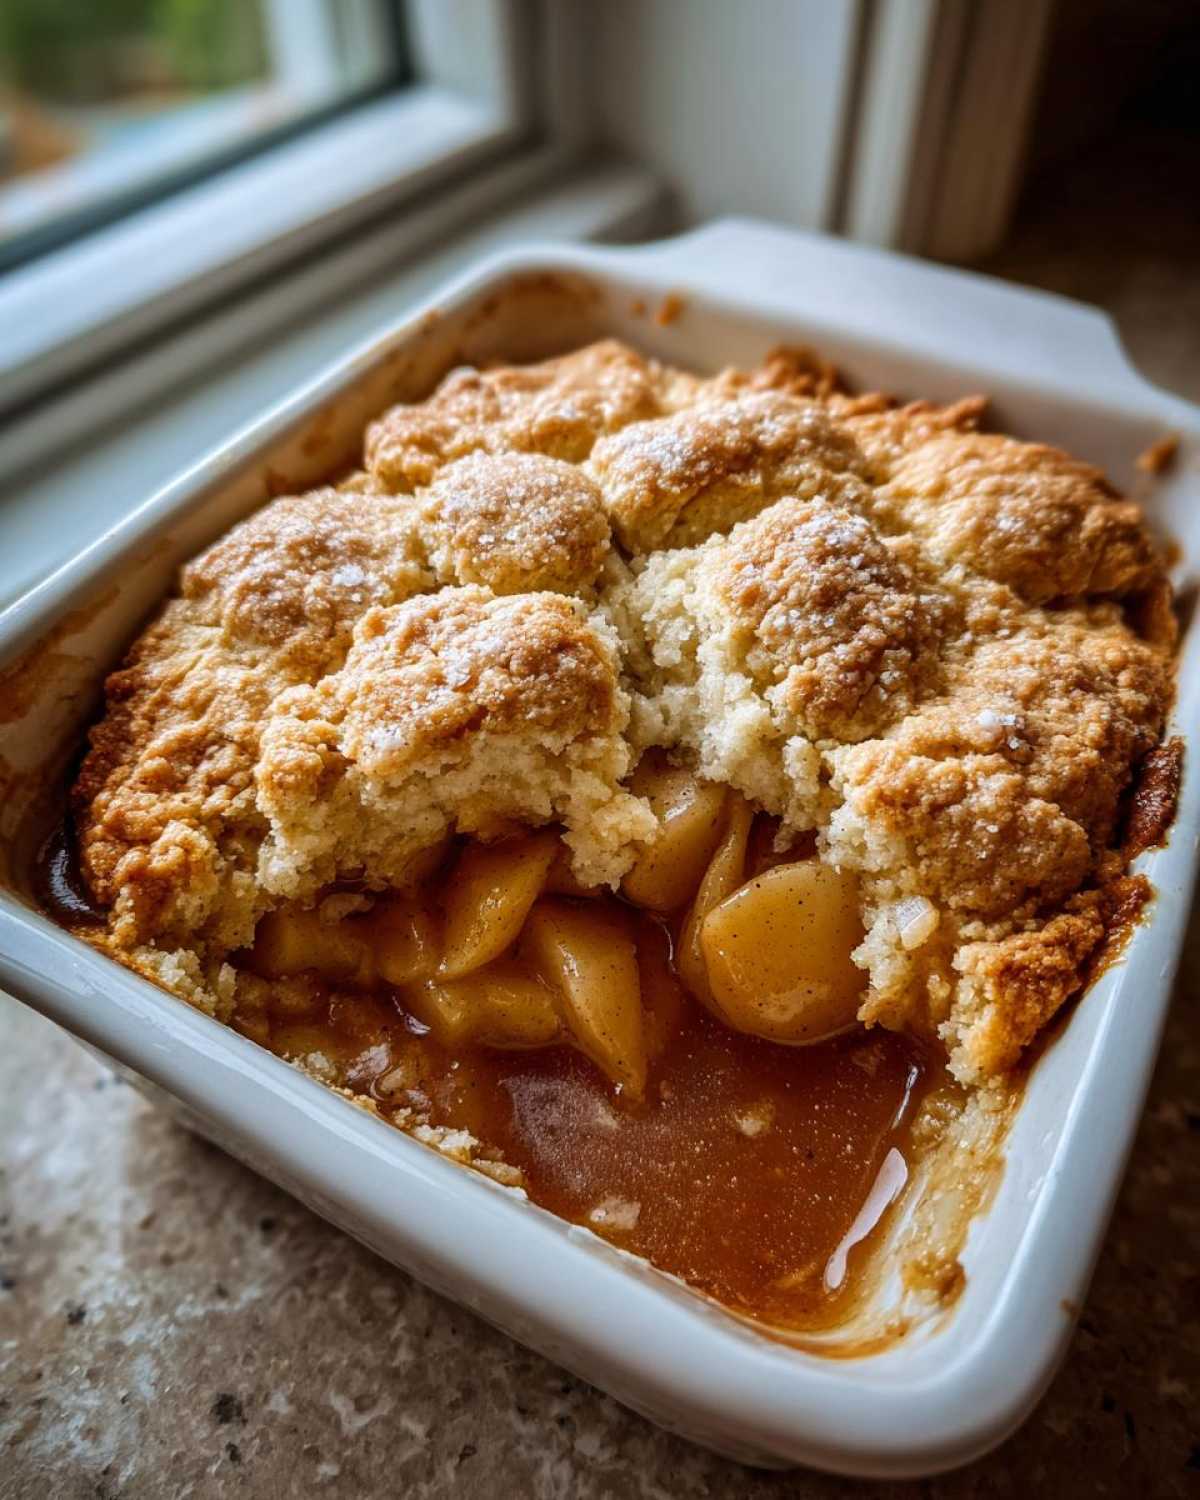
Making a truly outstanding cobbler, one that lives up to the ‘ridiculously delicious’ title, just needs a couple of extra little nudges throughout the process. My biggest piece of advice, straight from those recipe notes, is about the apples. Don’t even think about using a soft apple like a Red Delicious here. You need something that holds up during that 45-minute bake time. Granny Smiths are my go-to because that tartness cuts through the rich brown butter perfectly, and they stay firm!
Also, remember when we mixed the topping? If yours seems just a little too wet after you add the buttermilk, that’s okay! Just gently add an extra teaspoon or two of flour until you reach that ‘shaggy’ look. When you drop the dough onto the apples, resist the urge to smooth it out completely. Those peaks and valleys are what turn into the golden, crispy spots we are chasing. If you want maximum topping crunch, you can even gently flatten the mounds slightly with the back of a spoon before brushing with the final layer of butter and turbinado sugar. Honestly, a little bit of surface area means more crispy bits for everyone!
If you ever want to explore other incredibly satisfying fruit desserts, I have a fantastic apple pie cookies recipe that tastes just like a slice of pie but is portable!
Ingredient Notes and Substitutions for this Sweet and Tangy Apple Dessert
Choosing the right ingredients is what separates a good cobbler from this ridiculously delicious version. My notes always emphasize the apples because they are the heart of the dish, right? You absolutely must use Granny Smith apples here. They are tart, which gives us that necessary sweet and tangy apple dessert counterpoint to all the richness from the brown butter and sugar. If you use a softer apple, it will disappear into applesauce during the bake, and we want slices!
Now for the spices. Cinnamon and nutmeg are classics, but that little bit of allspice really rounds everything out. If you really want to try something different and lean into a more complex flavor, try swapping out the allspice for about 1/4 teaspoon of ground cardamom. Cardamom pairs beautifully with baked apples and that nutty butter flavor. For a richer color and deeper molasses note, if you only have light brown sugar, you can swap half of it for dark brown sugar, just like I do sometimes in my cranberry orange bread recipe!
Serving Suggestions for Warm Apple Dessert Ideas
That warm apple dessert ideas moment when the cobbler comes out of the oven bubbling hot? Pure bliss! But honestly, it’s not truly finished until you dress it up a little bit. Since this ridiculously delicious apple cobbler is rich from the brown butter and has that fluffy biscuit topping, you want something cold and creamy to cut through it. My absolute favorite thing to pair with this dessert is a big scoop of good quality vanilla ice cream. Seriously, the hot/cold contrast is unbeatable.
If you aren’t an ice cream person, a dollop of freshly whipped cream works beautifully too! You can even fold a little vanilla and almond extract into your whipped cream for a custom touch. For an extra holiday flair or just if you want to try a different flavor pairing—though skip my vanilla buttercream frosting recipe for this one!—you can drizzle on a tiny bit of homemade caramel sauce for decadent flavor. But honestly, a scoop of vanilla is all you need to make this perfect!
Storage and Reheating Instructions for Leftover Ridiculously Delicious Apple Cobbler
Oh, honey, if you actually have leftovers of this ridiculously delicious apple cobbler, I officially salute you! Because it’s so good, there usually aren’t any, but just in case you hide a piece away, you need to know how to keep it perfect. It’s best enjoyed the day it’s baked, but it holds up surprisingly well. Don’t leave it on the counter for too long; the fruit filling can start to weep after about four hours at room temperature.
Wrap up the cooled cobbler tightly in plastic wrap or pop it into an airtight container and stick it in the fridge. It’ll stay mighty tasty for about three or four days. When you go to reheat it—and you absolutely must reheat it!—skip the microwave if you can get away with it. Microwaving makes that beautiful biscuit topping a little soft. Pop a serving on a baking sheet at 350 degrees for about 8 to 10 minutes. That quick blast in the oven brings back all the crispness, and the apples get perfectly warm again. It makes it taste almost freshly baked! If you’re looking for other cozy treats, check out my recipe for oatmeal cookies – thick & chewy brown sugar recipe!
Frequently Asked Questions About This Ridiculously Delicious Apple Cobbler
I know you might have a few little cooking questions swirling around after seeing how we use brown butter in this recipe! It’s totally normal when you’re trying to figure out the best apple cobbler recipe. I tried to cover all my bases in the instructions, but sometimes folks just need a quick clarification on technique or terminology. These are the questions I get asked most often when I bring this dessert to parties, so let’s tackle them right now so you feel totally confident when you bake yours!
What is the difference between a cobbler and a crisp?
This is such a great question, and it comes up all the time when people are trying to decide on a rustic apple dessert! The main difference is purely in the topping. A crisp, like an apple crisp, uses a streusel topping made from flour, oats, butter, and sugar—it bakes up crunchy and crumbly. A cobbler, like this one, uses a biscuit or batter topping that is dropped in dollops over the fruit. Our buttermilk topping bakes up fluffy and tender on the inside with those lovely crispy edges we talked about. That biscuit topping is what really sets this apart from a standard crisp!
Can I make this Southern style apple cobbler ahead of time?
You certainly can get a head start, which is fantastic when you’re planning for entertaining! I absolutely recommend prepping the apple filling ahead of time. Mix the apples with the spices and butter, cover the dish, and let it chill in the fridge for up to 24 hours. This actually lets the spices soak in more, which helps achieve that truly rich flavor. However, I would *not* recommend mixing the buttermilk biscuit topping until just before you are ready to bake. The baking powder starts reacting as soon as it hits the liquid, so if you make the topping too far ahead, it won’t rise as beautifully on your Southern style apple cobbler.
Why do I need to let the cobbler cool for 20 minutes before serving?
This is critical if you want the filling to look good and not run all over the plate! When that fruit cobbler comes out of the oven, the juices are super thin and bowling hot. If you try to scoop it immediately, all that sugary liquid is going to spill right out, making your crust soggy underneath. Letting it rest for 20 minutes allows those juices to cool down just slightly and thicken up into that gorgeous, caramelized sauce that coats your apples perfectly. It’s the final, necessary wait time!
Nutritional Estimates for This Dessert
Now, let’s talk turkey for a second. Since this is such a rich, satisfying dessert, thanks to that brown butter and the decadent biscuit topping, I always feel like I should give you a heads-up on what you’re diving into! If you manage to only eat one serving of this ridiculously delicious apple cobbler—which, bless your heart, is tough!), here’s a rough idea of what you’re getting. Remember, please take these numbers with a huge grain of salt (and sugar, ha!). These estimates are based on standard calculations using the ingredients listed above.
We calculated this based on 6 servings, so if you cut bigger pieces—and I totally won’t judge you if you do—your numbers will climb higher. This is definitely not a light snack; it’s a true comfort food apple recipes indulgence that we save for special occasions or chilly Sundays!
- Serving Size: 1 serving
- Calories: 450
- Sugar: 35g
- Fat: 22g (Uh oh, but oh so worth it!)
- Saturated Fat: 14g
- Carbohydrates: 60g
- Protein: 6g
- Sodium: 320mg
The higher fat content comes primarily from all that delicious butter we use in both the filling (browned!) and the topping. But hey, it’s homemade, so you know exactly what went into it! If you want to see more of my general baking and dessert insights, feel free to browse my main blog page!
PrintRidiculously Delicious Brown Butter Apple Cobbler
This recipe delivers a ridiculously delicious apple cobbler featuring tender, spiced apples beneath a rich, buttermilk biscuit topping browned with butter.
- Prep Time: 25 min
- Cook Time: 45 min
- Total Time: 70 min
- Yield: 6 servings
- Category: Dessert
- Method: Baking
- Cuisine: American
- Diet: Vegetarian
Ingredients
- 6 large Granny Smith apples, peeled, cored, and sliced 1/4 inch thick
- 1/2 cup granulated sugar
- 1/4 cup packed light brown sugar
- 2 tablespoons all-purpose flour
- 1 teaspoon ground cinnamon
- 1/2 teaspoon ground nutmeg
- 1/4 teaspoon ground allspice
- 1 tablespoon lemon juice
- 1/4 cup (4 tablespoons) unsalted butter, for browning
- 1 1/2 cups all-purpose flour (for topping)
- 1 tablespoon granulated sugar (for topping)
- 1 teaspoon baking powder
- 1/2 teaspoon salt
- 6 tablespoons cold unsalted butter, cut into small pieces
- 3/4 cup cold buttermilk
- 2 tablespoons unsalted butter, melted (for brushing)
- 1 tablespoon turbinado sugar (for sprinkling)
Instructions
- Preheat your oven to 375 degrees Fahrenheit. Lightly grease an 8×8 inch baking dish.
- In a large bowl, combine the sliced apples, granulated sugar, brown sugar, flour, cinnamon, nutmeg, allspice, and lemon juice. Toss gently until the apples are evenly coated. Pour the apple mixture into the prepared baking dish.
- Melt the 1/4 cup of butter in a small skillet over medium heat. Cook, swirling occasionally, until the butter foams, then brown bits form at the bottom and it smells nutty. This takes about 3 to 5 minutes. Immediately pour the hot brown butter over the apple mixture in the baking dish.
- Prepare the topping: In a medium bowl, whisk together the 1 1/2 cups flour, 1 tablespoon sugar, baking powder, and salt.
- Cut in the 6 tablespoons of cold butter using a pastry blender or your fingers until the mixture resembles coarse crumbs.
- Pour in the cold buttermilk and stir just until a shaggy dough forms. Do not overmix.
- Drop spoonfuls of the dough evenly over the apple filling. Do not cover the entire surface; leave gaps for steam to escape.
- Brush the tops of the dough mounds lightly with the 2 tablespoons of melted butter and sprinkle with turbinado sugar.
- Bake for 40 to 45 minutes, or until the topping is golden brown and the apple filling is bubbling thickly around the edges.
- Let the cobbler cool on a wire rack for at least 20 minutes before serving warm.
Notes
- Use Granny Smith apples for the best balance of sweet and tart flavor that holds its shape during baking.
- Browning the butter adds a deep, nutty flavor that makes this cobbler truly delicious.
- For a crispier topping, you can slightly flatten the dough mounds before baking.
Nutrition
- Serving Size: 1 serving
- Calories: 450
- Sugar: 35
- Sodium: 320
- Fat: 22
- Saturated Fat: 14
- Unsaturated Fat: 8
- Trans Fat: 0.5
- Carbohydrates: 60
- Fiber: 4
- Protein: 6
- Cholesterol: 55
