

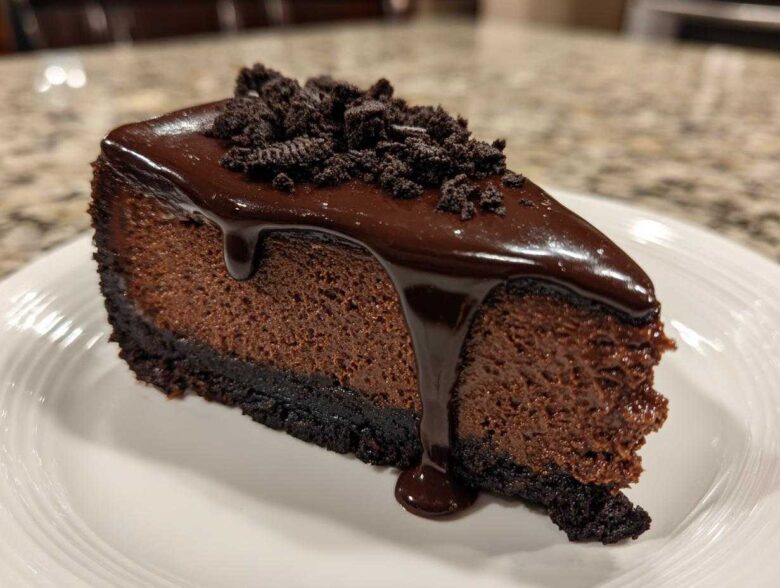
Listen, if you’re searching for just *any* dessert, keep scrolling. But if you need a moment of pure, unadulterated chocolate bliss—the kind that stops conversation at the dinner table—then you’ve found your holy grail. Forget those bland, fussy desserts. I am talking about the ultimate chocolate cheesecake experience: my Triple Chocolate Cheesecake, complete with a crisp, dark Oreo crust and crowned with a ridiculously glossy ganache topping.
I first made this showstopper for my sister’s engagement party. I was terrified, honestly. But when I pulled that perfectly chilled, towering creation out, everyone just gasped. It’s so rich and creamy; it’s basically a decadent chocolate dessert hug. Trust me, this recipe belongs on your holiday table or whenever you need to feel seriously indulgent!
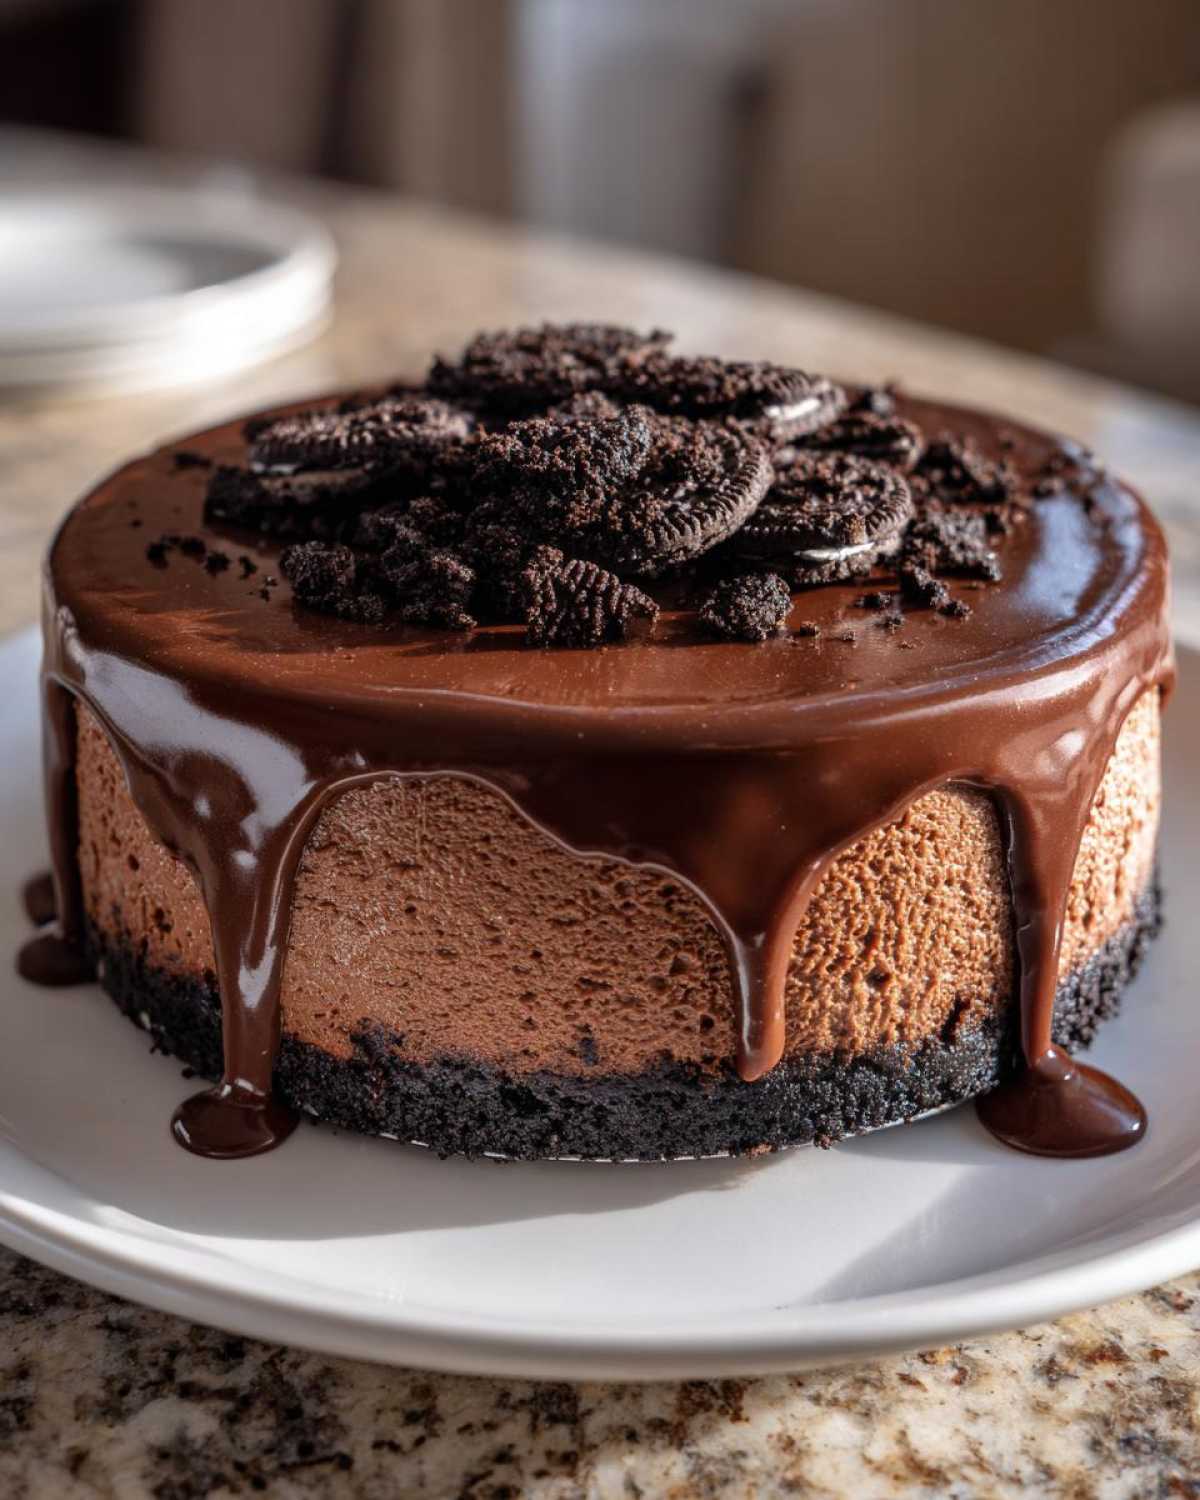
Why This Triple Chocolate Cheesecake Recipe is Your New Favorite
This isn’t just another cheesecake; it’s an architectural marvel of chocolate goodness. Why do I insist on making this version every single time? Because it checks every box for the serious chocolate lover. It’s the absolute best way to elevate your home baking game without needing a pastry degree.
- The base is a buttery, crunchy Oreo crust—no plain graham crackers here!
- It delivers triple chocolate impact: cocoa in the batter, melted semi-sweet, and chopped milk chocolate mixed right in.
- The water bath method ensures you get that unbelievably creamy cheesecake texture every single time. Seriously, it melts in your mouth!
Gathering Ingredients for the Ultimate Chocolate Cheesecake
Before we tackle this masterpiece, we need to gather our supplies. Think of this as prepping your tools for battle! For the best result, especially concerning that famous Oreo crust cheesecake, make sure every ingredient is measured out and ready to go. Organization is key here, otherwise, you risk over-mixing the delicate filling later on. Don’t worry about substitutions here; these specific ratios are what make this homemade cheesecake so unbelievable!
For the Oreo Crust Cheesecake Base
- 1 3/4 cups Oreo cookie crumbs (that’s about 30 cookies, crushed up! Don’t stress if you have a few chunky bits left over.)
- 1/4 cup granulated sugar
- 6 tablespoons unsalted butter, melted (makes it wonderfully crisp!)
For the Creamy Chocolate Cheesecake Filling
This is where the triple chocolate magic happens. Remember, the cream cheese needs to be fully soft; I mean, totally room temperature so you don’t end up with lumps in your rich chocolate dessert.
- 3 (8 ounce) packages cream cheese, totally softened
- 1 1/2 cups granulated sugar
- 1/2 cup unsweetened cocoa powder
- 1 teaspoon vanilla extract
- 1/4 teaspoon salt (don’t skip this, it balances the sweetness!)
- 3 large eggs (room temperature eggs mix in better!)
- 4 ounces semi-sweet chocolate, melted and cooled slightly (important that it’s not hot!)
- 4 ounces milk chocolate, finely chopped (this gives great little pops of meltiness)
For the Smooth Chocolate Ganache Topping
The final touch! This ganache comes together fast, so have your bowl ready for the cream.
- 1 cup heavy cream
- 1/2 cup semi-sweet chocolate chips
Step-by-Step Instructions for Baked Chocolate Cheesecake
Alright, we’ve got our ingredients ready; now let’s put this incredible chocolate cheesecake together! This is almost therapeutic, watching everything blend into that gorgeous, dark batter. We need to move carefully, especially around the water bath part, because that’s the secret handshake for a truly creamy texture. Follow me closely on these steps, and you’ll have no cracks and maximum richness.
Preparing and Pre-Baking the Oreo Crust
First thing: get that oven preheated to 350°F (175°C). Then, take your 9-inch springform pan and wrap the outside TIGHTLY with heavy-duty aluminum foil—and I mean wrap it well! Water will absolutely seep in if you’re sloppy here. Mix your Oreo crumbs, the 1/4 cup of sugar, and the melted butter until it looks like damp sand. Press that mixture firmly into the bottom and about an inch up the sides. Pop it into the hot oven for just 10 quick minutes. When it comes out, let it sit while you start making the filling; don’t let it burn!
Mixing the Rich Chocolate Cheesecake Filling
Drop your oven temp down to 325°F (160°C) now. Get out your big bowl! Cream the softened cream cheese and 1 1/2 cups of sugar until it’s perfectly smooth—no lumps allowed! Then, beat in the cocoa powder, vanilla, and salt. Now, the eggs. This is important: Add the eggs one at a time, and I mean slow. Mix just enough to incorporate each one before adding the next. Over-beating the eggs introduces too much air, which causes cracking later. Finally, gently stir in the slightly cooled melted semi-sweet chocolate and those chopped milk chocolate pieces until they’re just distributed. Don’t go crazy mixing!
Baking the Chocolate Cheesecake in a Water Bath
Pour that glorious, thick filling right over your slightly cooled crust. Now for the water bath part—this is non-negotiable for a super creamy cheesecake. Place your foil-wrapped springform pan inside a larger, deep roasting pan. Carefully pour hot water into the roasting pan until it comes halfway up the sides of the cheesecake pan. Pop the whole assembly into the 325°F oven. Bake this baby for about 60 to 75 minutes. You want the edges firm, but the very center should still have a little *jiggle* when you gently nudge the pan.
Cooling and Chilling for the Perfect Chocolate Cheesecake
This is where patience earns you the best results! When the time is up, turn the oven completely OFF. Prop the oven door open just a tiny crack—a wooden spoon works great for this—and let the cheesecake hang out in that residual heat for a full hour. Removing it immediately shocks the cake and causes cracks. After an hour in the door-propped oven, take it out of the water bath, remove the foil, and let it cool on a rack until it’s room temperature. Then, cover it up and send it to the fridge for a minimum of six hours, but seriously, overnight is truly best for that ultimate decadent chocolate dessert set.
Finishing with the Chocolate Ganache Topping
Once the cheesecake is totally chilled, it’s time for the ganache! Heat your heavy cream in a little saucepan until it just starts to bubble around the edges, but don’t let it boil hard. Pour that hot cream right over your chocolate chips in a heatproof bowl. Let it sit there doing its thing for five minutes—don’t touch it! After five minutes, whisk it gently until it’s one unbelievably smooth, shiny chocolate topping. Let that ganache cool down just enough so it’s thick but still pourable. Then, just pour it over the top of your chilled cake and spread it out evenly. Pop it back in the fridge for 30 more minutes to let that ganache set up nicely before slicing. Wow!
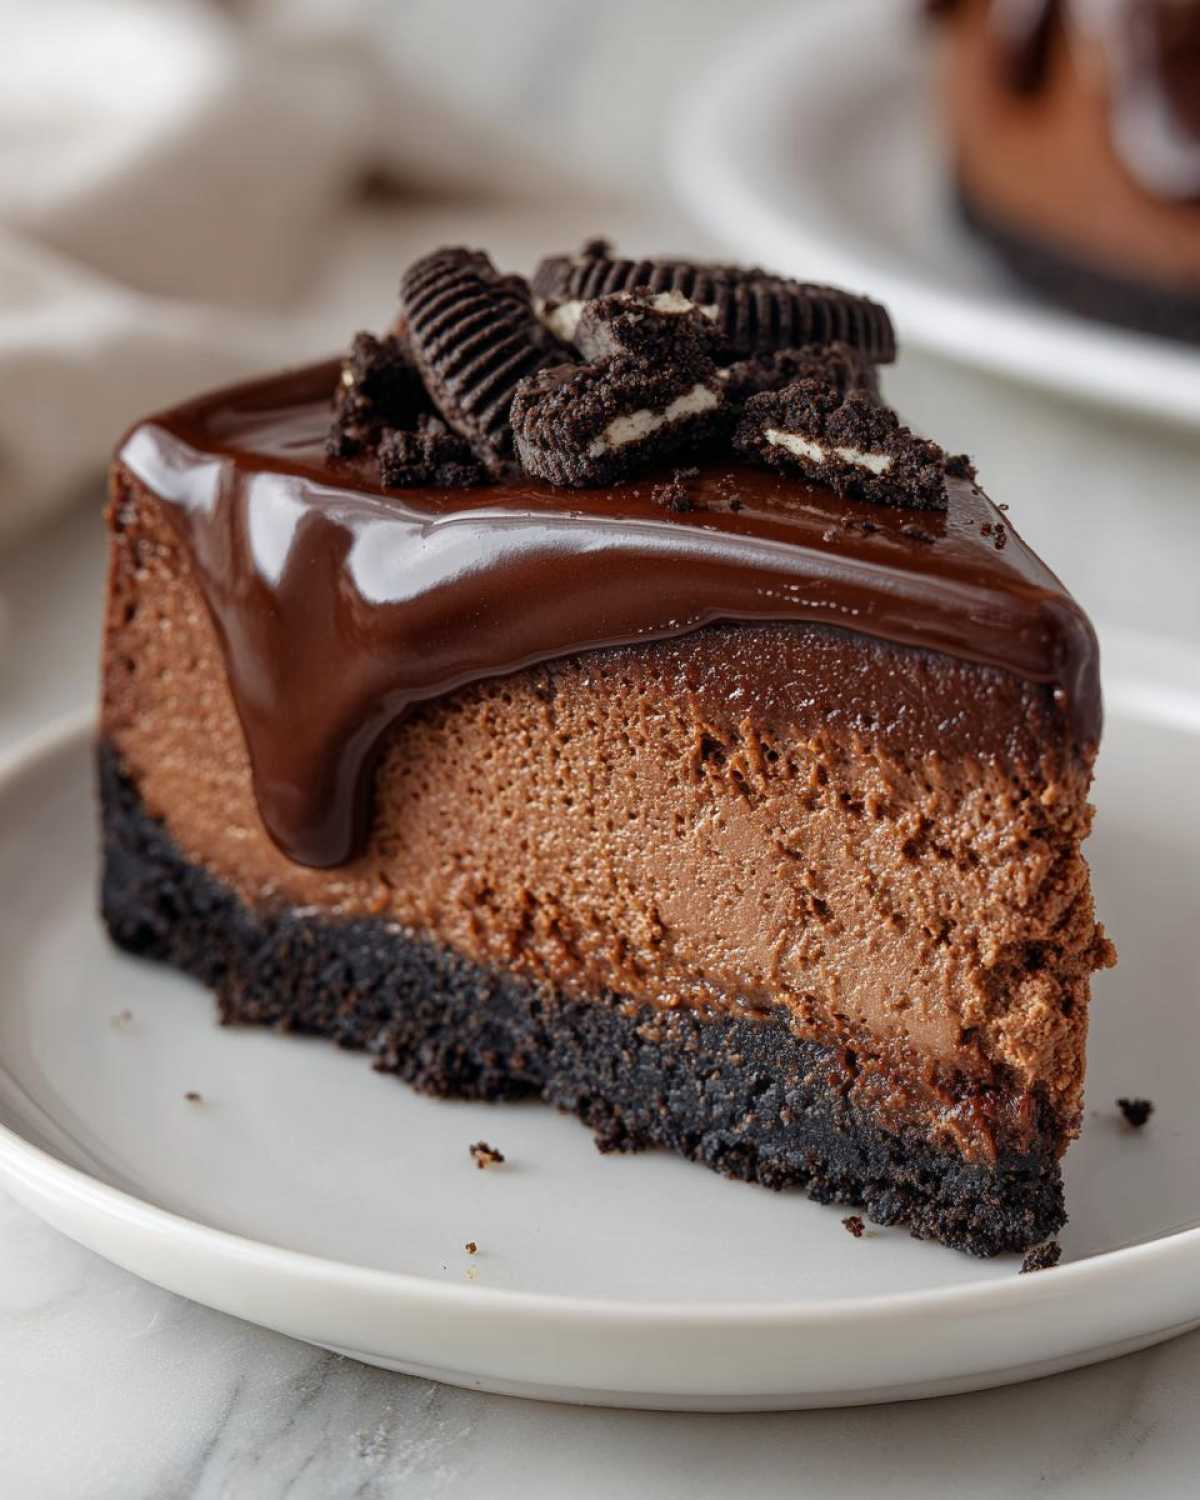
Expert Tips for a Flawless Chocolate Cheesecake
Okay, you’ve made it through the baking, and now you want to make sure your finished work looks professional and tastes exactly like that slice from a fancy bakery. Getting a truly flawless baked chocolate cheesecake is all about managing temperamental dairy and chocolate. These little secrets are what my mom taught me when I first started tackling this recipe, and they make all the difference!
First, I want to circle back to the cream cheese. This is my number one rule for any creamy dessert: your cream cheese MUST be fully softened to room temperature. If you try to rush this and they are even slightly cold, you’ll end up with chunks that just won’t blend smoothly, no matter how long you mix. Trust me, take it out an hour or two early. This ensures that super smooth, ultra-creamy cheesecake texture we are aiming for.
Next, let’s talk about cracks—the nemesis of every cheesecake baker! We already covered the slow cooling trick in the oven, but make sure you don’t forget to wrap that springform pan well before the water bath. If water gets into that crust, it gets soggy, and honestly, soggy crusts ruin the integrity of the whole dish. I usually double-wrap mine with good, heavy foil just to be safe. Checking out how I prep pan coatings for my sugar cookies actually gave me a great idea for making sure this pan seal is rock solid!
For an even deeper, more intense flavor that really screams “rich chocolate dessert,” try upgrading your cocoa powder. The recipe calls for standard cocoa, but if you use a Dutch-processed cocoa powder, it gives a much darker color and a smoother, less acidic chocolate flavor. It really makes the triple chocolate layers sing!
Also, when you’re melting the chocolate for the filling, make sure it has cooled down a bit before you add it to the batter, as noted in the instructions. Pouring hot chocolate into the cream cheese mixture can actually start to “cook” the dairy, which can affect the final texture. A little patience here pays off in that perfect, satiny mouthfeel. You want a show-stopping dessert, not a scrambled egg cheesecake!
Making Variations of Your Chocolate Cheesecake Recipe
You know, even though this triple chocolate version is absolutely perfect—I mean, it’s the ultimate chocolate cheesecake—I totally get that sometimes you need something different. Maybe you forgot to thaw the cream cheese, or perhaps you just don’t want to turn on the big oven in the middle of summer. Luckily, this recipe is really flexible once you understand the core structure!
It’s amazing how many ways you can spin this base recipe to fit your needs. If you loved the rich flavor but are wary of the boiling water bath, or if you just want to try something new, these simple swaps will keep you happy and full of delicious chocolate!
Creating a No Bake Chocolate Cheesecake Alternative
If your goal is an incredibly fast and easy cheesecake recipe, ditching the oven is the way to go. For a no-bake version, you totally skip the baking steps outlined above, including the water bath and the oven cooling time. You still want that Oreo crust, but you’ll need to press it into the pan and chill it while you make the filling.
The filling changes quite a bit, though! You still beat the cream cheese, sugar, and cocoa, but you need a stabilizer since there’s no egg to set it. I usually dissolve a single packet of unflavored gelatin in a quarter cup of warm heavy cream and then beat that right into the mixture before folding in the melted chocolate. Don’t forget to thoroughly chill the whole thing—we’re talking at least eight hours—to make sure it sets up firm enough to slice!
Switching to a Dark Chocolate Cheesecake
If you are a true dark chocolate fiend like my brother-in-law (he calls any milk chocolate “sweet compromise”), you’ll want to go darker. This is simple! For a seriously intense, almost bitter flavor that really balances the sweetness of the Oreo crust, swap out the semi-sweet and milk chocolate in the filling for a high-quality dark chocolate, say 70% cacao or higher. You might want to add an extra tablespoon of sugar to the filling just to keep it from getting too intensely dark, depending on your preference.
And when it comes to the ganache, use dark chocolate chips instead of semi-sweet. This yields a glossy, less sugary topping that contrasts beautifully with the sweet, creamy center. This adjustment moves you squarely into the territory of an indulgent cheesecake—a real grown-up dessert!
Serving Suggestions for Your Decadent Chocolate Dessert
Once this amazing chocolate cheesecake is chilled and set, you have to think about how to present it! Because this dessert is so incredibly rich and decadent, a little something bright on the side cuts through the fat perfectly. I almost always serve mine with fresh raspberries or bright strawberries. The tartness is just divine against the dark chocolate.
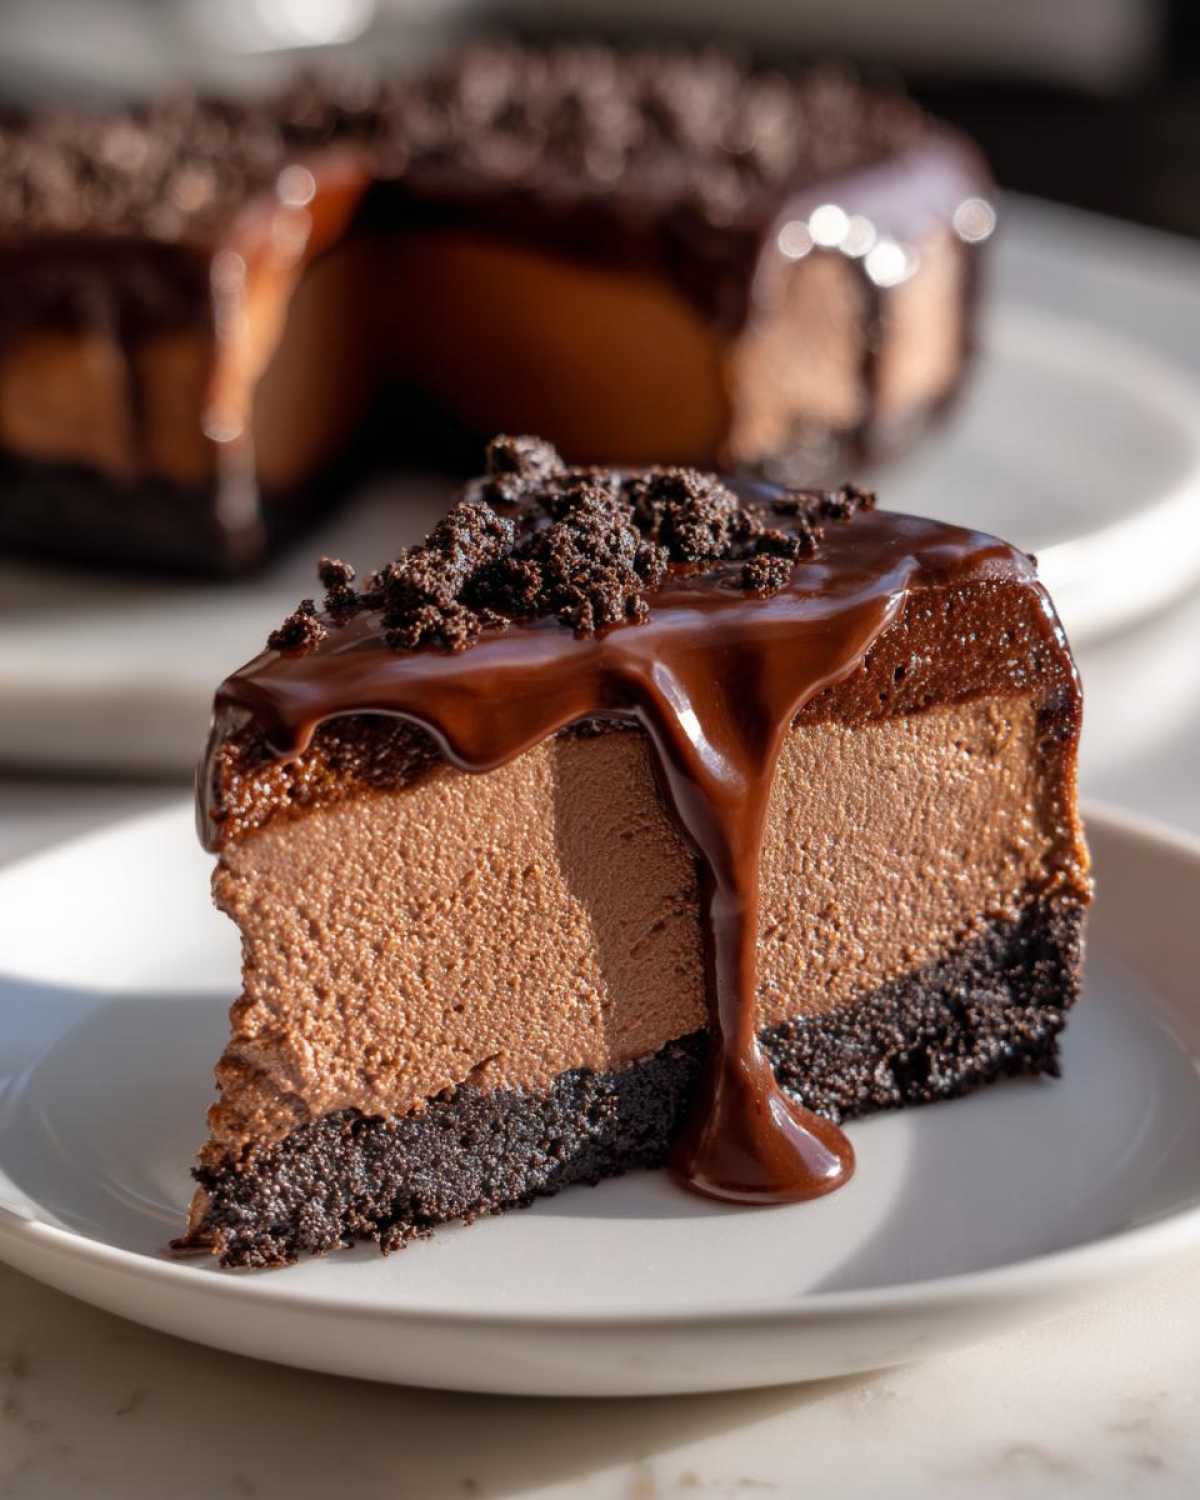
If you’re serving this after a heavy meal, a tiny dollop of unsweetened whipped cream is lovely, just to lighten the presentation slightly. And, of course, a fresh, hot cup of black coffee or an espresso is the only way to truly appreciate the depth of this rich chocolate dessert. Nobody needs fruity salsa with cheesecake, but berries are a must in my book—they make everything look even more tempting!
Storage and Reheating Instructions for Homemade Cheesecake
This amazing homemade cheesecake is actually a great make-ahead dessert, which is a huge win when you’re planning a big gathering!
Once the ganache topping has set completely—and I mean completely firm, usually after that final 30-minute chill—you need to get it covered up tight. If you try to cover it directly with plastic wrap, it’ll stick to that glossy ganache and make a mess. Don’t do it! The trick I use, which works perfectly, is to use toothpicks or small wooden skewers inserted gently around the perimeter of the cake, resting just above the cheesecake surface. Then, loosely drape plastic wrap over those supports.
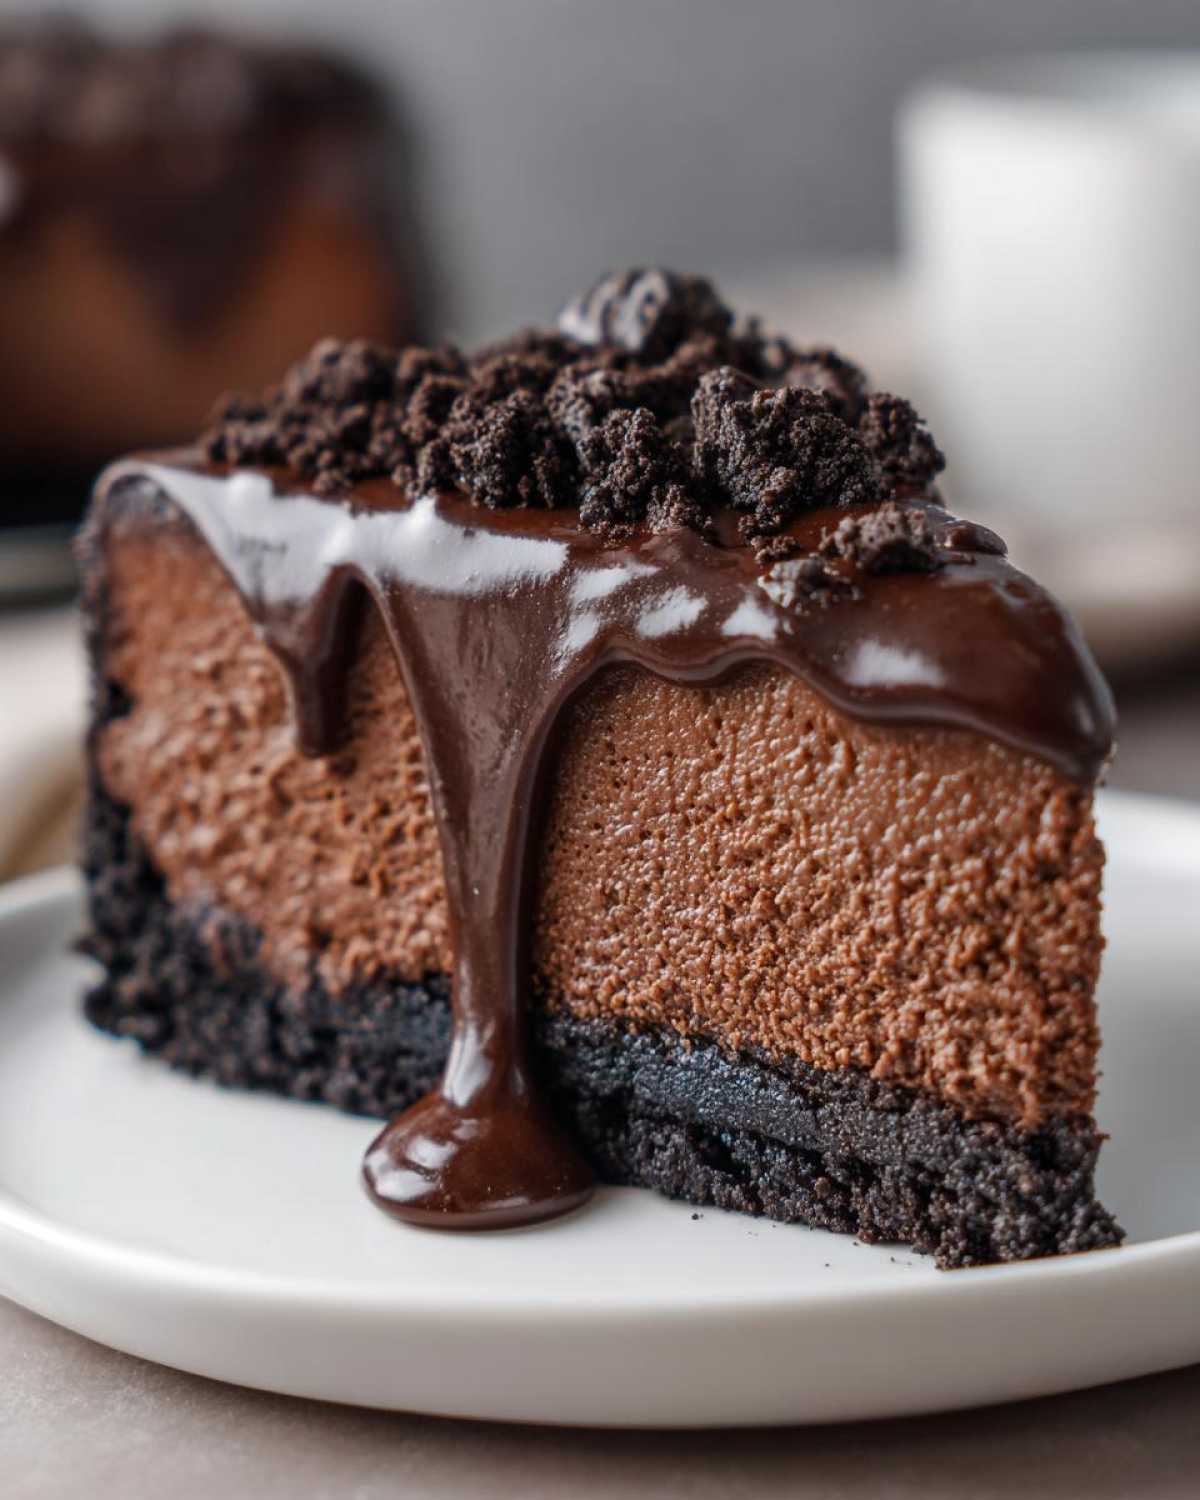
Keeping it cold is essential for that dense, creamy structure. Store your chocolate cheesecake, well covered, in the refrigerator. It maintains its absolute best texture for about three to five days. If you wrap it well, it freezes beautifully too! Wrap it first in plastic, then in a layer of foil, and it should be great for up to a whole month. Thaw it overnight in the fridge before you plan to serve it again.
Now, here’s the most important serving temperature rule: Never, ever try to serve this warm or try to reheat it. The texture is meant to be cold and firm; heating it will just turn your beautiful baked chocolate cheesecake into a soupy mess. Bring it out on a lovely platter about 20 minutes before serving—just enough time for it to lose the painful refrigerator chill but remain perfectly cool and solid. A little contrast with homemade lemonade on the side is a nice palate cleanser after all that chocolate richness!
Frequently Asked Questions About Chocolate Cheesecake
I get so many messages after people make this recipe, which I absolutely love! Honestly, most questions boil down to how to get that picture-perfect, smooth slice. Dealing with cheesecake can feel intimidating, but once you know these little secrets, you’ll be whipping up easy creamy dessert ideas without a second thought.
How do I guarantee my chocolate cheesecake is creamy and not grainy?
The absolute key to a perfectly creamy cheesecake is temperature control at the start! Like I stressed earlier, your cream cheese *must* be completely, totally softened to room temperature. If it’s even slightly cold when you start mixing, it won’t blend right, and you’ll get those tiny, annoying grain bits, no matter how long you beat it.
The second part is technique: after you add the eggs, you need to slow down. We are mixing just until incorporated. Do not overbeat once the eggs are in! Overbeating traps air, which expands during baking and then collapses upon cooling—that’s what creates a grainy, uneven texture instead of that luscious melt-in-your-mouth feel.
Can I skip the water bath when baking this chocolate cheesecake?
Oh, that big roasting pan full of water? I know it seems like a pain, but please don’t skip it if you want that amazing baked texture! The purpose of the water bath, or *bain-marie*, is to create a humid environment in the oven. This gentle, steamy heat cooks the custard filling very slowly and evenly from the outside in.
If you skip it, the edges of your chocolate cheesecake cook way faster than the center. When the edges set hard while the middle is still very liquid, the different rates of expansion and contraction almost guarantee cracking across the top. It might taste fine, but it’s rarely pretty!
What is the best way to slice a chilled chocolate cheesecake cleanly?
This is the final boss move! A chilled cheesecake is *very* firm, and trying to cut it with a regular knife usually results in dragging the topping and squishing the sides. Do yourself a favor: grab the longest, thinnest knife you own—a carving knife works great.
Here’s the real trick: fill a tall glass with very hot water. Dip the knife blade completely into the hot water for about 15 seconds, then quickly wipe the blade completely dry with a clean towel. Make one clean slice. Before you make the *next* cut, re-dip and re-wipe the knife. That hot, clean blade slides through the dense chocolate layers like butter, leaving you with perfect slices every time. It’s definitely worth the extra 30 seconds per slice!
Nutritional Estimates for This Rich Chocolate Dessert
I wanted to give you an idea of what you’re getting into with this incredibly rich chocolate dessert. Because let’s be real, a massive slice of triple chocolate cheesecake isn’t exactly a health food, but my goodness, it is worth every single bite! We’re talking pure indulgence here, perfect for a special occasion, not Tuesday night dinner!
Remember, these numbers are using the ingredients listed exactly as I have them, including the Oreo crust and the glossy ganache. If you use a slightly different brand of chocolate or a lighter cream cheese, the totals will shift a bit, so treat this as a helpful guide rather than a strict rulebook. When you make my chocolate cheesecake, focus on enjoying the moment!
- Serving Size: 1 slice
- Calories: 550
- Sugar: 45g
- Sodium: 350mg
- Fat: 38g
- Saturated Fat: 22g
- Unsaturated Fat: 16g
- Trans Fat: 0.5g
- Carbohydrates: 50g
- Fiber: 3g
- Protein: 9g
- Cholesterol: 110mg
Triple Chocolate Cheesecake with Oreo Crust and Ganache Topping
Make a rich, creamy triple chocolate cheesecake featuring a dark chocolate Oreo crust and a smooth chocolate ganache topping.
- Prep Time: 30 min
- Cook Time: 75 min
- Total Time: 125 min
- Yield: 12 servings
- Category: Dessert
- Method: Baking
- Cuisine: American
- Diet: Vegetarian
Ingredients
- 1 3/4 cups Oreo cookie crumbs (about 30 cookies)
- 1/4 cup granulated sugar
- 6 tablespoons unsalted butter, melted
- 3 (8 ounce) packages cream cheese, softened
- 1 1/2 cups granulated sugar
- 1/2 cup unsweetened cocoa powder
- 1 teaspoon vanilla extract
- 1/4 teaspoon salt
- 3 large eggs
- 4 ounces semi-sweet chocolate, melted and cooled slightly
- 4 ounces milk chocolate, finely chopped
- 1 cup heavy cream (for ganache)
- 1/2 cup semi-sweet chocolate chips (for ganache)
Instructions
- Preheat your oven to 350°F (175°C). Wrap the outside of a 9-inch springform pan tightly with heavy-duty aluminum foil.
- Prepare the crust: Mix the Oreo crumbs, 1/4 cup sugar, and melted butter until evenly moistened. Press the mixture firmly into the bottom and 1 inch up the sides of the prepared springform pan. Bake for 10 minutes. Remove from oven and let cool slightly.
- Reduce oven temperature to 325°F (160°C).
- Prepare the filling: In a large bowl, beat the softened cream cheese and 1 1/2 cups sugar with an electric mixer until smooth. Beat in the cocoa powder, vanilla extract, and salt until combined.
- Beat in the eggs one at a time, mixing just until incorporated after each addition. Do not overmix.
- Stir in the melted semi-sweet chocolate and the chopped milk chocolate until just combined.
- Pour the filling over the cooled crust. Place the springform pan inside a larger roasting pan. Carefully pour hot water into the roasting pan until it reaches halfway up the sides of the springform pan (this is a water bath).
- Bake for 60 to 75 minutes, or until the edges are set but the center still jiggles slightly.
- Turn off the oven, prop the door open slightly, and let the cheesecake cool in the oven for 1 hour. Remove from the water bath and cool completely on a wire rack. Chill in the refrigerator for at least 6 hours, or preferably overnight.
- Prepare the ganache: Heat the heavy cream in a small saucepan until it just begins to simmer. Remove from heat and pour over the chocolate chips in a heatproof bowl. Let stand for 5 minutes, then whisk until smooth. Let the ganache cool slightly until thickened but still pourable.
- Pour the ganache over the chilled cheesecake. Spread evenly. Chill for another 30 minutes until the ganache sets before slicing and serving.
Notes
- For the smoothest texture, ensure your cream cheese is fully softened to room temperature before mixing.
- To prevent cracking during cooling, do not remove the cheesecake from the oven immediately after turning it off.
- If you prefer a darker crust flavor, use chocolate wafer cookies instead of Oreos.
Nutrition
- Serving Size: 1 slice
- Calories: 550
- Sugar: 45g
- Sodium: 350mg
- Fat: 38g
- Saturated Fat: 22g
- Unsaturated Fat: 16g
- Trans Fat: 0.5g
- Carbohydrates: 50g
- Fiber: 3g
- Protein: 9g
- Cholesterol: 110mg
